|
|
Post by Robert on Dec 17, 2013 13:47:40 GMT -8
Hey and what mortar have you used for you brick layering?
|
|
morticcio
Full Member
   "The problem with internet quotes is that you can't always depend on their accuracy" - Aristotle
Posts: 371
|
Post by morticcio on Dec 17, 2013 15:19:18 GMT -8
Clay slip as it will be dismantled.
|
|
|
|
Post by Donkey on Dec 19, 2013 12:42:02 GMT -8
Yep.. Just dip each face in a thick, creamy, well screened slip bucket and stick it down. Hold it in place and try to wiggle it; if it rocks around, use a fine mortar made of the same slip mixed with screened wood-ash (make a dough) as mortar. Put the mortar ONLY on the low spots to keep bricks from wiggling and to make up for weird low spots (salvaged brick will sometimes be odd sizes).
Remember, mortar is for holding the bricks apart, NOT sticking them together. Gravity holds 'em together.
You'll be surprised at how well the clay will stick 'em anyhow..
|
|
morticcio
Full Member
   "The problem with internet quotes is that you can't always depend on their accuracy" - Aristotle
Posts: 371
|
Post by morticcio on Feb 2, 2014 8:35:28 GMT -8
I've had access to a flue gas analyser to record a 30 minute burn. Here is the chart.  The stove was warmish - a previous burn had extinguished about an hour before. Readings were taken every 10 seconds. At 8:30 minutes I closed the main air feed to half which explains the spike in CO. I opened it back up at 10:30. The analyser probe was inserted approx. 18" (45cm) from the exit of the bell in a single skin horizontal flue pipe. The temperature reading here (Stack °C) didn't get above 80°C (176°F). Average efficiency from the readings is 88.9% (gross). There was a gale blowing outside and the chimney kept blowing back so I need to put a decent cap on that and try it again. Any comments/observations welcome. The analyser is a TPI 716. |
|
|
|
Post by peterberg on Feb 2, 2014 13:01:15 GMT -8
Nice even stack temperature,
efficiency around 90%,
the CO spike shouldn't be there but is to be expected.
The best runs do show low CO and O2 at the same time. In my experience, when a gale is going on outside that's not the best of times to produce top diagrams. What's the average of CO and O2?
Not bad at all I would say. Some years ago I would be very, very happy with a graph like this.
|
|
morticcio
Full Member
   "The problem with internet quotes is that you can't always depend on their accuracy" - Aristotle
Posts: 371
|
Post by morticcio on Feb 2, 2014 13:54:51 GMT -8
Thanks for your observations Peter.
Averages as follows:
CO - 586 ppm
O2 - 11.9%
Excess air - 146%
CO2 - 8.1%
COR - 0.76%
|
|
morticcio
Full Member
   "The problem with internet quotes is that you can't always depend on their accuracy" - Aristotle
Posts: 371
|
Post by morticcio on Feb 7, 2014 12:44:28 GMT -8
Ran a quick test this evening with H cowl. Weather was windy and stove had been going for 10 minutes already before I started the readings. Added more wood @ 12 mins.
Weather permitting I will put the metre extension on the flue tomorrow.
Averages as follows:
Efficiency (gross) - 90.9%
CO - 532 ppm
O2 - 13.4%
Stack Temp - 42.6°C
Excess air - 187%
CO2 - 6.8%
COR - 0.9%

|
|
|
|
Post by smarty on Feb 9, 2014 1:47:15 GMT -8
Hey! Good to see you've got your stove up and running. We both started building ours at about the same time. I don't have a sensor so I can't vouch for the efficiency of mine but I have it running with no smoke back now and getting up to about 1100C with 80C flue gas at the bottom of the stack. Even with seasoned wood condensation is a problem right now but I think the masonry can't dry out properly in the shed and I still have another layer of masonry to build around my bell to moderate the heat output.I have a nut on the bottom of the stack so I might keep that in the final installation just to keep an eye on things. Just have to build the house to put it in now!
Cheers,
Martin.
|
|
|
|
Post by ericvw on Jun 23, 2014 15:26:55 GMT -8
Hey Morticcio,
Eric VW here, whats the progress on the stove? Have you installed in the house yet? I'm interested in seeing your finished product, as I plan on sort of, errr, copying your design... Just because it's so darn straight forward!
Few questions:
1) How well does the bell radiate heat? I plan on building ours in the basement, which has same square footage as main floor- about 900 sq. ft. The 6" square flue chimney runs through center of house, about 22 vertical feet from thimble to crown, good draft. Our outdated, inefficient wood stove heated the whole house very well this past winter, one of the coldest in recent years, despite the appetite of that old wood stove beast. Might be a limiting factor, but our ceiling height is 7'6." We leave the basement door open, have a cold air return cut in floor and ducted to about 6" off basement slab. Convection hasn't been a problem.
2) Have you or are you concerned about permitting, with local building codes in mind? Just curious about that and home insurance...
3) How has your door held up? I have access to 1/4" stainless steel sheet metal that can be plasma cut to shape. We have lots of scrap at our factory.
Any responses are truly appreciated, hope all's going well for ya's...
Eric VW
|
|
morticcio
Full Member
   "The problem with internet quotes is that you can't always depend on their accuracy" - Aristotle
Posts: 371
|
Post by morticcio on Jul 17, 2014 2:43:38 GMT -8
Hi Eric,
Apologies for taking so long to get back to you.
1. How well does the bell radiate heat? It is in a draughty shed but it seems to radiate the heat well. When installed indoors it will have to heat upstairs too as it is open plan with a gallery type landing.
2. Have you or are you concerned about permitting, with local building codes in mind? I'll follow the local codes, treating the whole stove, bell and all, as an 'appliance'. This is the reason it is on a metal frame off the floor to adhere to Document J. That is the easy part - getting the building inspector (a.k.a. the wife) to pass it off has been the difficult bit!
3. How has your door held up? The door itself is great. It is a heavy lump and although it would be nice to see the flames I don't feel a glass door is necessary. My one concern is getting it airtight around the frame. I'll pay more attention to sealing it when I build it indoors. I have some high temp silicone available! I might render the inner surface of the bell to help to increase airtightness.
4. What's the current status of this project? It is still in the shed. Haven't had time to install it in the house yet. I had it running last night for the first time in 6 weeks. I was expecting it stall as the temperature here was about 20C. I started it slowly and after that it ran like a dream. The inside of the firebox was bleached white which is always a good sign!
When I take it apart I'll take some photos. Will be interesting to see how it has coped inside. I've run it very hard at times to kind of stress test it before moving it indoors.
That aside, overall it is a brilliant stove. I followed Peter's design to the millimetre and it just works. All credit to him for the hours he has spent perfecting it.
Andy
|
|
|
|
Post by ericvw on Jul 17, 2014 3:29:20 GMT -8
Hey there Andy,
Time gets away from all of us soooo quickly! Thanks for the response and answers. I have been too busy to even fire up my test core in the back yard for weeks now! I'll post some pics later this evening after work of how NOT to dry out castable sleeves! Spent a fair amount of time on them, but at least the cracks are stable, ie, no daylight thru them and they just sort of stare back at me even when cold!
Til later,
EVW
|
|
|
|
Post by dimitrisgr on Jan 20, 2015 0:51:57 GMT -8
Is it easier to make two half-shell for firebox + two half shell to the second chamber? Molds easier to build and easier to pour concrete evenly? Bernard Yes it would but you'd need to ensure they join together and don't get knocked apart. Saying that I'm hoping to add a 200mm/8" extension on the front so it will take 500mm/18" lengths of wood. The riser in the picture is a test cast using normal concrete. The batch box is using the insulative castable.   Did you test the concrete firebox?I prety sure you did  |
|
|
|
Post by dimitrisgr on Jan 20, 2015 0:59:07 GMT -8
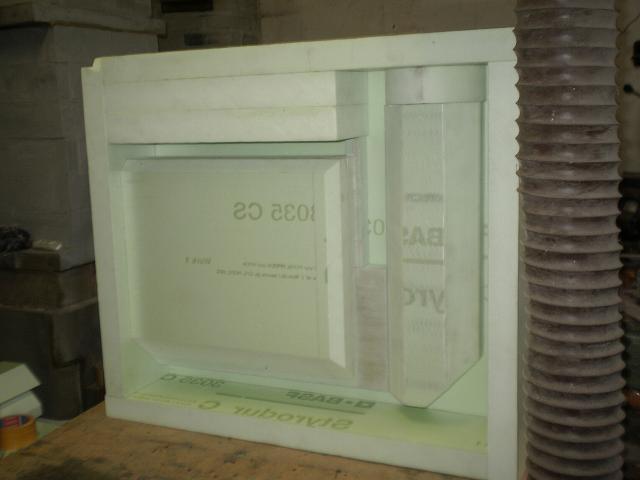
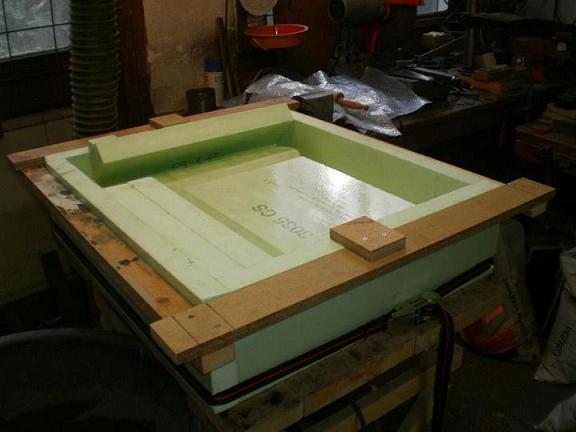
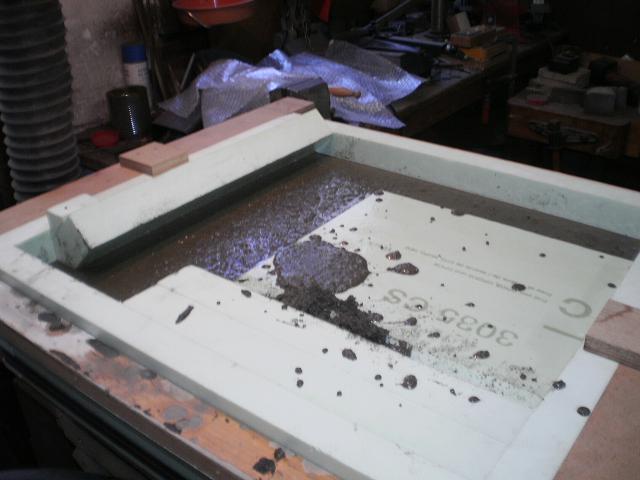
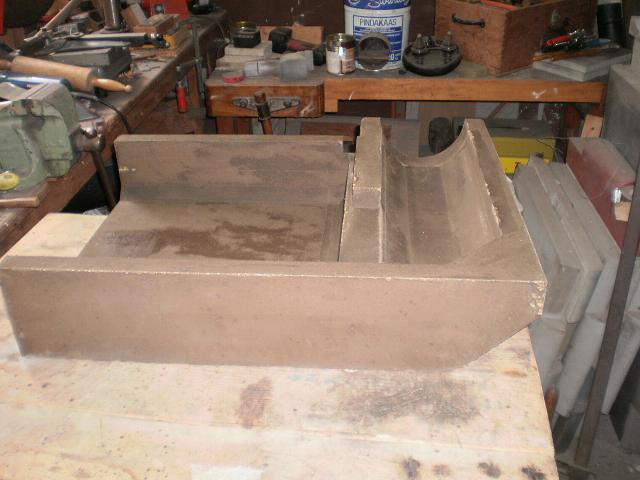
Did you have some holes on the top half to allow the excess castable mix to escape through or did it squeeze through the joints as you screwed the two halves together? Short answer: the mould consisted of just one single item. With some fill blocks to create the 45 degree angles on the outside. I'd made the entire mould out of XPS polystyrene foam, all the parts are stuck in there by means of two-sided adhesive tape. Here's a picture of one mould.  High res pic: High res pic:I've used only one fill block for the outside at the back:  This is the mould filled for a part and vibrated. This should be about the stage to mount the rest of the fill blocks, in effect, hanging in there and secure. Not a complete lid on the box so to speak, but some bridge holding the fill blocks down.  High res pic: High res pic:Of course, you have to fill and compact it further, up to the top. The unmoulded product should look something like this:  High res pic: High res pic:Is this clear? Very good product Peter and thank you for the pics. How did you cut the foams?Do you have a wire cutter? Do you have a sketchup of the mold? I am planning to use castable filled with Lecca or perlite for making it more lighweight and more insulated, do you think this is a good idea? I think that we dont need thermal mass but insulation, right? |
|
|
|
Post by peterberg on Jan 20, 2015 2:32:45 GMT -8
How did you cut the foams?Do you have a wire cutter? No, I used a circular saw which can be tilted to 45 degrees. Do you have a sketchup of the mold? There are some in the "Adeventures with a horizontal feed" thread. I am planning to use castable filled with Lecca or perlite for making it more lighweight and more insulated, do you think this is a good idea? It can be done but the castable will become a great deal weaker. I never did something like that and used good quality castable only. Insulation around the firebox helps, around the riser it is a must. |
|
|
|
Post by peterberg on Jan 20, 2015 2:34:25 GMT -8
For a couple of years I'd work as a mold maker for an aicraft builder by the way. Mold making like this is easy from my perspective.
|
|