Post by terry on Mar 23, 2016 14:37:17 GMT -8
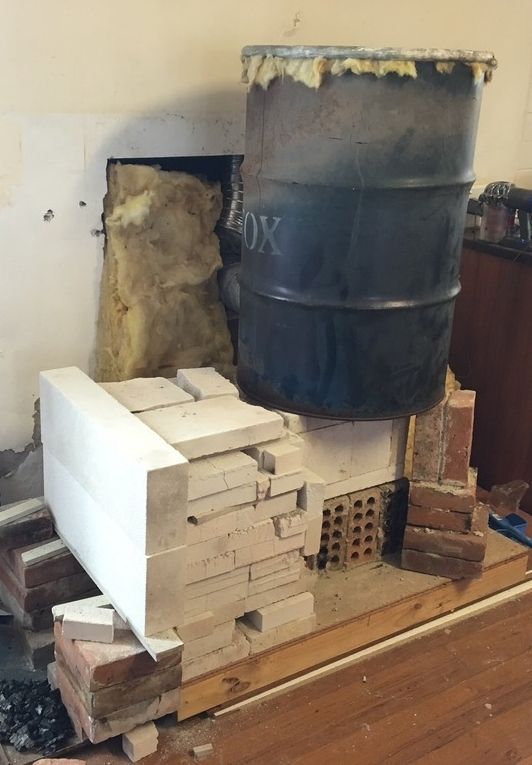
Well, that's what I am calling it. The bitza heater because, as it turned out, it is a bit of this and a bit of that. To be honest, I no longer know what sort of heater I have.
From my earlier experiments of using/adapting an existing wood boiler with a rocket combustion set up, I concluded it was not worth doing because of the inherent compromises that arise from re-purposing an existing set up. You're basically behind the eight ball from the get go. As but one quick example, however you do it the combustion chamber itself will get very hot. As mine had to be external to the boiler, only place to put it (and have the hot, clean exhaust vent into the 'old' firebox thereby heating the water), all of that heat is lost to the cellar (and it IS a lot of heat) is essentially wasted. I don't want or need my cellar to be warm.
However, that very same heat that represents a loss in the cellar when lost to the room I DO want to heat is in no way a loss.
So in a nutshell, yes it can be done (adapt an existing boiler) but makes no real sense to do so. At least in my case.
So here we are.
One last thing to explain. I did not want to use 'bits of wood'. We get delivered big chunks of hardwood, so I wanted/needed a combustion chamber large enough to hold these 'chunks'. So no Jtube, or vertical feed. Some sort of horizontal feed/batch arrangement.
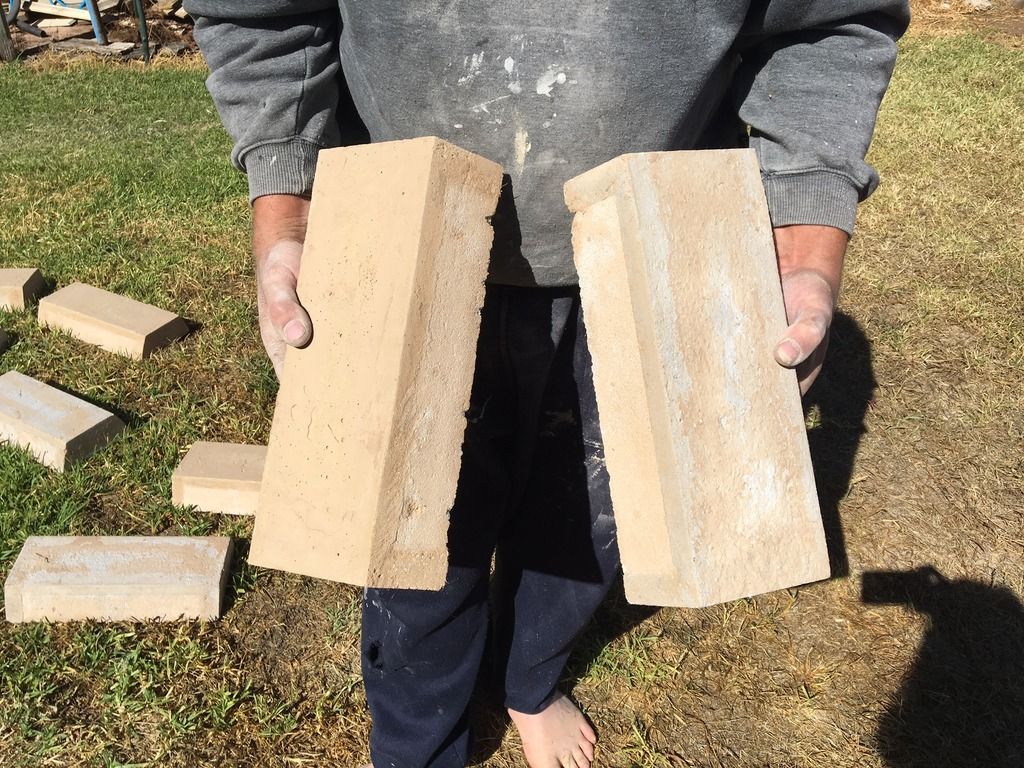
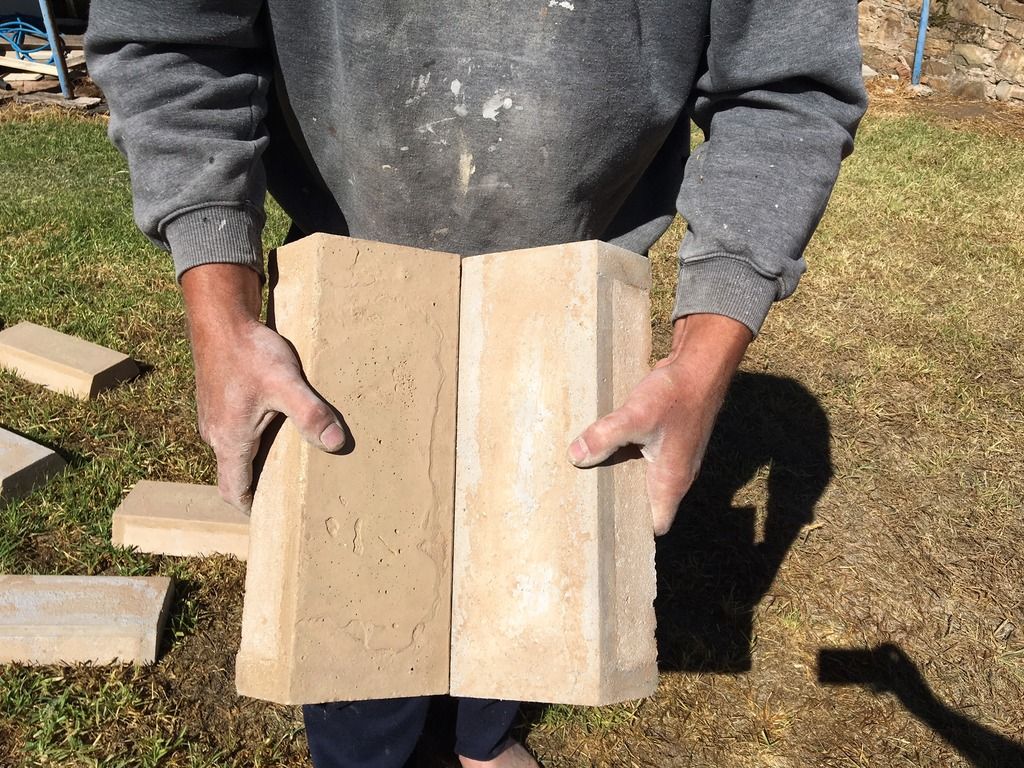
In my mind, the ideal shape to hold, retain, reflect heat back into the fire is a sphere. Not very practical, so that transforms to a cylinder. That was (to me) a tad tricky to cast in refractory, so that transformed into an octagon. So I cast a monolithic octagon in refractory. Just as an observation, that cracked. I let it dry for a week, and it is possible I did not leave it long enough, but I am convinced a monolithic casting of any appreciable size is destined to crack. The crack has not affected it functionally, but none the less.
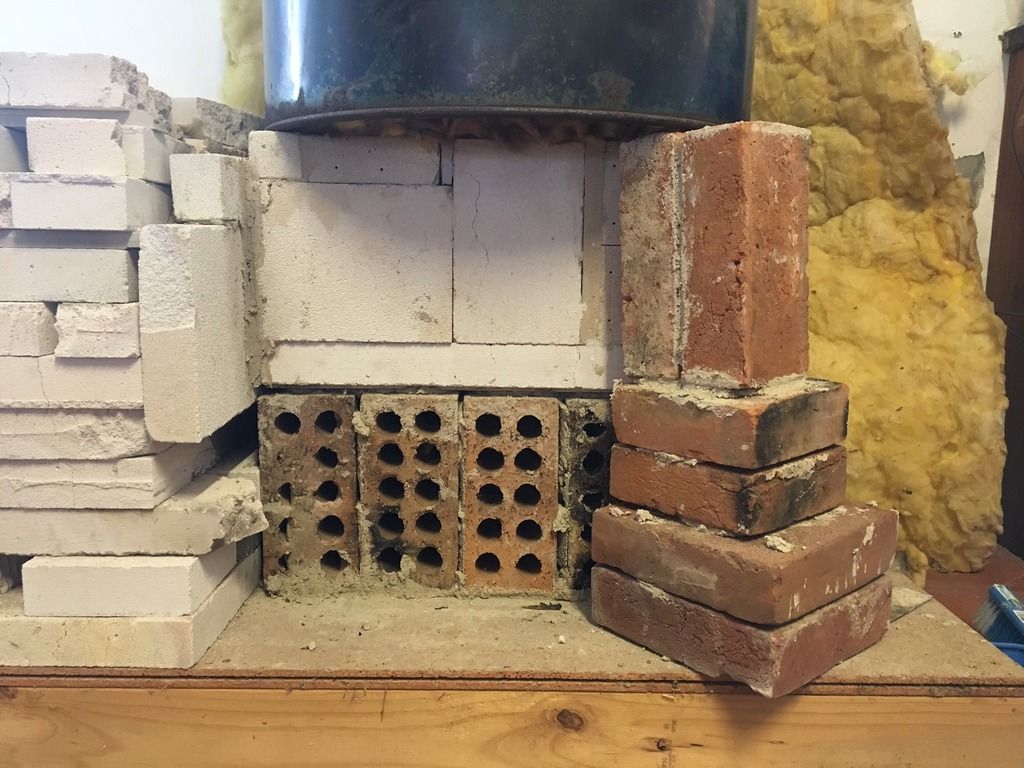
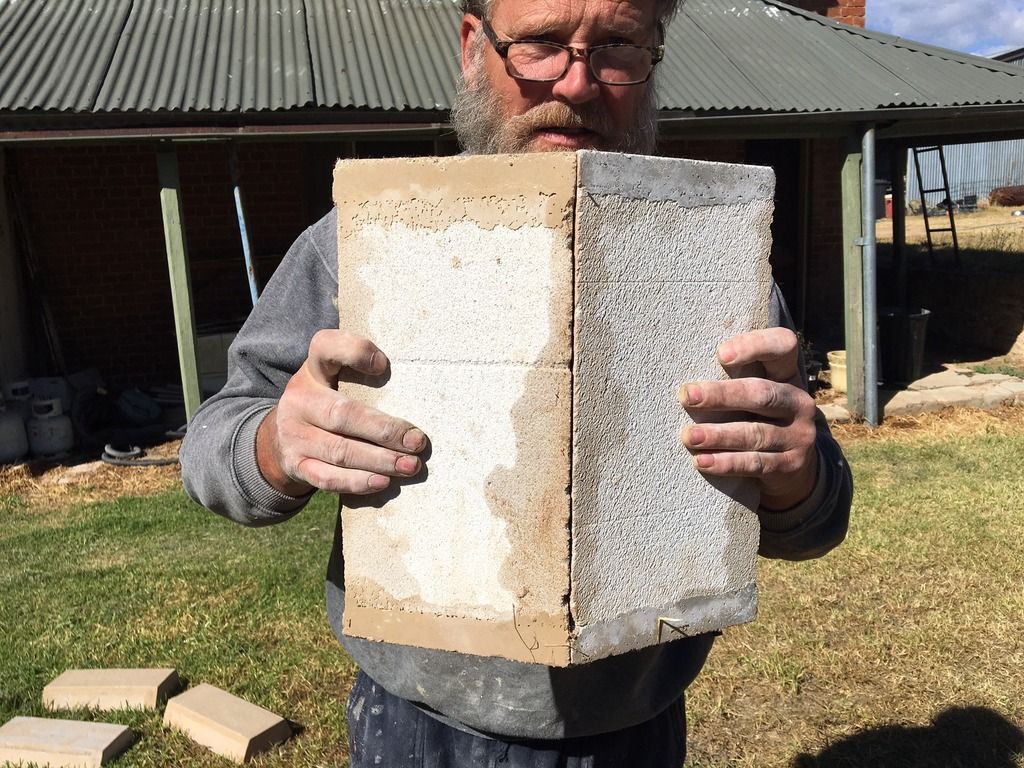
For the experiments with this, I used AAC as the insulater around the cast refractory. Here we call it hebel block, I think elsewhere it is called Ytong or something similar. It is VERY effective. And to date, I have not observed any deterioration of the AAC that is in direct contact with the combustion chamber.
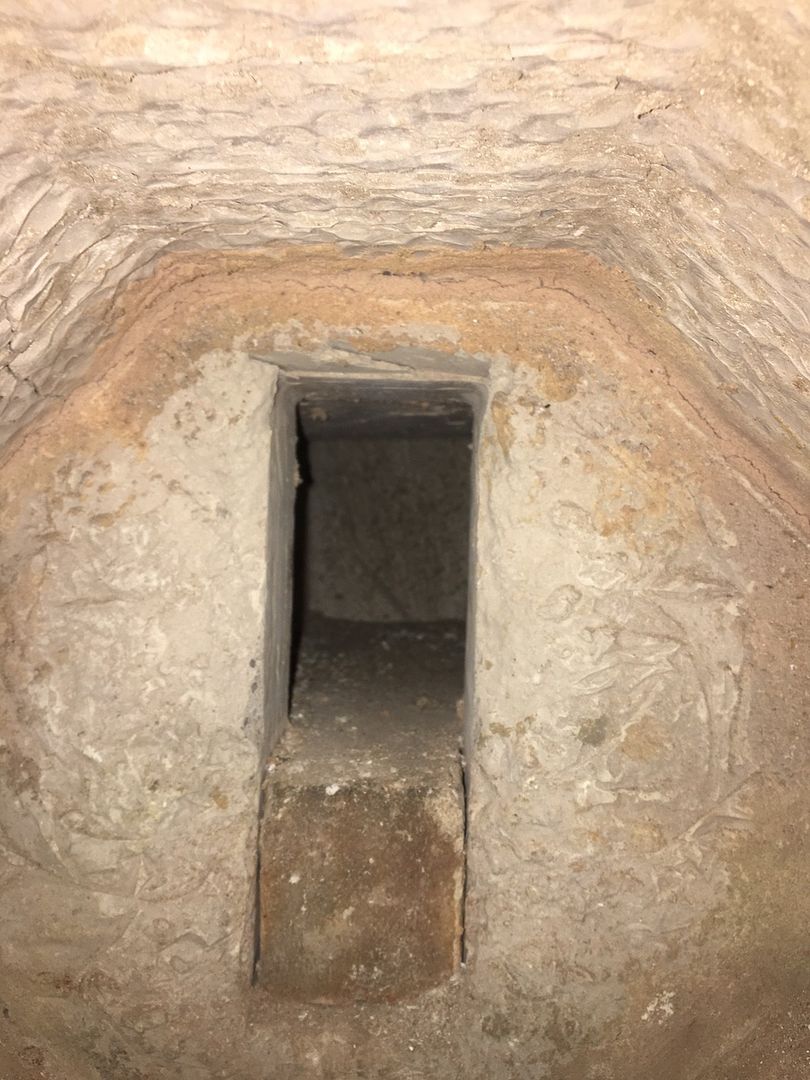
That led me to make another experiment. A picture would be very helpful here, but I think a word description will suffice. I cut the AAC a bit like a jigsaw puzzle so that when assembled it formed a burn tunnel. Shaped like an 'L', but laid horizontally so that the long leg is the entrance from the combustion chamber, the short leg leads to the heat riser.
By screwing pieces of melamine board (16 mm thick) to the hebel block I was able to mix and pour refractory and have it adhere to the hebel block, so that when fully assembled the burn tunnel has a 16 mm refractory lining internally yet with it's own built in insulation which is the hebel block. Hope that made sense. Look at it from the outside and it is all hebel block, look at it inside and it is all refractory.
So very light (especially compared to a full refractory cast of the same dimensions), hell of a lot cheaper as refractory is damned expensive, already has a very good insulation jacket, and non monolithic which I am convinced would crack.
The hebel block in direct contact with the cast combustion chamber has had at least two hundred hours on it and has yet to show any degradation due to heat. the burn tunnel to the heat riser has had one hundred hours, and has not yet 'fallen apart'. Yes, it has a few cracks visible in the AAC but is still structurally sound. (I can't see the surface between the refractory and the hebel block obviously, unlike between the hebel and cast combustion chamber which is simply butting up to each other)
Would this last a season, or indeed a few years? I don't know, so i am simply putting it out there if others might like to experiment with this method.
So, the bitza. A few hints have been given already. A horizontal batch, except it is not anything like the dimensions/shape given the Peter. I guess my octagon is at least similar in concept.
I close off the end of the combustion chamber similar to the traditional batch, with the 'letterbox slit'. Except my letterbox slit is at the TOP, not the bottom. It gave much better results that way, dunno why. But, go with what gives you the best result I guess.
And, duhh, note I talked about a burn tunnel. Stupid me, initially I did not get that the batch does not use a burn tunnel! I could never work out why I was not getting anything close to a double rams horn effect. I mean it was burning fine, clean and hot, but nothing that even approached looking like a rams horn.
Then the penny dropped, no burn tunnel in the batch.
Oh well, I have a burn tunnel haha. Hence the name bitza.
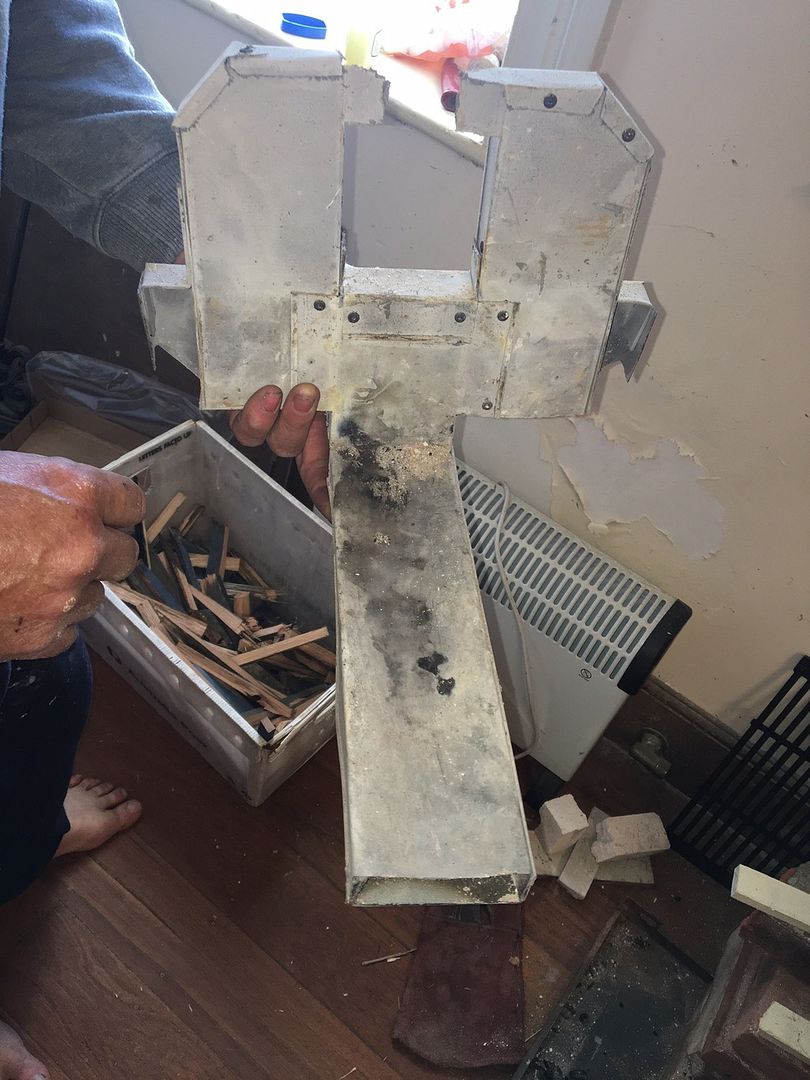
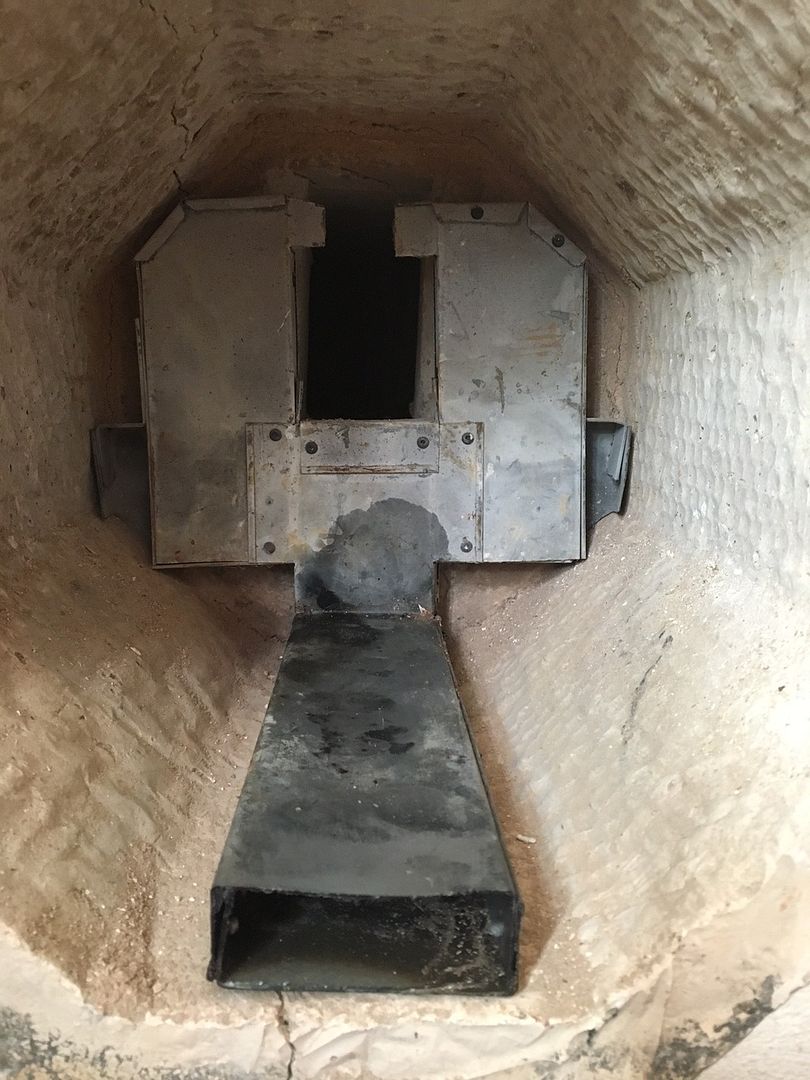
And, as it was an afterthought, the P channel I fitted a few days ago is completely internal, no part of it is outside the combustion chamber. As it was a quick experiment, I used stud that is normally used for gyprock sheeting. It is only 0.5 mm thick, all riveted together. As it is stud channel, it is quite large and essentially covers the entire 'back wall' of the chamber, each side of the letterbox. So it gets hot very easily and very quickly.
Boy, what a difference that made in the cleanliness of the burn!! So much so that I kinda think it is essential to have.
0.5 mm is not very thick, and the first time I used it you could see it glowing red hot internally by looking at the air inlet. So how long it will last I don't know.
However, the last 'trick' I found was the way I started the fire. I used to do it the way I always did, and no doubt how every one who uses a conventional heater does, kindling on the bottom and gradually increasing logs on top.
When I switched it around, the results were tremendous. On a cold start, all the big wood on the bottom, kindling on the very top. The fire burns downward. For the first time, on a cold start, I can fill the combustion chamber 80% with wood, burn from top down, and not see any smoke at all at any time. (I have no instruments at all, my only guage of success or not is 'NVS', no visible smoke)
I guess that makes sense, as the fire starts it gets all the air it needs (being on top) and is not trying to burn when smothered with cold wood on top of it and the combustion products struggling up thru the mass of wood on top of it.
anyway, with the addition of the P channel and the new procedure of stacking the wood NVS is the order of the day. Additionally, the P channel no longer glows red hot as it is protected by the unburnt wood on top, and eventually a bit of a layer of ash. I reckon it will last quite a while, tho the actual time it will last is not yet known.
So win win really.
So due to my stupidity and not reading threads properly I have a bit of a weird stove, but one that by good luck or fortune seems to work OK. The bitza.
I only have a single drum atm, the exhaust is very hot (cannot touch it) so I obviously need more heat harvesting. I want to build a temporary stove just for this coming winter, and switch to brick and bells.
I presume a clay mud mortar will last a season??? Has anyone tried that? Or is it only usually used for a day or two. As it is only temporary I don't want to use any sort of cement. Does anyone have any experience with this aspect? thanks.
The burn tunnel is 140*140, just under six inches. From what i can gather, the ISA of a bell for this size is around 5 sq m. I have seen a figure is 6 sq m, but think that got revised down slightly.
anyways, there it is. Hope that the idea of facing hebel block with refractory is an idea that others might explore, early days on that as far as longevity goes, but looks promising.
From my earlier experiments of using/adapting an existing wood boiler with a rocket combustion set up, I concluded it was not worth doing because of the inherent compromises that arise from re-purposing an existing set up. You're basically behind the eight ball from the get go. As but one quick example, however you do it the combustion chamber itself will get very hot. As mine had to be external to the boiler, only place to put it (and have the hot, clean exhaust vent into the 'old' firebox thereby heating the water), all of that heat is lost to the cellar (and it IS a lot of heat) is essentially wasted. I don't want or need my cellar to be warm.
However, that very same heat that represents a loss in the cellar when lost to the room I DO want to heat is in no way a loss.
So in a nutshell, yes it can be done (adapt an existing boiler) but makes no real sense to do so. At least in my case.
So here we are.
One last thing to explain. I did not want to use 'bits of wood'. We get delivered big chunks of hardwood, so I wanted/needed a combustion chamber large enough to hold these 'chunks'. So no Jtube, or vertical feed. Some sort of horizontal feed/batch arrangement.
In my mind, the ideal shape to hold, retain, reflect heat back into the fire is a sphere. Not very practical, so that transforms to a cylinder. That was (to me) a tad tricky to cast in refractory, so that transformed into an octagon. So I cast a monolithic octagon in refractory. Just as an observation, that cracked. I let it dry for a week, and it is possible I did not leave it long enough, but I am convinced a monolithic casting of any appreciable size is destined to crack. The crack has not affected it functionally, but none the less.
For the experiments with this, I used AAC as the insulater around the cast refractory. Here we call it hebel block, I think elsewhere it is called Ytong or something similar. It is VERY effective. And to date, I have not observed any deterioration of the AAC that is in direct contact with the combustion chamber.
That led me to make another experiment. A picture would be very helpful here, but I think a word description will suffice. I cut the AAC a bit like a jigsaw puzzle so that when assembled it formed a burn tunnel. Shaped like an 'L', but laid horizontally so that the long leg is the entrance from the combustion chamber, the short leg leads to the heat riser.
By screwing pieces of melamine board (16 mm thick) to the hebel block I was able to mix and pour refractory and have it adhere to the hebel block, so that when fully assembled the burn tunnel has a 16 mm refractory lining internally yet with it's own built in insulation which is the hebel block. Hope that made sense. Look at it from the outside and it is all hebel block, look at it inside and it is all refractory.
So very light (especially compared to a full refractory cast of the same dimensions), hell of a lot cheaper as refractory is damned expensive, already has a very good insulation jacket, and non monolithic which I am convinced would crack.
The hebel block in direct contact with the cast combustion chamber has had at least two hundred hours on it and has yet to show any degradation due to heat. the burn tunnel to the heat riser has had one hundred hours, and has not yet 'fallen apart'. Yes, it has a few cracks visible in the AAC but is still structurally sound. (I can't see the surface between the refractory and the hebel block obviously, unlike between the hebel and cast combustion chamber which is simply butting up to each other)
Would this last a season, or indeed a few years? I don't know, so i am simply putting it out there if others might like to experiment with this method.
So, the bitza. A few hints have been given already. A horizontal batch, except it is not anything like the dimensions/shape given the Peter. I guess my octagon is at least similar in concept.
I close off the end of the combustion chamber similar to the traditional batch, with the 'letterbox slit'. Except my letterbox slit is at the TOP, not the bottom. It gave much better results that way, dunno why. But, go with what gives you the best result I guess.
And, duhh, note I talked about a burn tunnel. Stupid me, initially I did not get that the batch does not use a burn tunnel! I could never work out why I was not getting anything close to a double rams horn effect. I mean it was burning fine, clean and hot, but nothing that even approached looking like a rams horn.
Then the penny dropped, no burn tunnel in the batch.
Oh well, I have a burn tunnel haha. Hence the name bitza.
And, as it was an afterthought, the P channel I fitted a few days ago is completely internal, no part of it is outside the combustion chamber. As it was a quick experiment, I used stud that is normally used for gyprock sheeting. It is only 0.5 mm thick, all riveted together. As it is stud channel, it is quite large and essentially covers the entire 'back wall' of the chamber, each side of the letterbox. So it gets hot very easily and very quickly.
Boy, what a difference that made in the cleanliness of the burn!! So much so that I kinda think it is essential to have.
0.5 mm is not very thick, and the first time I used it you could see it glowing red hot internally by looking at the air inlet. So how long it will last I don't know.
However, the last 'trick' I found was the way I started the fire. I used to do it the way I always did, and no doubt how every one who uses a conventional heater does, kindling on the bottom and gradually increasing logs on top.
When I switched it around, the results were tremendous. On a cold start, all the big wood on the bottom, kindling on the very top. The fire burns downward. For the first time, on a cold start, I can fill the combustion chamber 80% with wood, burn from top down, and not see any smoke at all at any time. (I have no instruments at all, my only guage of success or not is 'NVS', no visible smoke)
I guess that makes sense, as the fire starts it gets all the air it needs (being on top) and is not trying to burn when smothered with cold wood on top of it and the combustion products struggling up thru the mass of wood on top of it.
anyway, with the addition of the P channel and the new procedure of stacking the wood NVS is the order of the day. Additionally, the P channel no longer glows red hot as it is protected by the unburnt wood on top, and eventually a bit of a layer of ash. I reckon it will last quite a while, tho the actual time it will last is not yet known.
So win win really.
So due to my stupidity and not reading threads properly I have a bit of a weird stove, but one that by good luck or fortune seems to work OK. The bitza.
I only have a single drum atm, the exhaust is very hot (cannot touch it) so I obviously need more heat harvesting. I want to build a temporary stove just for this coming winter, and switch to brick and bells.
I presume a clay mud mortar will last a season??? Has anyone tried that? Or is it only usually used for a day or two. As it is only temporary I don't want to use any sort of cement. Does anyone have any experience with this aspect? thanks.
The burn tunnel is 140*140, just under six inches. From what i can gather, the ISA of a bell for this size is around 5 sq m. I have seen a figure is 6 sq m, but think that got revised down slightly.
anyways, there it is. Hope that the idea of facing hebel block with refractory is an idea that others might explore, early days on that as far as longevity goes, but looks promising.