|
|
Post by mkrepel on May 20, 2016 15:35:17 GMT -8
That's funny, "iPhone thingy"! I can tell you from experience there isn't an easier way to take pics. I am looking forward to your experimentation in the area of digital photography! It will also be nice to see pics of the things you describe so well.
|
|
terry
Junior Member

Posts: 128 
|
Post by terry on Jun 9, 2016 17:39:04 GMT -8
hot off the presses with the iphone thingy! thought I'd do a quick update. The p channel has now done (very conservatively) 476 hours, the hebel block faced with refractory 540 hours. The hebel, as far as I can tell, is doing fine. It might fall apart if I touched it, who knows, but is still in one piece and holding the refractory in place. The p channel is working well, a bit battered and bruised but doing it's job. 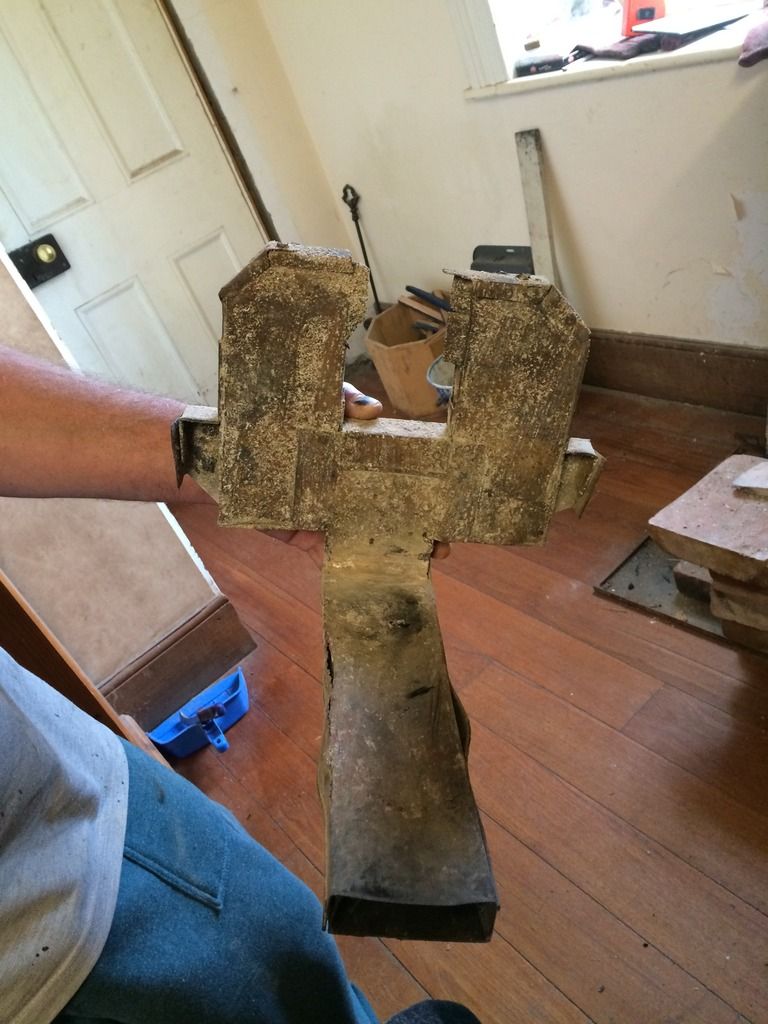 One of the folds is starting to wear away/crack (bottom) 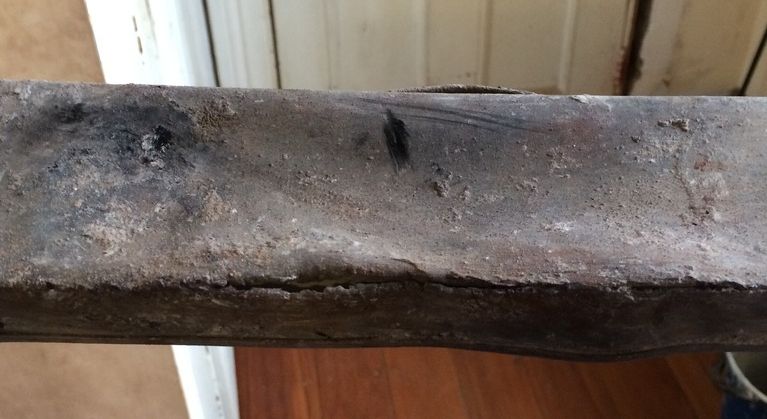 It did not crop, sorry. So anyway, for metal only half a mm thick it is doing surprisingly well I think. As promised Peter, I tidied it up a little and hopefully these are better pictures. Choose what you like. 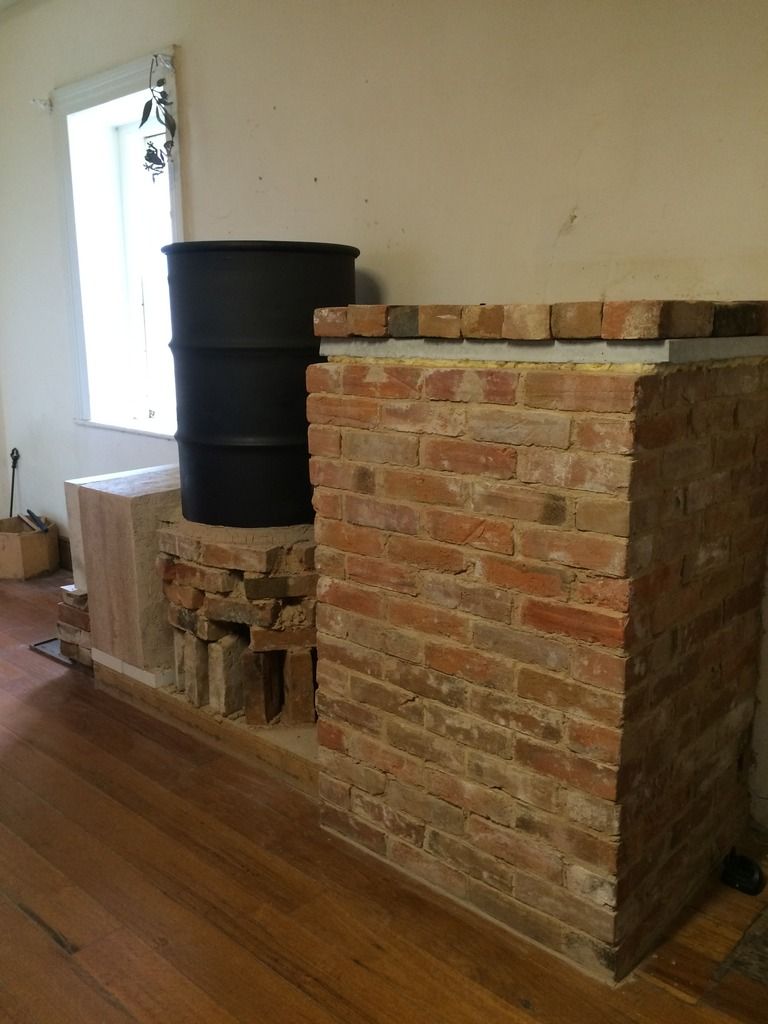 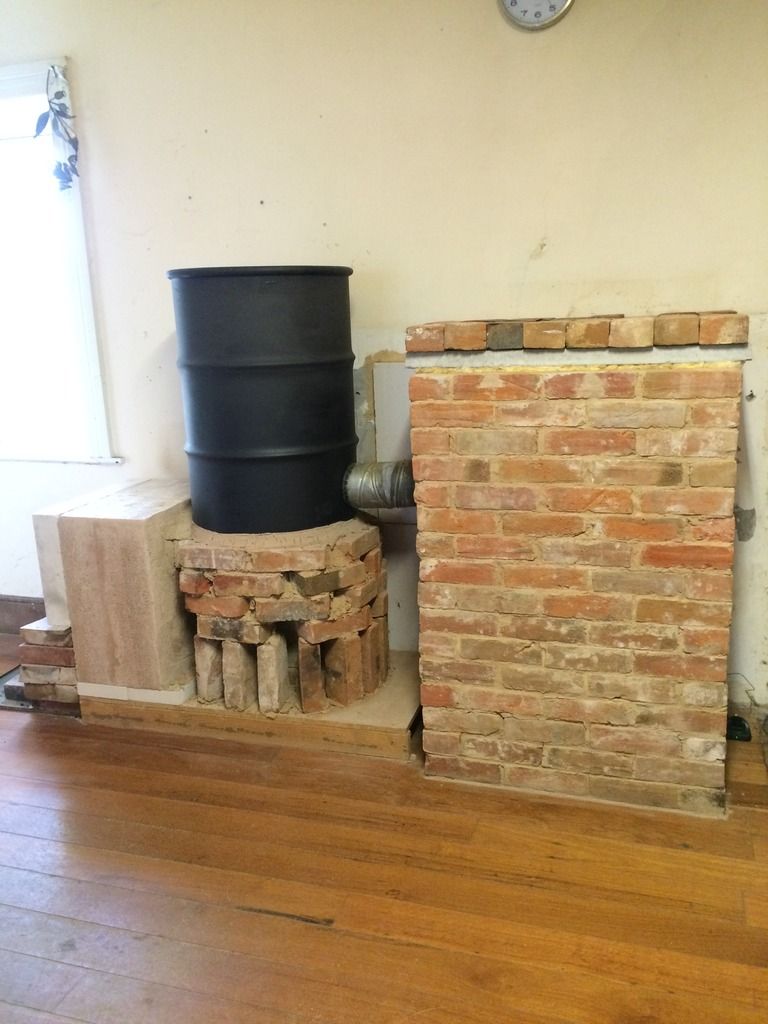 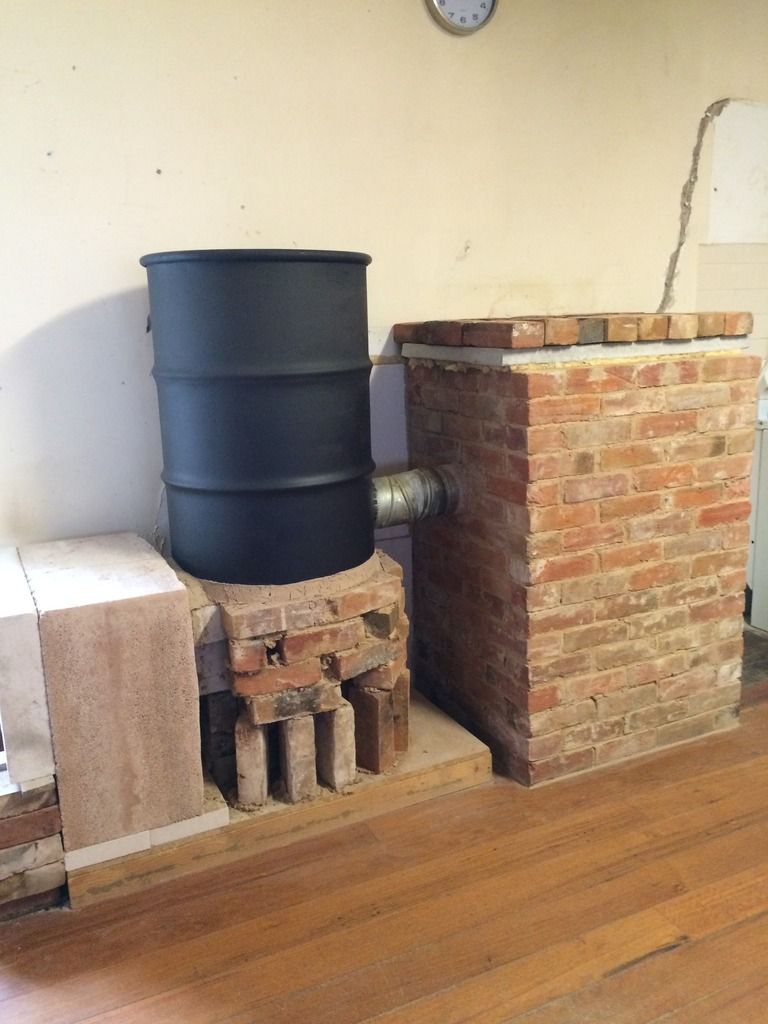 |
|
|
|
Post by mkrepel on Jul 6, 2016 11:23:53 GMT -8
Nice Terry,
It is looking like a finished project. Do you feel like it has met your performance goals? How is it doing so far this winter? Do you feel you have the proper balance between "instant" heat and storage?
|
|
terry
Junior Member
Posts: 128
|
Post by terry on Jul 12, 2016 16:08:12 GMT -8
Nice Terry, It is looking like a finished project. Do you feel like it has met your performance goals? How is it doing so far this winter? Do you feel you have the proper balance between "instant" heat and storage? Feel quite pleased at your interest, thanks kindly. And very thoughtful questions really, will try to be complete in my answer. I guess it was destined to happen, but the P channel has finally bit the dust. I will have to make another one today. Would have been nice (easier) if it lasted all season but there ya go. Not bad results tho, it has easily done over 700 hours. At least the hebel/castable structure is still hanging in, if that fails the entire heater fails. That is getting up to 800 hours and to the eye looks completely fine. I am sure it could not be handled for example, but as long as it 'sits in place' it should continue to work until I dismantle the whole thing after winter. In normal operation there is extremely little smoke, which is of course pleasing. It is trivial to get it to smoke, load up with kindling when up to temp for example and it will smoke like nobody's business. I imagine that is the same for all heaters, so at the end of the day it takes working knowledge of each heaters idiosyncracies to best practice. I assume that is. I did a little test a day or so ago. One indication of clean burning is of course 'no smoke', but without test equipment that is a little rough around the edges. I accurately weighed all of the wood burned for that day, and then weighed the ash residue that resulted. Again a bit rough around the edges but approaching the question of efficiency from a different angle. I burnt 22.061 kg of hardwood and had 0.512 kg of ash. I was pretty thorough in this process so have a large degree of confidence in those numbers. If my maths is correct that is a figure of about 2.32%. No doubt some ash went thru the system so the figure is a bit higher than that. I think those ash figures are low(ish?), and if true is an indirect indicator of efficient burn. Am I happy? Most definitely. The space it needs to heat is kinda odd, well maybe not-perhaps it is common enough. Any heating of the actual air would be mostly done by the barrel, but I DO need to heat quite a bit of air. To the left of the heater as you look at it in the pics is a narrow stairwell that leads upstairs to our TV room, which is heated from the rocket. As it can only be heated by hot air rising that explains why the barrel is most useful. If we were to only heat the kitchen I think the intense heat from the barrel would be better gone and replaced by a larger bell. So for the proper install, I have to balance those two competing factors. I am sure it is not operating completely as it should, By that I mean I do NOT do 'one or two firings a day' and have even radiated heat for twenty four hours. It really is operated as more of a 'very efficient slow combustion heater'. I am trying to work out just why that is, and perhaps a large part of it is the very small combustion chamber, (especially for the first burn of the day) it can only fit in about 4-4.5 kgs of wood. And that is tightly packed. It takes about two firings before it is completely up to operating temp (meaning I can put a large log in and have it catch fire without smoke). The bell is still gaining heat at this time tho, so I'm scratching my head trying to understand just how anyone could get away with 'two firings a day' even if both were ten kgs each say. (which is roughly my daily usage BTW) I tend to keep an eye of the flue temp to determine my loading schedule. If I just pack regularly, then the flue temp can rise above what I want. Just for info, the hottest (once) I have ever had the flue temp was 120 celsius. That to me is wasted heat up the flue. When all is up to temp, usually after the second pack, I wait till it (flue temp) falls back to 75 roughly, and then load a large log. The flue temp goes back to around 85-90 and kinda just stays there for hours, which is what I mean by 'slow combustion mode'. The mass of the bell is 520 kgs. The only guess was the weight of the concrete topping slab which was bought from the hardware. Pretty heavy, but the weight was just a guess. IT usually gets up to around 60 celsius at the end of the day (say last load at 8 pm) and in the morning is 35 or so, varies a little but that seems to be the pattern. So quite pleasant to get up to on a cold morning. But for the life of me I cannot see how doubling the mass of the bell would give longer release times, given I keep an eye on the flue temp (low means efficient harvesting) as double the mass would only get to half the operating temp. If I keep the same mass, then the flue temp will go through the roof. There must be something conceptually missing in my mind. One thing I will definitely have to figure out is some sort of timing mechanism and flap (air intake) set up. No point in putting a log on before going to bed, as when it burns down we are left with an air syphon which would just suck warm air out of the room overnight. But a mechanical timer which closes the air flap *three hours after being set* (or whatever) would allow the log to burn completely, with a safety margin, then close the air flap and stop the syphon and allow the warm air to linger in the bell overnight. In any case, even if I cannot comprehend just how to get 24 hour heat from a burn or two, the current usage is completely fine to live with and gives vastly better results than ever before. So, yes, very happy. My daughter is being a bit slack with my video, must put a bomb under her. Still not sure how to make it interesting tho...I guess we can call it a Seinfeld video, a video about nothing (no smoke). Won't be as much fun as seinfeld tho. |
|
|
|
Post by satamax on Jul 12, 2016 21:50:20 GMT -8
Terry, i would think ash leftover is not a dead giveaway of efficiency. If for example, there is not enough turbulence; the hydrocarbons which have offgased from the wood are not being necessarily being burned. But the wood will still turn to ash. I find your "exhaust" temps a bit high. 85/90 celcius in normal mode. Would be better in my opinion around 65/70. Peter might disagree tho. I think a dead giveaway, for not enough heat gathering, is the spike to 120C° at reload. I can't remember what your bell architecture is. But if single skin, you have about 11cm of brick, so that takes about 4 to 5 hours, for the top bell temperature to cross to the other face. But if you increase heat exchange surface, and lower exhaust temperature; risk of smoking back or not drafting well is increased. My workshop one is double skin, with air gap, 21cm thick or thereabouts. 20cm of concrete filled bricks 3mm metal. Takes a good 8 hours to reach peak temp. Burned it for 8 hours once. The mass was at 35C°, but i'm sure during the night it increased. Would be good to have a reccording thermometer. Air temp inside outside, mass and chimney temps  |
|
terry
Junior Member
Posts: 128
|
Post by terry on Jul 13, 2016 14:24:34 GMT -8
for sure Max, the only real way to determine actual efficiency would be to properly measure it. In the absence of that, I am kinda working in reverse of how *we* know we have low efficiency. See smoke? Not as efficient as could be. Lots of ash? Not burned as efficiently as could have been. Black/sooty burn chamber? Not as efficient as could be.
All I can observe is that I have very little smoke, tho of course a testo might detect unburned hydrocarbons/co etc that are not visible. Conclusion..'pretty efficient'. I have seen how much ash accumulates from most fireplaces, this is observably (and measurably) much less. Conclusion...'pretty efficient'. The firebox is as clean and uncoloured as the day it was installed, no black or soot ever. Conclusion...'pretty efficient'.
One alone is not all that compelling an argument, most modern heaters probably produce no visible smoke most of the time, but do they simultaneously have the other indicators present too?
So I am not going overboard and simply leave it at what I think is a reasonable conclusion...'pretty efficient'.
Interesting about the flue temp. That figure of 120 was mentioned as data, it hardly ever gets that hot, indeed that was the once and the highest. A reasonable stab at how long it takes to get over 70 is about four or five hours of burning. At that stage I kinda go into 'one log every two hours' and maintain it between 80-100. The draw is pretty good at that stage and so yes I too wish it would be lower, but fear the four or five hours of getting there (much lower draw at start up and thru the four hours) if the 'hot end temp' was 70.
Idle speculation along those lines make me imagine some sort of double bell setup, charge the first (or lower) bell as it is now, open up and begin to charge the second (or upper) bell when the temps get to 80 (say) so they stay low whilst the heat is charging the second resevoir. Best of both worlds. To have the flap dividing the two actuated by a coiled spring that opens due to heat would be ideal!
Yep, it is single skin. I could not have too much weight because, as it was an experiment, I did not re-inforce the wooden floor to cope with greater weight, indeed the whole structure can and does 'flex' when you stomp past it haha. So it is still a bit jury rigged from that aspect.
Thanks for your input, appreciated.
|
|
|
|
Post by satamax on Jul 14, 2016 2:01:10 GMT -8
Yep, double bell with automatized charging would be nice! |
|
|
|
Post by mkrepel on Jul 14, 2016 16:19:26 GMT -8
Terry,
Thank you for the detailed answer. It sounds like you are happy with it and that is the important part. When I build one of these, I will probably go more for the low, slow heat and cover up most of the barrel...if I even use one. I really like the look of the firebox built right into a brick bell with a bench next to it. I even know where to find some used brick, so that option is becoming stronger every day.
I think your conclusions about your efficiency are probably right on for the data you have. The real data that matters is that you have used it a good bit and are happy with what you are getting out of it.
Mike
|
|
terry
Junior Member
Posts: 128
|
Post by terry on May 2, 2017 15:12:44 GMT -8
A new heating year has arrived. I got lazy. This was intended to be for one year only. Ha, decided to keep it for another year. Lazy.
So what was learnt that might at least be of some use to others?
Overall, am pretty happy with it, especially considering that it did not really follow any of the rules other than the 'basics of a RMH', heavily insulated firebox, heat riser etc. The real basics.
The real experimental part, as far as I was concerned, was the construction of the burn tunnel, Hebel block with a thin facing of refractory cemented to it. There is no way in hell that the hebel block will still be sound and intact, it has probably turned to powder. I know the hebel block is not intact because there was one place where it failed, and that was the roof of the burn tunnel. Stupidly I had built the burn tunnel with the roof of the burn tunnel-the refractory roof-that snugly fit inside the walls of the tunnel, rather than having the refractory roof sitting ON the walls of the tunnel. That meant when the hebel gave way, the roof hinged down into and partially blocked the burn tunnel. That must have happened late in the season last year as I only saw it around the new year when I thought I'd better check on what needed to be done for this coming season.
It was a very simple solution, put a new roof in (after taking of the barrel etc) that sat on TOP of the walls, not between the walls.
Anyhows, for quick experiments I can highly recommend using hebel block with refractory adhered to it. Mine has lasted a whole season and is going into the next, for which I have complete confidence.
This season did not get off to the greatest start tho. Basically something had gone catastrophically wrong over the summer. CO alarms were going off madly. For the life of me I could not work out where the CO was coming from, especially as last year was fine. It was driving me mad.
I won't bore anyone with long tales, but I finally worked out what was happening, it was another of the temporary parts of the construction that had failed. I was left with 'possible blocked flue' as the only remaining option, even tho I simply could not believe that the flue could be THAT blocked, so little smoke etc etc.
Turns out the flue was more than blocked. One part of the experimental setup was the quick and easy flue. I think I mentioned what I did earlier in the writeup, what I did was simply use those extendable aluminium dryer type pipes, the ones that come all closed up and then you pull them out to extend them. I think there may be two types, the really thin and pathetic ones, and the rather more solid type which was the one I used. I simply taped two together and ran them up the chimney as far as/high as I could get it to go, and it stayed there under it's own rigidity.
Using it as a flue for a year had weakened it so drastically that any rigidity it had was lost.
It had all fallen down into a sphagetti like mess at the bottom, with the exit for whatever gas could make it through the roller coaster of flue exiting at the level of the top of the bell, where there are a lot of air gaps. In other words, straight into the room.
So no draw, and whatever made it came straight back into the room.
Pretty embarassing to admit really. Simple solution tho, put a proper flue in.
Problem solved and into the new heating season.
|
|


