Post by chrisburge on Mar 6, 2013 14:24:10 GMT -8

Even though this system has been developing under the posted heading 4.5" rocket stove with pellet feeder and ashbox , I felt it necessary to re-post it under this new heading because it has truly evolved into a successfully operational mini rocket mass heater. Plus, for those who are struggling with the need for small footprint/low mass/limited output applications, I think it might be more useful to post something that concisely presents all of the pros and cons of such a system, design parameters, and a clear illustration of what I've put together.
To begin with, I would consider this system experimental, but completely functional. In addition, although my application is somewhat unorthodox, I think there are some aspects that can be generally applied to smaller systems --if not simply encourage others that such a system is possible. However, there were a few definite operational challenges that I suspected during the design and mock-up phases of this project, that have been confirmed during installation and optimizing...
--> The exhaust must have a very limited horizontal run.
--> The exhaust requires a vertical chimney that is at least 12" taller than the top of the barrel.
--> 4" is the lowest limit to which a properly drafting mini-rrmh system can be scaled.
--> The smaller combustion area requires a grate, ash collection, and adjustable bottom draft to prevent occlusion from cinders and maintain proper burn temp.
As far as the limitations on a horizontal run: I would have to say that a lot depends on how tall the vertical chimney is as to how long a horizontal run can go, but not a lot can be expected from a 4" system; plus, you can't extract all of the heat or the gases will stall out when they try to go up. On the whole, you have to sacrifice a little bit on the efficiency side of the equation in order to have enough heat leftover for the vertical chimney to do its job.
Bottom draft is a tricky subject and can easily backfire on you (pun intended
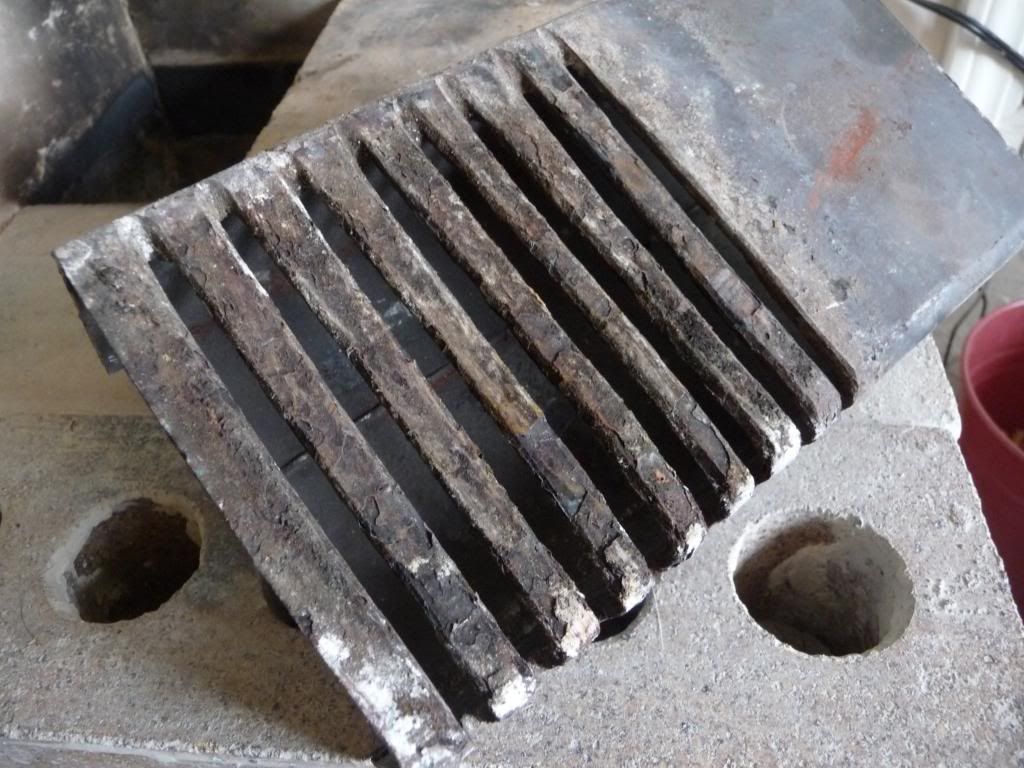
 ). Sor far, I would have to say that a good rule of thumb is that the total CSA of the combined feed tube and bottom draft openings cannot exceed the mean CSA of the system. As a practical example, this system has a feed tube opening that is 4" x 4.5" and a draft opening that is 4" x 0.5", but they both can't be fully open at the same time. The only times I use the bottom draft is either when I'm using the pellet feeder (which takes up half of the feed tube) or when I'm shutting the stove down-- whereby I close the lid on the feed completely and leave the bottom draft open to burn out whatever is left. I'm definitely getting good temps because this is my grate after 1 week:
This spalling is not an issue as i have designed this to be cheap and easily replaceable. A short piece of HSS 2x4 is easy to come by at the scrapyard... 10 min with the angle grinder... done.
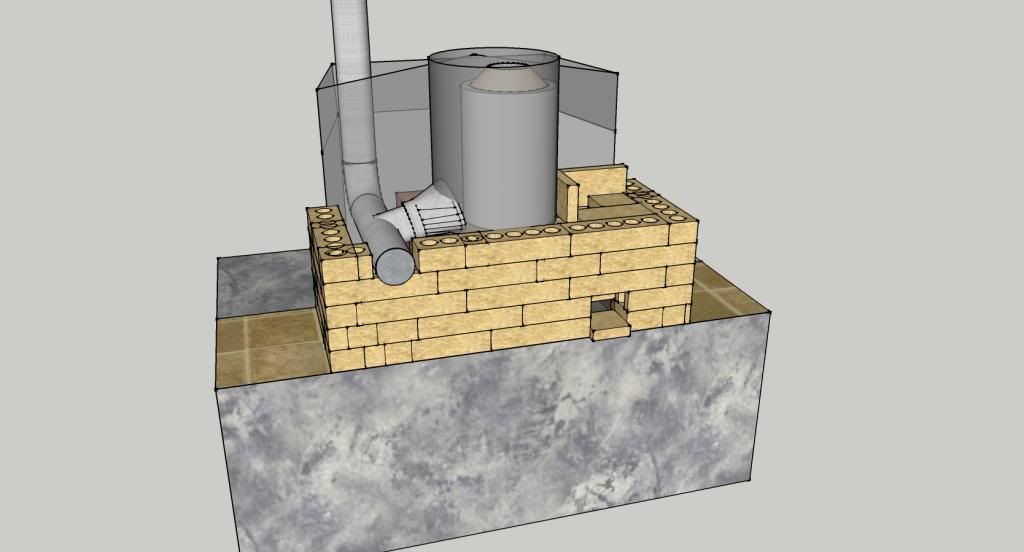
Here's a SketchUp of what's going on... [the fireplace is only represented by the dimensions of its interior]

As you can see from the drawing, what makes this a "mass" system by default is the fact that I've integrated it into the existing fireplace --which happens to be constructed atop a 3'x3'x5' concrete block. Unfortunately, the major detractor to this huge block is that it's in direct contact with the ground-- essentially making it impossible to fully 'charge' it with thermal energy. But, since concrete is so slow at conducting heat, I've found that after a long (6-8hr) burn, I can sort of charge up the top half and get some residual heat, but it's mostly delivered right back into the core of the stove. I have a pile of brick rubble and big pieces of basalt that are supposed to fill in the exhaust side of, as my wife refers to it, “the big brick box” (-- she's not too fond of my design), but I was waiting until I'd worked out all the final bugs with draft.
Here's the list of critical dimensions (in inches):
feed tube opening: 4 x 4.5
bottom draft opening (w/ ashbox in place): 4 x 0.5
burn tunnel: 3 x 4.5
total burn tunnel length (from front of feed tube to back of riser): 13
length of burn tunnel ceiling: 4.5
bottom course of riser flue: 4.5 x 4.5
second course of riser flue: 4.25 x 4.25
third course of riser flue: 4 x 4
riser: 4 (diameter) x 17
total riser height: 27.25
interior barrel dimensions: 14 (dia) x 18.25
top gap: 1.25
manifold opening: (circle segment) 10 (chord) x 4 height
exhaust: 4 (dia)
The original intent of this system was supplemental heat, but so far, when I go toe to toe with the gas furnace, I win. Prime example: got home last night from picking up the wife and kids; my wife went straight to the thermostat and turned it up a little to take the chill off the house; I went over to the other side of the living room and fired up the rocket; then, about halfway through what would be expected as the typical run-time for the gas furnace to bring the temp up 3 degrees, the furnace shuts down-- I was able to heat up the living space of the house faster than the central heating system!
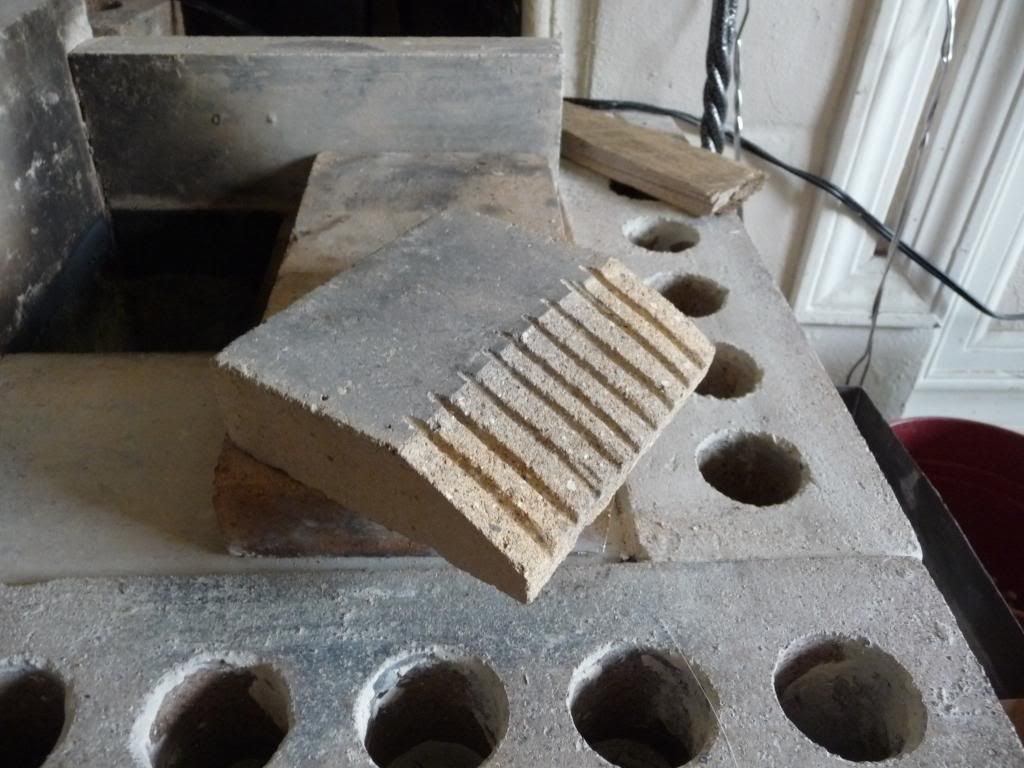
Optimizations after installation consisted mainly of futzing with the exhaust; shortening the horizontal run, removing a 90degree turn, and keeping the smoke path above the negative pressure plane of the system. But the biggest improvement to the draft velocity was installing this reducer plate at the bottom of the burn tunnel:

The bevelled edge catches coals and pellets that fall into the burn tunnel and holds them against the slots on the side of the grate where they are burned completely, but more importantly, the height of the plate reduces the burn tunnel from 4.25" x 4.5" to 3" x 4.5". Decreasing the CSA at the point in the system where the gases are expanding increases their velocity. This is the basic principle behind any rocket engine used for propulsion. So far, this one change has provided the greatest improvement to the system's overall function.
Here's a video of it burning with the new reducer installed:
Now for the bad news.... it can't stay. I promised my wife that this was an experimental installation to prove the viability of such a system and that as soon as the burn season was over, I would disassemble it and rebuild the pseudo-rumford insert that I had mocked up in the fireplace over the holidays (she misses the aesthetic of an open fire). BUT, now that I have proven to her that I can effectively heat the house with a scaled down unit, I have been given the go-ahead to develop a 6" system that can go in the basement and tie into the central heating system. WOOHOO!


