dvawolk
Full Member
   DSR2 125mm open system (actual project)
Posts: 273
|
Post by dvawolk on Sept 16, 2013 9:25:40 GMT -8
Is this build on a concrete floor that is tiled or a wood floor that is tiled? Its concrete floor with tiles... |
|
dvawolk
Full Member
   DSR2 125mm open system (actual project)
Posts: 273
|
Post by dvawolk on Sept 18, 2013 6:20:10 GMT -8
As the building phase approaches the end... The question appears. I was thinking. Right now all bricks are damp. It is easy way to go on with clay plaster right now... I am quite certain that the thing would work. I have tested similar design with almost the same characteristics and it worked. This one should work, too. So, IMO, no need to try it prior to plastering... What would you do?
And after the plaster application, after a week or so, i can start with small fires. I was thinking of lighting up some candles inside bench and batchbox to accelerate the drying process...
How fast can i start drying process after plastering... When it is firm to the touch? When it becomes lighter in color?
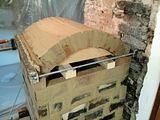
P.S.: i have just finished the arch and it went well. Photos on their way. Now i must close the arch sides and wait for a week or so to remove the slab floor on the bench...
Very excited!
|
|
dvawolk
Full Member
   DSR2 125mm open system (actual project)
Posts: 273
|
Post by dvawolk on Sept 19, 2013 11:21:43 GMT -8
|
|
|
|
Post by Rinchen on Sept 19, 2013 23:30:59 GMT -8
Hi, I see you are using vermiculite board as a heat riser. I would suggest you keep a way to be able to replace it after time, especially since it is not held together by anything. I took apart my heater with a heat riser made the same as yours. It has done service as an ordinary j-tube for one season and an hybrid batchbox (see my thread) for another season. I was surprised to see the wear on it. The whole things has cracks running all the way through it, came apart into two pieces and the surface of the back inner wall of the tube had become cracked like muddy soil in the hot sun. Very similar to this: thumbs.dreamstime.com/z/dried-mud-cracks-322222.jpgI also noticed the color had changed to a red like color for about two millimeters deep in the hot zones and the surface has gone hard like baked clay. My riser had been contained in a mesh jacket with the inner space filled with perlite and vermiculite (loose) and would probably have been able to do some more service for some time. I have to add that the worker who gave me the board from the warehouse commented that this batch of boards was of a particularly heavy quality (this is a supplier of industrial oven materials). Anyway this is just my 2 cents :-) hope it might be of use. |
|
|
|
Post by peterberg on Sept 20, 2013 0:44:02 GMT -8
The whole things has cracks running all the way through it, came apart into two pieces and the surface of the back inner wall of the tube had become cracked like muddy soil in the hot sun. (snip) My riser had been contained in a mesh jacket with the inner space filled with perlite and vermiculite (loose) and would probably have been able to do some more service for some time. These cracks could be caused by the loose filling, in my opinion. When the filling heat up, it will expand a bit. After cooling down it is settled down a little lower. This process is repeated every day and will put pressure to the sides of the vermiculite board. When you replace the riser it would be wise to stabilize the loose vermiculite with clay slip? The wear at the lower back of the riser do sound familiar, though. Later on I made some amendments to the back end of the tunnel in order to kick the flames to the center again. That last modification to the J-tube, by the way. |
|
|
|
Post by Rinchen on Sept 20, 2013 4:29:42 GMT -8
Hi Peter!
Hope you are well and your house building will come along soon.
The settling of the loose filling sounds plausible and yes, the next riser will receive a clay/vermiculite mix around a clay stabilized ceramic paper tube (like Jeroen in the Netherlands did).
However I would expect the large cracks to appear lengthwise in that case, but they are in the horizontal plane.
|
|
dvawolk
Full Member
   DSR2 125mm open system (actual project)
Posts: 273
|
Post by dvawolk on Sept 20, 2013 5:52:08 GMT -8
Hi, I would suggest you keep a way to be able to replace it after time, especially since it is not held together by anything. I took apart my heater with a heat riser made the same as yours. It has done service as an ordinary j-tube for one season and an hybrid batchbox (see my thread) for another season. ... I also noticed the color had changed to a red like color for about two millimeters deep in the hot zones and the surface has gone hard like baked clay. My riser had been contained in a mesh jacket with the inner space filled with perlite and vermiculite (loose) and would probably have been able to do some more service for some time. I have to add that the worker who gave me the board from the warehouse commented that this batch of boards was of a particularly heavy quality (this is a supplier of industrial oven materials). Anyway this is just my 2 cents :-) hope it might be of use. Hi. After testing this outside the boards did show cracks from the inside, also the red coloration appeared. They were much less sturdy after the testing but didn't look like they would collapse... Also the boards for the heat riser are glued with 1200°C glue and with some screws... Hope they will hold fine... Well it won't be easy task to change them... But i will make sure that i will be able to change them from the back of the stove (that is garage and not appartment). |
|
dvawolk
Full Member
   DSR2 125mm open system (actual project)
Posts: 273
|
Post by dvawolk on Sept 20, 2013 6:06:19 GMT -8
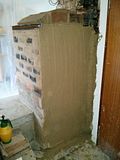
And some more photos:  This is chamotte brick cut in half. It was at the bottom of the heat riser at my testing stove outside. The grey discolration goes about 1cm deep. Anyone knows what it means? Temperature? What does it do to chamotte?  The metal U-profiles that hold the arch together will be wrapped in thin piece of insulative rock wool and then all will be plastered. This is to prevent cracking. In the plaster that is closer to surface i will add a net of yute with 10x10mm squares. I would say that adding straw when plastering this netting inside will not be good.?!   Plastering is fun! I mix surprisingly more than half of sand to my clay. Probably 60 to 70%... I also add some chopped straw, but not much so that there will be more mass. I might add more fibers (horse dung) at the total end of plastering so that the thermal battery is fast charge and slow dissipation of heat?!? |
|
dvawolk
Full Member
   DSR2 125mm open system (actual project)
Posts: 273
|
Post by dvawolk on Sept 27, 2013 8:15:59 GMT -8
So when i finish the plaster, I can already start a short fire to speed up the dying process?! Any cons about that?
|
|
|
|
Post by Donkey on Sept 29, 2013 12:37:18 GMT -8
If you have very thick plasters or very high clay content, fast drying is more likely to crack.
Besides that.. No.
|
|
dvawolk
Full Member
   DSR2 125mm open system (actual project)
Posts: 273
|
Post by dvawolk on Sept 29, 2013 22:40:56 GMT -8
Great, then. I started small fires now.  Exhaustill is below 35 Celsius, but fires are small, less than 1kg of wood. It burns vigorously as seen on above video. There was also a nocking Voice from part of the door, because of the not constant draw... the fire is heard like a steam train at that time.. |
|
|
|
Post by peterberg on Sept 30, 2013 2:14:15 GMT -8
Exhaust still is below 35 Celsius, but fires are small, less than 1kg of wood. It burns vigorously as seen on above video. There was also a nocking Voice from part of the door, because of the not constant draw... the fire is heard like a steam train at that time.. Klemen, That steam engine sound is a sign that the gas velocity isn't high enough yet. The whole thing is still wet, probably around 50 gallons of water is in there. Keep the small fires going, these will dry the thing out. This running in proces could take several weeks or a couple of months. The exhaust temperature should be around 100 C (212 F) or a bit more to operate properly. The stove didn't stall up till now? |
|
dvawolk
Full Member
   DSR2 125mm open system (actual project)
Posts: 273
|
Post by dvawolk on Sept 30, 2013 2:36:45 GMT -8
Hi, Peter.
I couldn't find the right translation for 'stall'. What do you mean by it?
|
|
|
|
Post by peterberg on Sept 30, 2013 4:07:52 GMT -8
Hi, Peter. I couldn't find the right translation for 'stall'. What do you mean by it? It is a term from the airplane industry. When the speed of the plane become too low, the wings aren't producing lift anymore and the plane will drop vertically down. Not the same way as a dive, the plane itself will stay horizontal. And now the stove: When the chimney temperature is too low and stays that way during the burn condensation will form high up in the chimney. That water will run down, where the temperature is still high enough and it will evaporate again. Higher up it will condensate again, run down again etcetera. The net result is: the chimney will act as a heat pipe. The level where condensation occur will gradually come down and the chimney will cool off this way instead of heating up. Eventually, when there's not enough additional heat from the stove, the draw will stop altogether and the stove will belch out smoke, all of it. That's what is commonly called a "stall" of the stove. Not very logically, but the apparatus will stop doing what it is designed for altogether, that's the similarity. |
|
dvawolk
Full Member
   DSR2 125mm open system (actual project)
Posts: 273
|
Post by dvawolk on Oct 7, 2013 4:10:13 GMT -8
Ok,i understand now. I started about 20 fires inside. Very few of these were started from cold stove. And it didn't stall. And I know how it looks from my test under the balcony. But yesterday I started it from cold again and I put 3kg of wood on the short preheating. It was on the edge of stalling. I saw some smoke coming from the main connection to the chimney. But then it started to work properly. The stalling occurred at the temperature of 26C (exhaust to chimney).
I am experiencing PROBLEMS WITH PLASTERING...
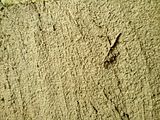
on the concrete bench I already plastered 1cm of clay sand plaster and then I pushed in yute mesh. It dried and it stayed on the concrete.
then I rewetted it to apply a second coat of plaster. When this was dry, it came apart from the concrete on some places... this is heard when I scratch like a thin voice that clearly shows air gap below... any clue? Where did I do it wrong?
|
|