Teach
Junior Member

Posts: 89
|
Post by Teach on Jan 24, 2010 11:53:42 GMT -8
I have searched the forums here all morning and for the life of me can't find previous discussions on what I am about to ask and I know they are here "somewhere"!
The best bang for the buck in heat storage material? If I am able to find clay to do the body of the stove I know I will not be able to harvest enough to do the entire run for the exhaust pipes and bench. So I am considering using an alternate like sand or gravel. Now these I have surplus of. I would build a form affair of stone and mortar within which I would run my stove pipe but instead of cob to fill in and around the pipe to use sand and or gravel and then cap the forms with concrete pavers?
Will sand and gravel take up the heat as fast as cob?
Will they hold onto the heat as long as cob?
Alternatives other than these two? Pros/cons?
Thanks, and my apologies for the repeat.
|
|
|
|
Post by canyon on Jan 24, 2010 14:25:14 GMT -8
Not quite clear on what you're looking for. You don't mention "urbanite" or "breakout" or salvaged concrete but this material is a handy alternative for heat storage. If you are just trying to make do without clay and use dry sand/gravel I think you will be missing out on some performance. I want to encourage you all I can to find some clay! That stuff you mentioned around the lake might work just fine! I have a decent proportion of silt in my clay dirt but it works great. You just need to do the testing and research. The jar test, the ball test, the worm test etc. There is clay somewhere within driving distance of your location! A little goes a long way as well. One decent pickup load will do more than what I am gathering you have going! If you can't wait till spring then commercial clay can work too. It is more pure so you use way less! It doesn't take that much! After all of the work of packing urbanite,rocks and gravel with clay/sand mortar I have been thinking about trying to pour a test bench with gravel/sand/clay "claycrete" (wet) in a form encasing the flue! I know the storage capacity will not be as good but it might be good enough and the labor savings would be huge! Grizbach appeared to use dry sand to encase some of his flue in bench so he might be able to pipe in on this. I'm not saying it won't work (it will of course) I am just trying to encourage you to get your hands in the wet stuff! Clay is magic!  |
|
Teach
Junior Member
Posts: 89
|
Post by Teach on Jan 24, 2010 15:35:04 GMT -8
Well, upon reading this reply Canyon I went down to the lake and took several scoops with a shovel from the bank as it was thawed enough to scrape enough for a jar test. I've added a ts of salt and gave it a good vigorous shaking for a minute or so. Maybe what I can do is post a pic of the results once it has cleared and let you guys tell me if there is enough clay in it or not.
Rock has greater heat storage capacity than clay so why would using sand or gravel as fill around the pipes be bad? curious.
I should also add here that I have carpul tunnel syndrome quite bad in my hands so digging is a painful exercise. So if I can get away without digging or to dig as little as possible so much the better for me.
|
|
|
|
Post by mountaindreamer on Jan 24, 2010 15:53:09 GMT -8
Do please post a picture! I've got a jar test of my soil here, but I'm not entirely sure what to make of it, so I'd love to see yours and what people say about it. Maybe I can post mine too.
|
|
|
|
Post by grizbach on Jan 24, 2010 18:56:13 GMT -8
I started to harvest and purify some clay around here, and then talked myself out of it. My thoughts are it is used as a binder. If I was building with cob I would definitly use it. Since my bench has hard sides, I figured I didn't need it. My sand is from the yard, so it has silt/clay in it anyway.
To get the most heat transfer, Im sure I could pour a quart or so of water into my bench. I could turn off my humidifier then.
Also, round ducting has the least amount of surface area. Most use it because it is the strongest also. You don't want to sit on your bench and have it collapse under you. I flatened my pipe to a D shape for the back of my bench to save on space and also better contact with the brick.
I like the idea of fins on the ductwork to wick away the heat better also.
|
|
Teach
Junior Member
Posts: 89
|
Post by Teach on Jan 24, 2010 19:08:27 GMT -8
Ok, jar tests taken. I did two jars with their contents taken approximately 50 yards apart. This is the stuff from the local clay banks close to the lake. I think it is mostly silt but maybe there needs to be more time to settle for better definition of the sepparation lines but the water has cleared fairly good. I did a couple of tests with the stuff before throwing it into the jars. I moistened a small amount and made a golf ball size ball in the palm of my hand and pushed it flat between my palms and then turned my hand upside down and the stuff stayed stuck to the underside of my palm. Also made a worm about the thickness of my index finger and it wrapped all the way around my finger without breaking. Also reshaped that ball in my hand and dropped it from a height of my waist and it hit the floor forming the shape of a mushroom cap with no torn or broken edges with a height 1/3 of its diameter. Here are some fairly high res pics of the jar shake test. 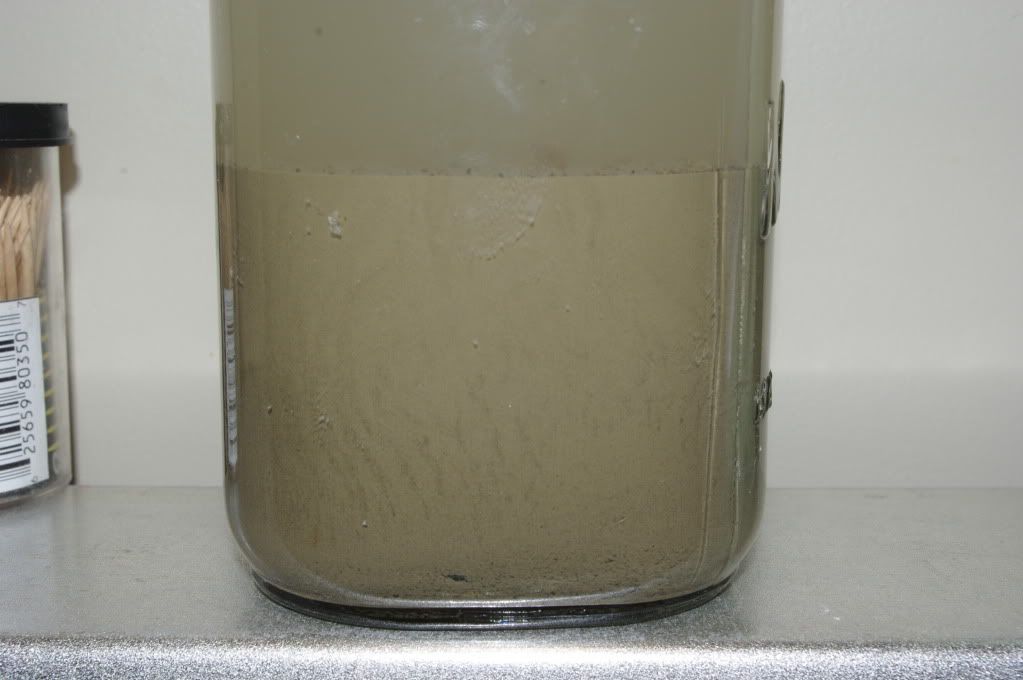 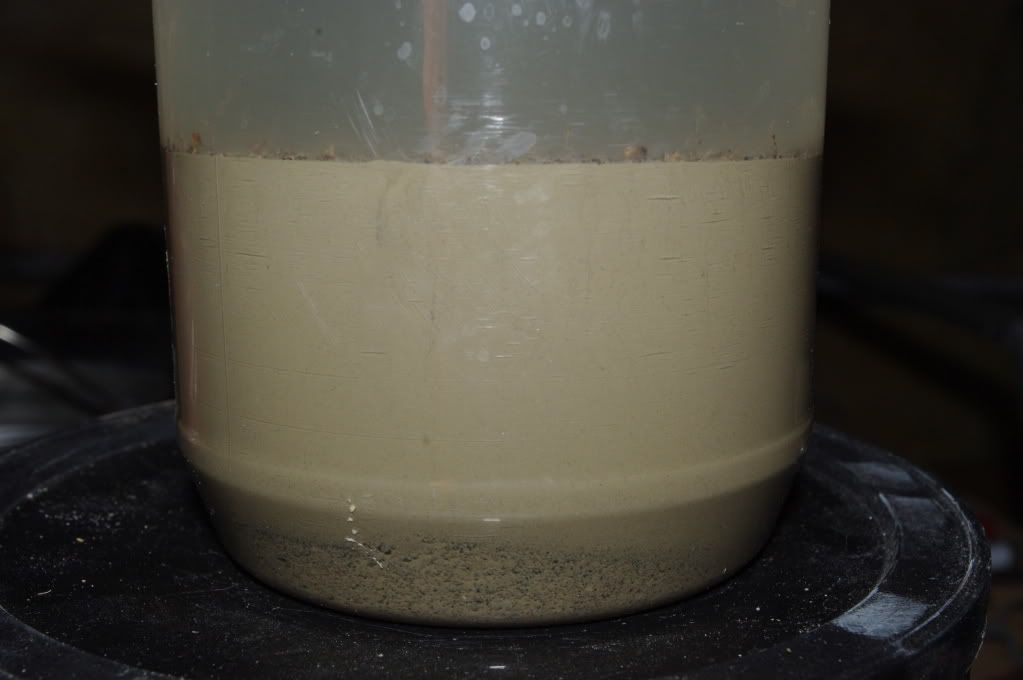 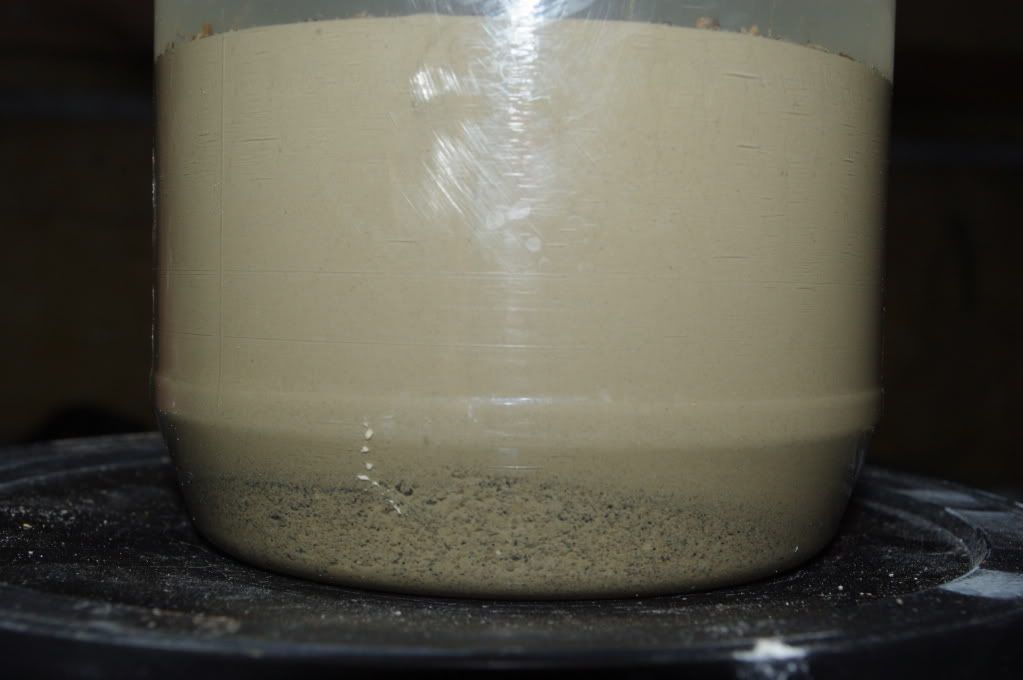 I look forward to hearing your verdicts one and all! |
|
|
|
Post by mountaindreamer on Jan 24, 2010 19:21:00 GMT -8
Wow, well, definitely a one-up on what I've got for clay. Of course, this is from my urban house's yard and not from the mountain (the mountain's... worse), but I was still going to use it. I've got plenty of sand, but I think the rest is silt. If only I could remember how it acted when I'd make mudpies! I've lived here since I was two and never afraid to get dirty. The graphic above my picture was found online somewhere. I saved it for reference, but I don't think it really helps with anything between clay/silt. Ah well. Soon as this straw mattress project is done, I'll mess with my dirt.
lh3.ggpht.com/_lApnceKLuWg/S10NjGl97SI/AAAAAAAACmA/IYT2zAg6rjY/Testing%20One%20Two!.JPG |
|
Teach
Junior Member
Posts: 89
|
Post by Teach on Jan 24, 2010 21:17:37 GMT -8
So is it clay or silt that I have?
The bottom picture looks like there is another layer of material above the sand but it is just the plastic jar causing the color making it look slightly darker but it seems to my eyes that there is just one layer above the sand of all one type of material. What is that material? Silt or clay? Thanks
|
|
|
|
Post by mountaindreamer on Jan 24, 2010 21:32:10 GMT -8
I have no idea. That's what I'm trying to figure out too. Soon as I get a chance I'll be messing around seeing if mine acts like clay. Sorry I can't be more help.
|
|
|
|
Post by canyon on Jan 24, 2010 22:20:04 GMT -8
You're worm and ball tests sound positive. The pictures in the jar test are different. First I see what looks like a mason jar (how much settle time is that one?) and then the two pictures in the plastic container. I haven't done that trick of adding salt to speed things up but the clay stays in suspension for some time. If the water above is clearing up quick it does look like it could be very silt rich. You need to be able to make a slip.  |
|
Teach
Junior Member
Posts: 89
|
Post by Teach on Jan 25, 2010 9:41:30 GMT -8
Canyon, as stated ...two jars....two different samples 50 yards apart were taken. The plastic jar pics showed more sand so I took one shot from above and another from below to illustrate the sand more so you guys could really see what was there. Settle out time in these pics were 4 hours from the time of shaking to the time I made the post.
While I was first mixing water into the stuff it was very runny and I looked for the properties that Donkey mentioned about forming a glove over your skin and it displayed those properties well. So I don't know. It should show three layers - sand, silt, and clay in that order from the bottom up and I have only been able to detect two layers - sand and whatever that layer is on top of the sand. Is it all clay? Or is it all silt?
|
|
|
|
Post by Donkey on Jan 25, 2010 12:10:01 GMT -8
Y'all, the shake test is of limited value.
Better to make a test puck and dry it out. If it cracks badly when it dries but hangs together and makes for generally hard pieces then you've got tons of clay. If it dries hard as a rock without cracking (much) then you've got plenty of clay and even better plenty of sand/aggregate too. If it crumbles like rice flour cookies then you've got silt or too much sand/not enough clay.
To the topic of the thread:
Heavier stuff makes for better thermal mass. Cob isn't the best choice, it just the most sculpt-able. I make a cob pan, place the pipes in it, pour sand over, under and around then cap it all off with cob. Sand is good because of the grain size, there wont be voids in it. Gravel will work, big rocks will work, you just gotta make sure there aren't big voids.. You could use rock and fill up the holes with sand.. Whatever works.
|
|
|
|
Post by mountaindreamer on Jan 25, 2010 12:26:30 GMT -8
Well, that answers my unspoken question of how to construct a bench. I reckoned I could figure it out, but that pretty much sums it up. Thanks!
|
|
Teach
Junior Member
Posts: 89
|
Post by Teach on Jan 25, 2010 12:58:07 GMT -8
Thanks Donkey, can you elaborate a bit more on the puck? How big around and how thick should it be? Flat on both top and bottom like a hockey puck?
Will the water content before drying affect it's dried properties?
Thanks
|
|
|
|
Post by Donkey on Jan 26, 2010 18:57:48 GMT -8
It's all relative..
Actually, the larger the better, up to the limits of practicality. When I do pucks, I make 'em about an inch (or so, maybe 2 inches) thick and about the size of my palm (4 inches or so in diameter), I make 'em flat on either side like hockey pucks. When testing for clay properties or basic mix properties I want it to be the consistency of a workable dough, not too wet, not too dry.
What matters most is that all of the samples that you are working with (from different places, or with different mixtures (more or less sand, more or less straw, what have you)) are the same size so that they can be RELATED to each other.
Don't forget to label 'em. I scratch a number in 'em and use a notebook to keep track of what's going on with each. This is a good strategy for working with just about any natural, clay based material, for just about any use.. Dig it up add as much water as the use requires, screen if necessary, mix it with whatever is needed, make pucks/bricks, label 'em, mark 'em down, set 'em out together to dry, try a new mix of varying amounts, repeat.
|
|


