|
|
Post by AlexHarpin on Oct 6, 2014 5:28:35 GMT -8
I think you did not miss much in the last year have not been super productive for maple syrup, at least not here in Québec.
|
|
|
|
Post by jetset on Oct 6, 2014 11:41:07 GMT -8
Alex, indeed, that was what I heard when I got back. Really short season, and it seemed like what sap was gathered didn't have as much sugar as it should have.
Take care and
God Bless!
Jacob
|
|
Bram
New Member

Posts: 46 
|
Post by Bram on Oct 11, 2014 8:36:24 GMT -8
Hi there, today I was listening to the Rocket Mass Heater Innovator Event podcast, run by Paul Wheaton. In podcast number three, the australian guy talks about a heating system for tiny homes using a RMH to heat the water (is that Tim Barker?). Since one year I am building such a tiny home in Leiden, the Netherlands. It is a strawbale home of 6.20 by 3.60 meters. Insanely high humidity, ease of build, exclusion of concrete foundation and excess beams of enormous size made me choose to build it on a raised platform (about 40cm). The pluses are obvious, the minus is that a RMH is going to add so much weight I am scared the building might sink!  So yeah, what to do? I want an effecient system that is custom fit for a house like this... Total 24 square meter is not difficult to heat, also considering the attached greenhouse and solar oriented kitchen. I was familiar with the video made by Geoff Lawton, in which he shows Tim Barkers system. I did a bit of internet research, thinking I could maybe triple up on my uses for this system. - Hot water for showers and kitchen.
- Heat the house.
- Cook on the rocket stove heat riser/chimney.
During my research I stumbled upon this site (mainly through google images). I know many people say not to experiment on your first build, but I've build stoves before, know how to weld, will test it outside and have participated in building one RMH before. I went into sketchup using your sketchup file, and lowered the whole setup into the floor, as you can see here.  If I am not mistaken, this should allow one to cook on it, as well as heating the water! Maybe I'll make my house even more luxurious and go for a heated cob floor!  Your thoughts? ps. I read through most of this thread before registering to reply. I read that you were in the process of building this. Did you manage? Are there pictures? Is it as awesome as I imagine it to be?  |
|
|
|
Post by jetset on Oct 11, 2014 11:35:44 GMT -8
Welcome to the forum Berry! Can't say I have as much experience with these stoves, but I don't see why what you propose to do wouldn't work. It's not like you're talking about changing system dimensions, just lowering it into the floor. One concern I will mention is that if your floor material is flammable, ie wood, make sure you leave plenty of space to fireproof insulate around it. 24m 2 may not be very big, but if it's all you've got and you loose it all because you didn't leave enough room, that would be devastating. I'm just starting a system based on Donkey's design there, just finished casting the core: linklinkTake care and God Bless! Jacob |
|
|
|
Post by Donkey on Oct 11, 2014 23:05:08 GMT -8
Hello Berry,
Yes, that should work just fine. You can also use a smaller buffer water tank.
You will loose heat (of course) to the cook-top/pot or pan, reducing the efficiency of the hot water heater. Just remember that when you ask a stove to do more than one thing, you will compromise it's ability to do them all well. It is a trade-off that may well be worth making for added utility.
I have completed the water heater and it works quite well. I've yet to sort through the build-images to post, I've been VERY busy lately.
Soon.. Soon.
|
|
joel
New Member

Posts: 10 
|
Post by joel on Oct 12, 2014 9:24:20 GMT -8
Hello Berry, Yes, that should work just fine. You can also use a smaller buffer water tank. You will loose heat (of course) to the cook-top/pot or pan, reducing the efficiency of the hot water heater. Just remember that when you ask a stove to do more than one thing, you will compromise it's ability to do them all well. It is a trade-off that may well be worth making for added utility. I have completed the water heater and it works quite well. I've yet to sort through the build-images to post, I've been VERY busy lately. Soon.. Soon. Waiting with anticipation.... |
|
|
|
Post by ronyon on Oct 13, 2014 13:08:00 GMT -8
Welcome to the forum Berry! Can't say I have as much experience with these stoves, but I don't see why what you propose to do wouldn't work. It's not like you're talking about changing system dimensions, just lowering it into the floor. One concern I will mention is that if your floor material is flammable, ie wood, make sure you leave plenty of space to fireproof insulate around it. 24m 2 may not be very big, but if it's all you've got and you loose it all because you didn't leave enough room, that would be devastating. I'm just starting a system based on Donkey's design there, just finished casting the core: linklinkTake care and God Bless! Jacob Do you have pictures of your manifold? |
|
|
|
Post by Donkey on Oct 13, 2014 20:45:24 GMT -8
Ok.. Some images of the build: There has been a little bit of a redesign as the space that the stove was built in was rather tight. The tank sets directly on top of the heat riser, rather than beside it. The stove is much taller than I had planned, but much narrower and al in all a tighter build. I like that heat coming from the riser strikes the bottom of the tank directly. The intense hit should provide a rather violent mixing action, turning over the water and making it stratify less. First, some of the parts. This is the stand that will hold up the water tank and allow heat-flow around the bottom of the tank and up to the bell above. 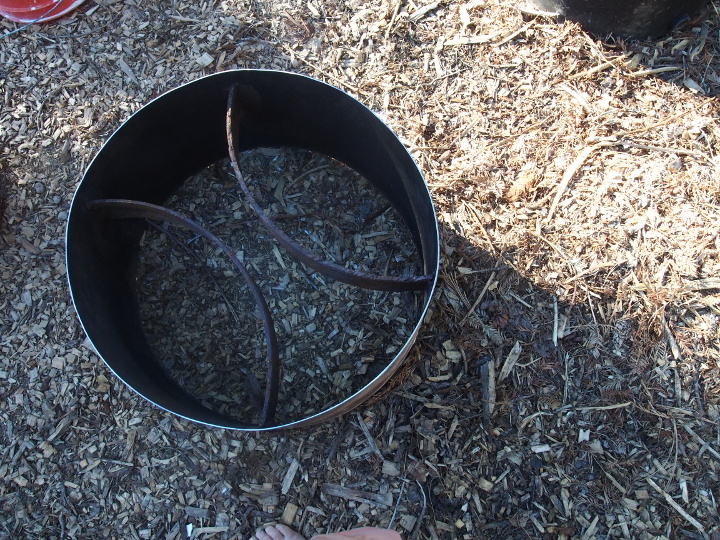 The tank. This is a 24 gallon tank, taken from the old hot water heater (in the same location). We cut the top off and added a sleeve for extra height to allow some free-board in the water level. I wanted to keep the solar pre-heater in the system and the top pipe connector seemed a bit too close to the top, now there's room for expansion and to keep the water level up a bit. 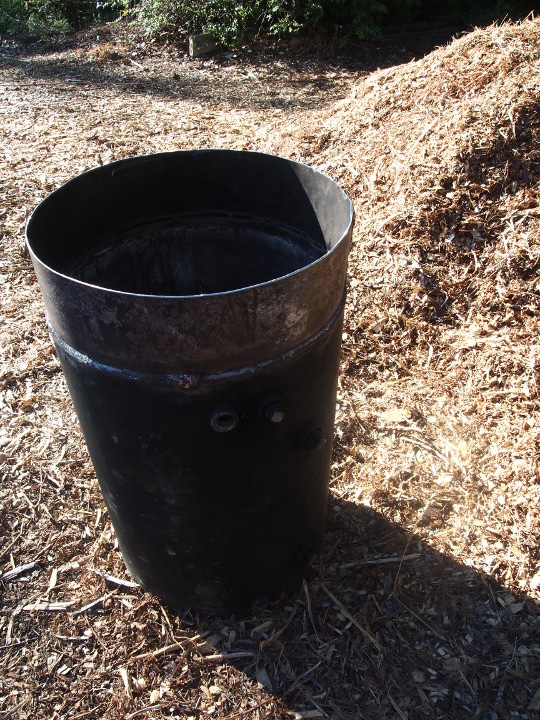 The base going in. It's insulated under with perlite/clay. 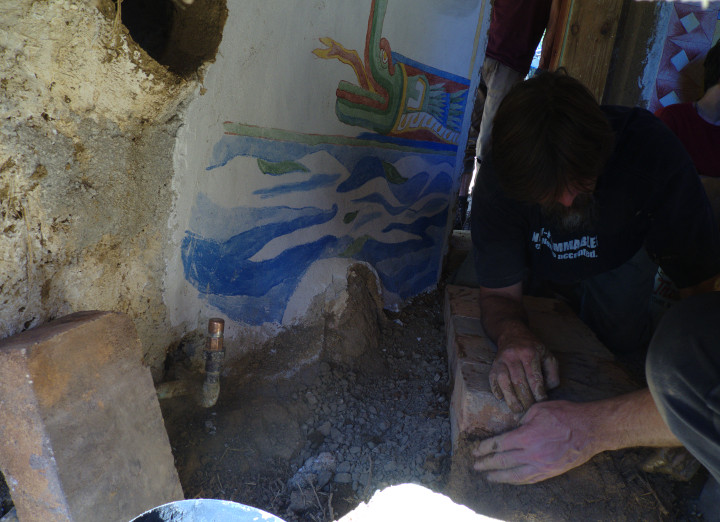 The bottom of the stove, the firebox and burn tunnel are built with firebrick. My neighbour gifted me with some extra large bricks, measuring 12" by 6" by 3", not a lot of them are needed to do the job. The body of the stove was built from adobe brick and cob. In this image, you can see the bottom layout. The heat riser was cast in place using adobes as the outside of the form and sonotube, cardboard concrete forming tube as the inside. We kept the burn tunnel as short as possible, you can see that the center of the heat riser (base) is not in the center of the build. The heat riser is angled to the center at top. 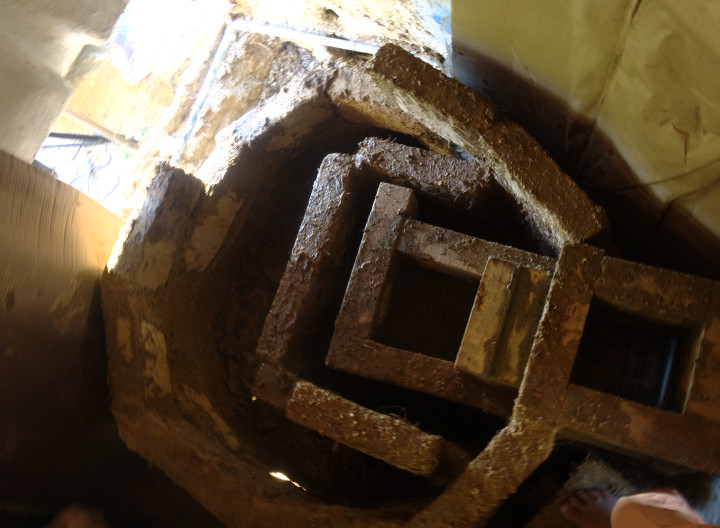 Unfortunately, I don't have any images of the forming/packing of the heat riser. The base was built up with adobes, making an inside adobe form left quite a bit of space around to be filled. We used the dirt/rocks/broken adobes and other debris left over from taking apart the previous stove to fill in extra space in this new build. Here you can see the rocket stove base, J-tube inside, with the spacer and stove setting on top. 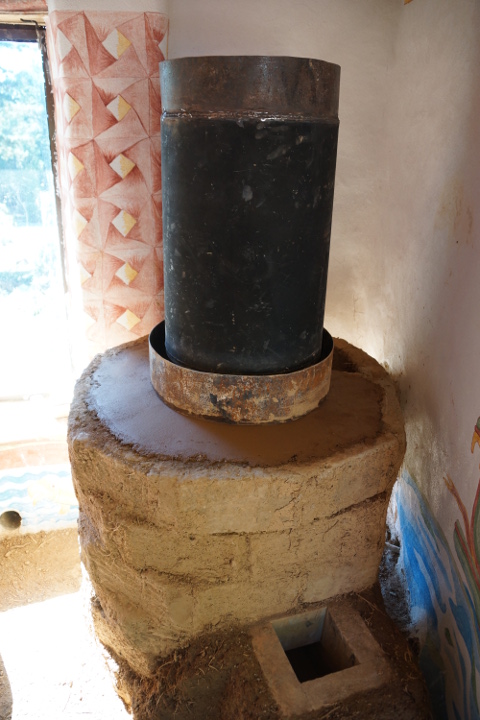 You can see in this image the piping for the solar pre-heater attached to the tank. The exhaust manifold is partially visible at the bottom left of the tank. 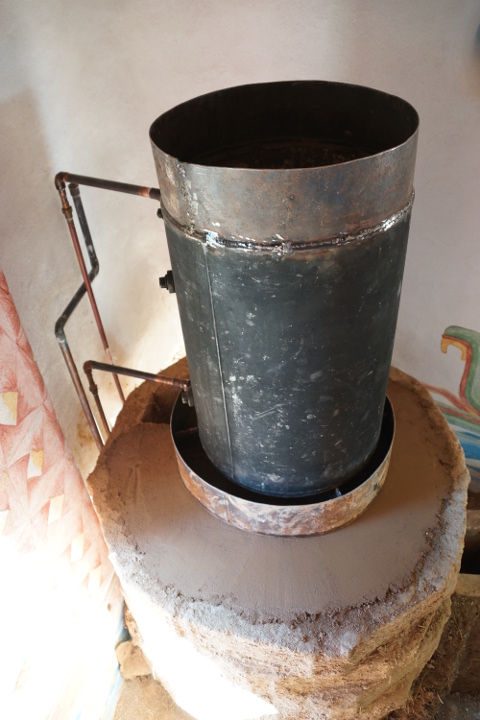 We then built a "bell" around the hot water heater. We built a surround of adobes, leaving a gap of around 8 inches between the adobes and the tank, all the way around. The adobes were plastered with an insulating layer of perlite/clay, added as we went, layer by layer. Here you can see down between the tank and the bell walls to the exhaust below. 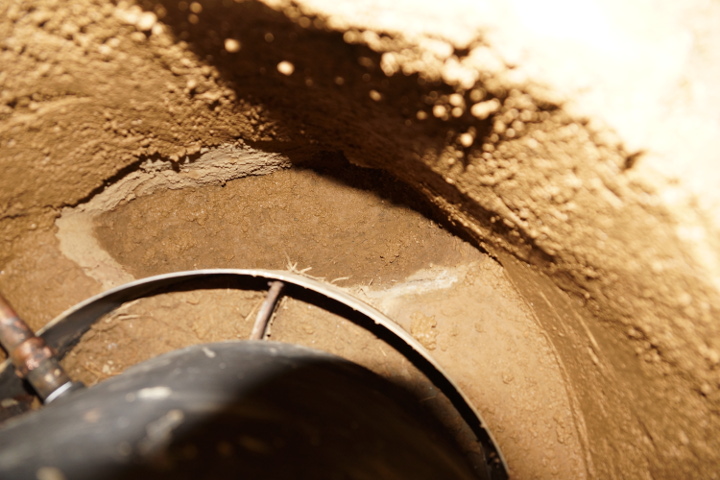 Leslie Jackson, having fun with the process. 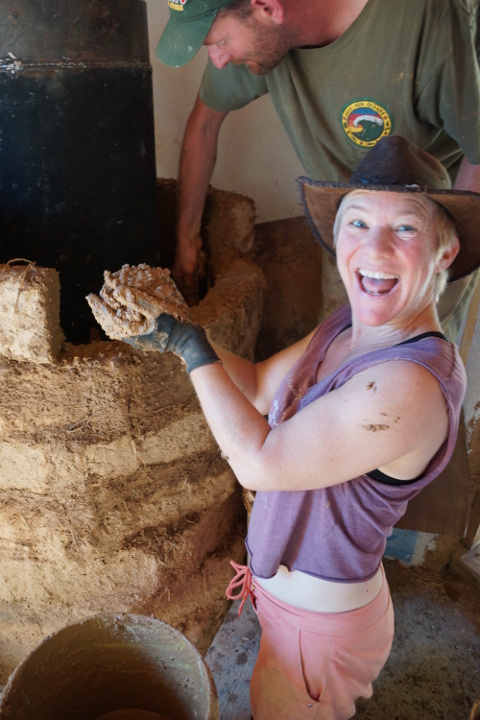 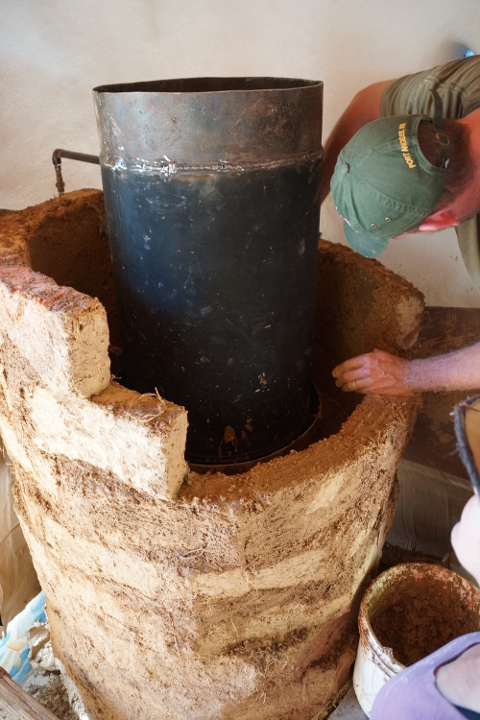 The top layer was made with adobes leaned up the long way, angled into the barrel and cobbed around to seal. Here, James Henderson places the last bricks and closes 'em up. 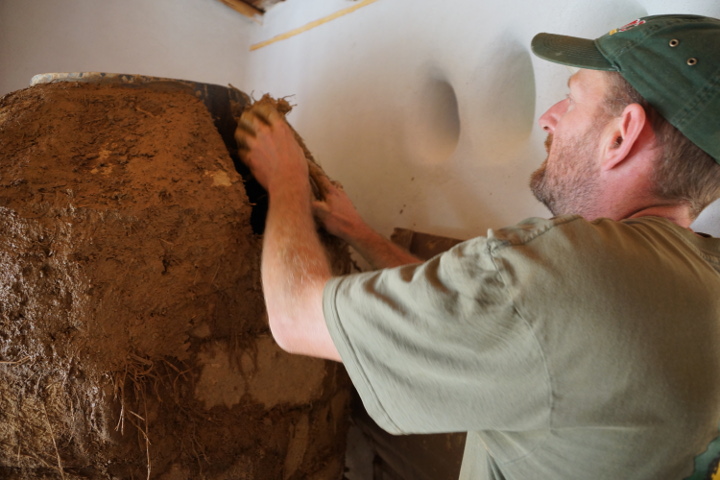 The stack, raw. 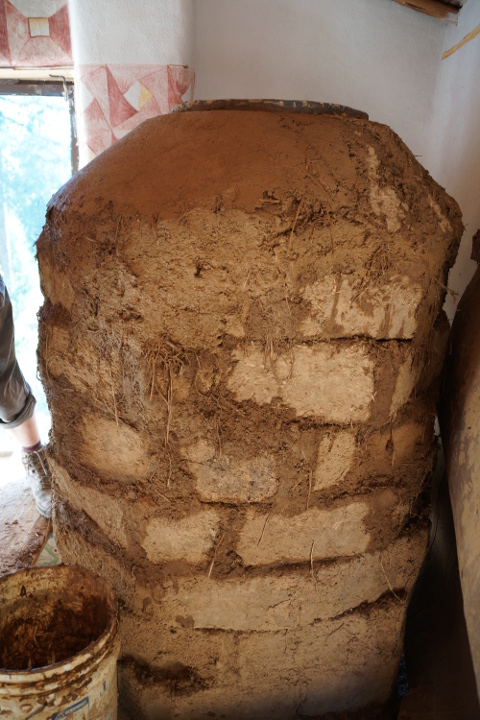 The top acquired a little definition and some sealing with a wet, cob like plaster. Here, Jay Emery applies and smooths. 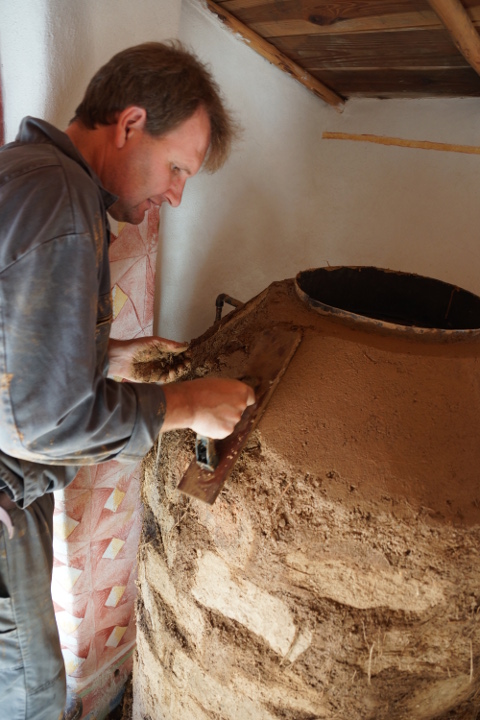 The coil was suspended (by myself and Robin Bonine (pictured)) by hanging it from wires. The coil is not allowed to touch the bottom or sides, in case of a failure that may drain the tank it will never be allowed to come in direct contact with a super-heated barrel side. 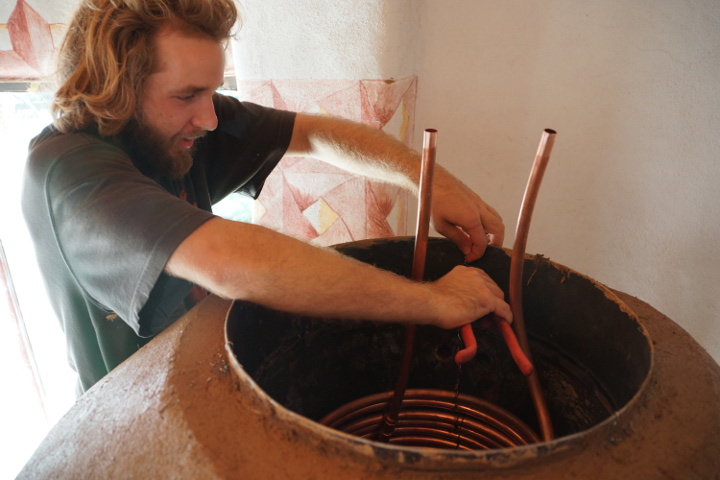  Then, the coil was hooked up to water inlet/outlets, the tank was filled with water and the system tested. 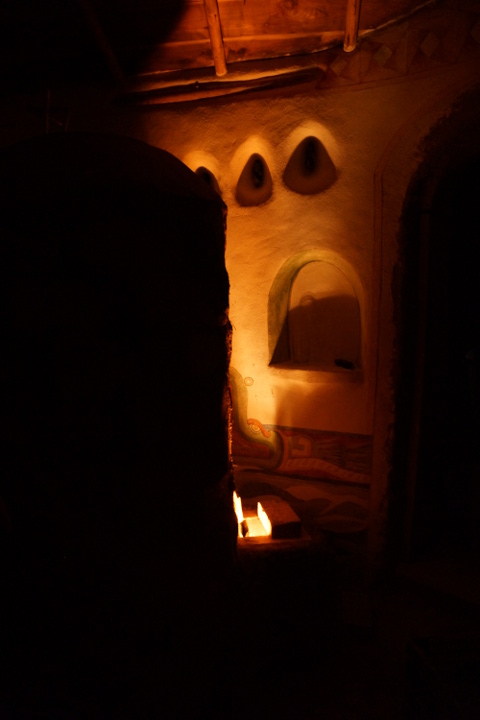 It works! |
|
|
|
Post by matthewwalker on Oct 13, 2014 22:05:15 GMT -8
Awesome build, great write up! Looks like you guys had fun. So, is this a situation where solar provides most of the water heating in the summer months and the RMWH will pick up the slack in the winter? Does the bell also provide heat to the space?
I think James has a Swain's hat! My local go to store for just about everything. Small world man.
|
|
|
|
Post by Donkey on Oct 14, 2014 7:49:55 GMT -8
Yep, the solar can provide all the showers that my little family needs in the summer months. I do think that the new arrangement will reduce the efficiency of the solar heater and I'll need to (eventually) build a new panel. The panel that I'm currently using was made from spare copper parts that I had laying about. It's risers are rather far apart and small and the panel, overall, has a rather small surface area. It's been GREAT, considering it's what I think of as a "freebie"; made of loose bits, a little time out of a weekend and no extra money.
It will heat the space very effectively. Last night, the solar heated water did a fine job of that on it's own. I need to make an insulated cap that allows for steam-off but (at least) helps to hold in some heat.
|
|
|
|
Post by jetset on Oct 16, 2014 11:14:43 GMT -8
Donkey, I'm confused that doesn't look anything like your sketch up picture at all! If Lesli had at least been wearing purple tinted sunglasses you would have been a tad closer at least. LOLOL  I'm totally joking of course. It looks awesome and whats more looks like it was tons of fun to build as well. Ronyon, Loooooong way from having a physical manifold to show and seeing as how I don't know how to present the sketchup file for your viewing pleasure the best I can do for ya are these screen captures of cutaway views: linkAlso, for those interested I did the first burn to test out the core. linkThose more experienced among you will probably notice right off that I'm doing pretty much everything wrong that I possibly can. None of the joints are sealed even temporarily with some mud, neither core or riser are remotely insulated, the refractory is still more or less green, and to top it all off it wasn't much above freezing that night. So, if you're wondering: Yes, it was hard to get lit. Yes, it was hard to keep lit. And yes, it smoked pretty bad. Despite all that though, at one point when it was going pretty good it did have that good ole rockety rumble going. I did burn it again a couple days later and took the time to seal the joints with a little mud and it was warmer so it ran much better and smoke free once warm. Next step, cast perilite refractory cement riser sections. Unfortunately that won't be for another 10 days or so as I wait for my order of perilite to arrive from home depot. Take care and God Bless! Jacob |
|
|
|
Post by Donkey on Oct 16, 2014 12:17:00 GMT -8
 I should probably make a new sketchup model to reflect the actual stove.. |
|
hendo
New Member

Posts: 1 
|
Hot Water
Oct 19, 2014 7:10:20 GMT -8
via mobile
Post by hendo on Oct 19, 2014 7:10:20 GMT -8
Hi Matthew, I have just moved back to Joyce. You can email naturalbuildingsupplies@zoho.com if you want to chat, James
|
|
|
|
Post by quorum on Nov 6, 2014 20:36:45 GMT -8
Hi I am new member I really like to be a part of this group I am from Ecuador so sorry for my ackwrd english.. Wich length of copper pipe did you use for the water heater? and is it 1/2 inch? you dont need a pressure relief valve in this system? thank you so much ,, we want to build this water heater in a place where people take a lot of showers thats why we are trying to build a on demand system like this one.. how long does it takes to warm the water for the first shower?? thanks
|
|
|
|
Post by quorum on Nov 8, 2014 20:31:55 GMT -8
Hi I really like all whats been posted,, I am new to this group,, just a question: wich length of copper pipe did you use?? and is 3/8 inch as in the coil for the propane trial? Ok.. Some images of the build: There has been a little bit of a redesign as the space that the stove was built in was rather tight. The tank sets directly on top of the heat riser, rather than beside it. The stove is much taller than I had planned, but much narrower and al in all a tighter build. I like that heat coming from the riser strikes the bottom of the tank directly. The intense hit should provide a rather violent mixing action, turning over the water and making it stratify less. |
|