|
|
Post by bryani on Jul 28, 2018 13:44:34 GMT -8
Would there be a detail drawing (sketchup ?) or picture of the 5 minute riser joining to the port base ? Does the 5 minute riser come right to the floor level (with an appropriate size slot at the port) or on top of bricks coming up from the base ? Any help most appreciated.
|
|
|
|
Post by wiscojames on Jul 28, 2018 13:59:39 GMT -8
5 minute riser sits atop a brick manifold, the base of the chimney. Or a cast piece. I've considered cutting a slot in the 5 minute riser. An idea worth trying, I think
|
|
|
|
Post by invention1 on Jul 28, 2018 14:15:25 GMT -8
I'm trying to understand how the 5 minute riser connects to the port. I'm building an 8" stove, if that makes any difference. Trap the base of the riser pipe with masonry? Just cut a slot in the side of the riser pipe? Seems like it would be loose between the pipe, ceramic fiber insulation and the port masonry.
I hope someone posts more pics of the details of building one.
|
|
|
|
Post by Vortex on Jul 29, 2018 1:44:05 GMT -8
Peter answered this question in another thread: Regarding mounting of the 5 minutes riser: I'd think the same method as with a vacuum formed ceramic fibre riser could be used. This would be the same as for a riser out of split firebricks, those are prone to heat cycling creep, essentally walking away. Here's a picture of the build during the Innovator's Gathering in Montana 2014. 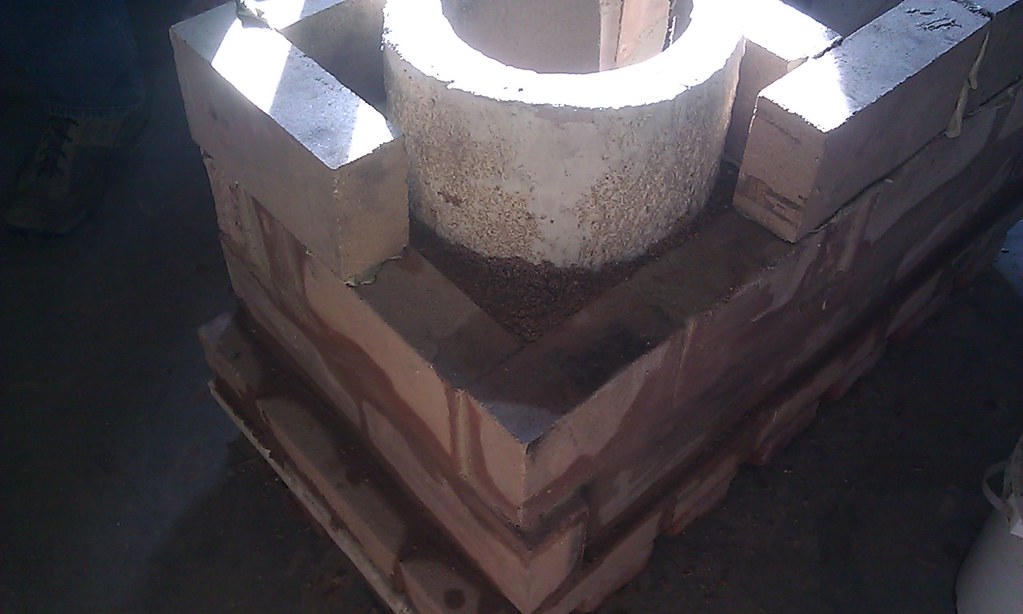 The bricks of the firebox' walls are extending along the sides and the back of the riser. A mixture of perlite and clay slip is used to fill the back and the sides between bricks and riser so it'll stay in place. In fact, you could use anything as back fill since the outside of the 5 minutes riser won't get terribly hot. This way, you could just cut out the port in the riser itself. A flat face on the firebox' side around the port is even better so the port isn't any deeper than the thickness of the bricks. The floor of a bell that's vented to the side could be done in ordinary bricks and mortar, yes. I do prefer cement, lime and sand in proportions of 1:2:12. This is a quite flexible mortar with one part hydraulic components and four parts sand. |
|
|
|
Post by bryani on Jul 29, 2018 13:04:49 GMT -8
Thanks Vortex - I missed the other post, it sounds like setting the 5 minute riser on top of splits on sides and back and adding clay/vermiculite mix would do the trick.
|
|
|
|
Post by peterberg on Jul 29, 2018 22:30:11 GMT -8
That's not what I meant. Just place the 5 minutes riser on the floor level of the core. After that, build around with the same firebricks of the firebox. And I mean here in a running bond with the rest of the firebox so it will provide very good support for the riser to stay in place. And back fill it with perlite/clay, clay/straw, or something else in such a way that the riser can't move in any direction.
|
|
|
|
Post by pinhead on Jul 30, 2018 8:10:38 GMT -8
That's not what I meant. Just place the 5 minutes riser on the floor level of the core. After that, build around with the same firebricks of the firebox. And I mean here in a running bond with the rest of the firebox so it will provide very good support for the riser to stay in place. And back fill it with perlite/clay, clay/straw, or something else in such a way that the riser can't move in any direction. This is how I did mine and it hasn't moved at all. |
|
|
|
Post by bryani on Jul 31, 2018 11:05:59 GMT -8
Peterberg : Thanks so much - it's clear now and I will set the riser on the bottom, cut a slot to match the port in the riser and ceramic blanket and backfill around the riser. Sorry to be a little obtuse about these things.
Pinhead : Thanks again for your recommendation of the 5 minute riser.
|
|


