jrl
Junior Member
 
Posts: 101 
|
Post by jrl on Jan 12, 2017 9:22:33 GMT -8
I finally chose a design and built it...
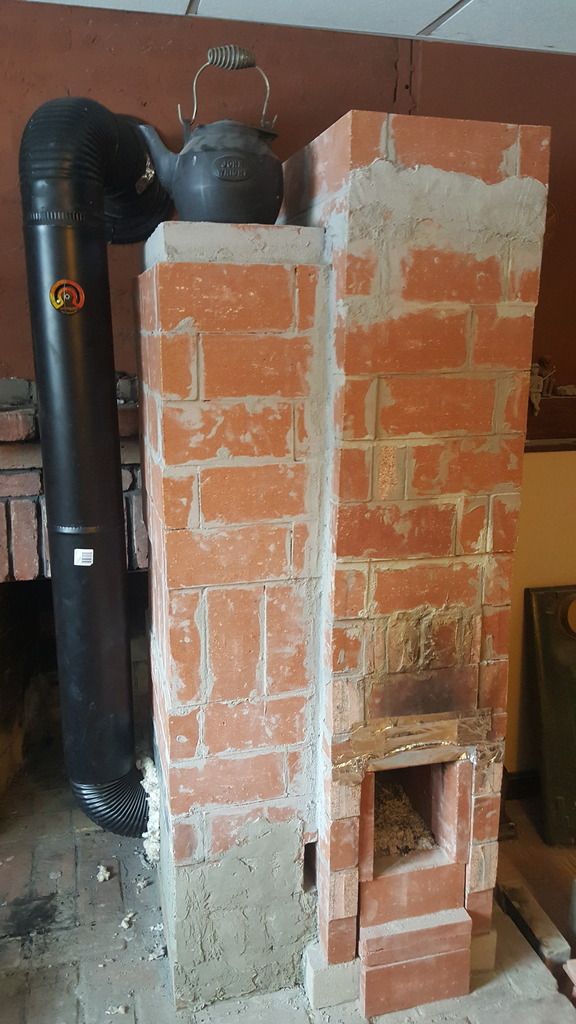
I chose a 4" system, both because of limited space/height and because the heat riser at 4" fit exactly within the outer bell design with limited cutting of bricks. So far it is 100% firebrick w/Heatstop mortar. My next steps are attaching a old cast iron front/doors I pulled out of a 1970's coal stove I used to run, and adding a second layer/skin. I bought hydrated lime to make lime putty for a final finish.
The first bell is directly above the firebox. At the bottom of the first bell there is a port on the left wall that empties into the second bell on the left. The second bell on the left has 4 walls, so there is a double wall between right bell and left bell for extra mass. The left bell is an open space top to bottom. The flue pipe is temporarily stuffed into the bottom left port with some kaowool for air-tightedness.
So far, this thing seems to heat up completely with 2 loads of wood (using compressed biobricks so far as I haven't bought firewood in a couple years). The first load burns a little slower, the second load is usually larger and burns more ferociously. The stack temp, measured on the surface of the flue pipe, stays around 100 degrees through the first load and into the second load. Towards the end of the second load the stack temp starts rising and gets to about 150 degrees F. A 3rd load gets a little excessive as the first bell gets really stinking hot! This hearth is in the lower house level (split level ranch style house), and this seems to heat the lower level of the house with a nice subtle warmth. It's nowhere near the output of the coal stove that I removed, but it's a nice even warmth that doesn't swelter you out of the downstairs area. |
|
|
|
Post by coisinger on Jan 12, 2017 9:37:04 GMT -8
I like this JRL. Compact and simple.
The opening that is shown in the second bell, is that for primary/secondary air?
|
|
jrl
Junior Member
 
Posts: 101 
|
Post by jrl on Jan 12, 2017 10:18:22 GMT -8
I like this JRL. Compact and simple. The opening that is shown in the second bell, is that for primary/secondary air? That is the roughed in secondary air channel. The channel is bricked into the second bell and enters the firebox on the left wall just before the riser. I plan to fabricate a box steel tube p-channel deally that fits into the channel opening within the firebox. |
|
|
|
Post by satamax on Jan 12, 2017 11:35:55 GMT -8
Nice JRL.
Where are you standing ISA wise?
|
|
jrl
Junior Member
 
Posts: 101 
|
Post by jrl on Jan 12, 2017 12:09:10 GMT -8
Nice JRL. Where are you standing ISA wise? I will have to find my notes on that. I did calculate it but based a slightly different second bell design. If I recall my original calculations were around 27-30ish square ft. One question: does the shared double firebrick wall between the first and second bell count towards the ISA? I would assume it does. |
|
|
|
Post by satamax on Jan 12, 2017 22:08:39 GMT -8
It does usualy if the bells are separated. In this case, the heat exctracted is released by the edge of the bricks and the top. So longer transfer time. Wall might get hotter than the gases at some point. It might transfer heat from bell A to bell B too.
|
|
|
|
Post by peterberg on Jan 13, 2017 1:46:13 GMT -8
One question: does the shared double firebrick wall between the first and second bell count towards the ISA? I would assume it does. Yes, I think it does. For the gases that separation wall is just an area that absorbs heat. Since it is double it'll take up as much heat on both sides as the other walls, but it will stay warm longer. So the effect is probably noticable in depth of winter when you run it to its full capacity. |
|
|
|
Post by coisinger on Jan 13, 2017 5:22:16 GMT -8
I'd really like to see some more pictures as well, just for looksee purposes. Did you do any build photos as well?
|
|
jrl
Junior Member
 
Posts: 101 
|
Post by jrl on Jan 13, 2017 9:58:49 GMT -8
I'd really like to see some more pictures as well, just for looksee purposes. Did you do any build photos as well? 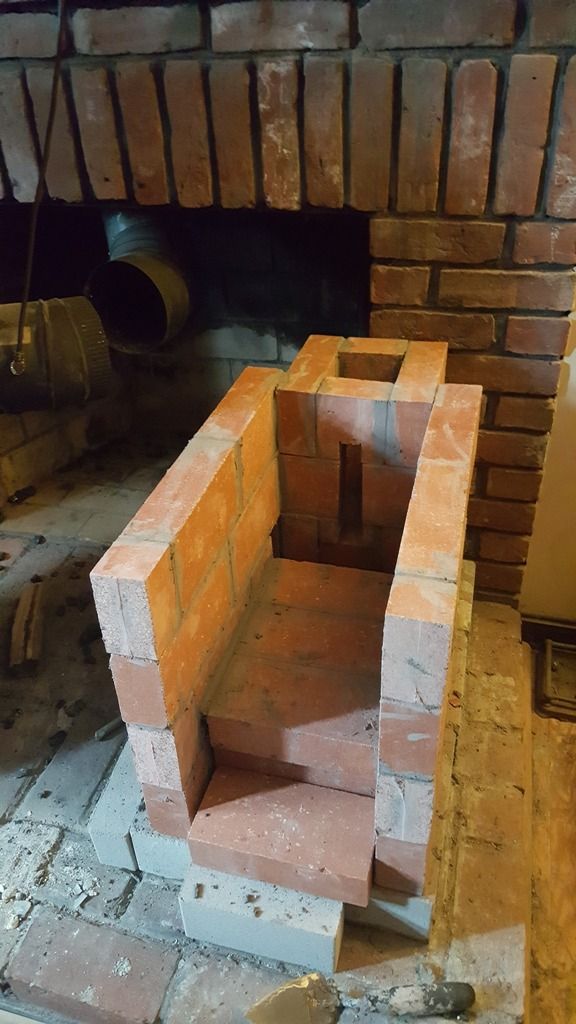
This one gives you a feel for the overall construction. You can see the secondary air port in the back of the left side wall. You can see the double wall construction of the bell encasing the heat riser, etc.
|
|
jrl
Junior Member
 
Posts: 101 
|
Post by jrl on Jan 13, 2017 10:27:35 GMT -8
So last night I got home and the stove was still a little warm from the previous night's burn. I didn't run it in the morning. I loaded up the firebox completely this time. This firebox fits exactly 8 biobricks, 2 rows, 2 high, 2 deep. I lit the stove and it took off like a bat out of hell, rocketed for over 1.5 hours and heated up completely on 1 load. I let it go out and the downstairs heated up nicely. The stove seems to equalize (left bell goes from hot to super hot) only after the fire goes out. I was pretty amazed that only one burn did the trick. I think I will do that from now on. I'm sure the stove can handle another load, but at this point I don't see the benefit. The right bell gets so hot you can't touch it for more than a moment without burning yourself.
To put the fuel consumption out there: 8 biobricks (1 full load) costs me exactly $2.04. Each brick weighs about 2lbs so that's one 16lb load.
I have a thermocouple and usb gadget for logging temperature with some .net/sql code I wrote. I can't wait to get that hooked into the first bell, second bell, and exit flue to gather some real data.
|
|
jrl
Junior Member
 
Posts: 101 
|
Post by jrl on Jan 16, 2017 9:09:09 GMT -8
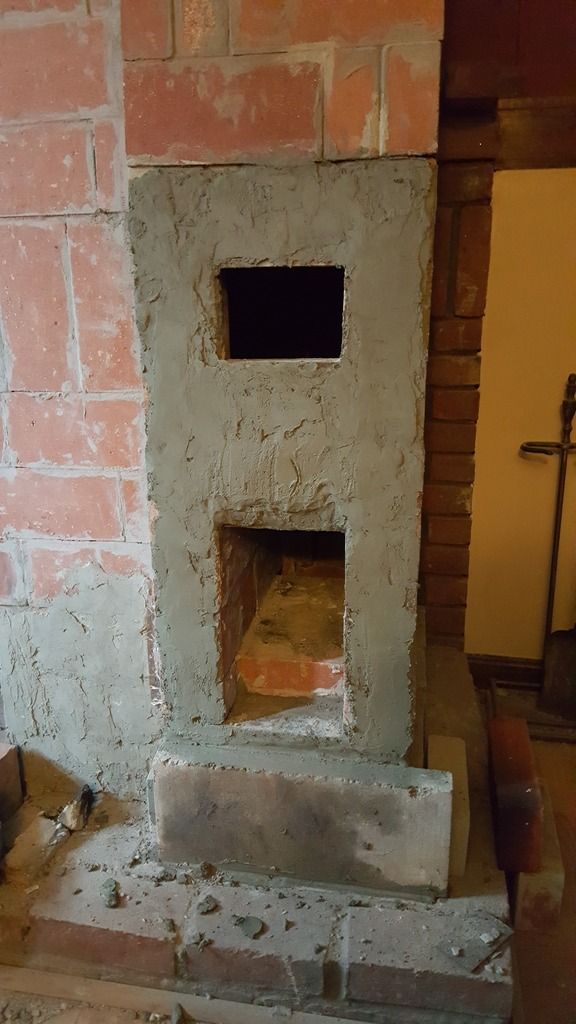
Access port to 1st bell cut out and front facing mortared to receive face plate:
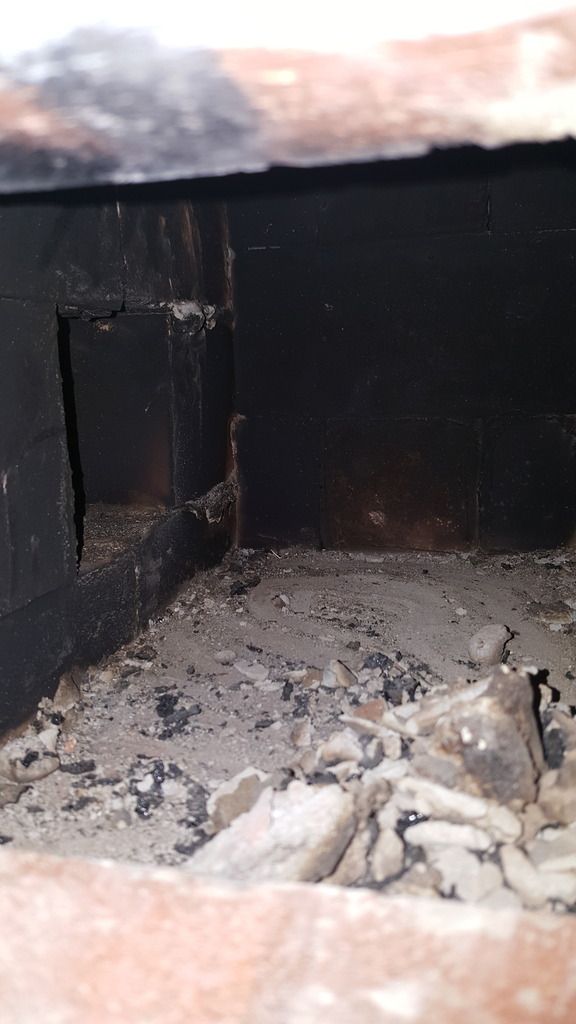
Inside 1st Bell, you can see 4x4 port to second bell on the left:
Front face mortared in place below. It is all porcelain coated cast iron. The stove was a Jotul NR507, probably the best coal stove design I've ever seen, made in Sweden I think during the 70's and not made anymore. It feels good to give it new life in this rocket stove build.
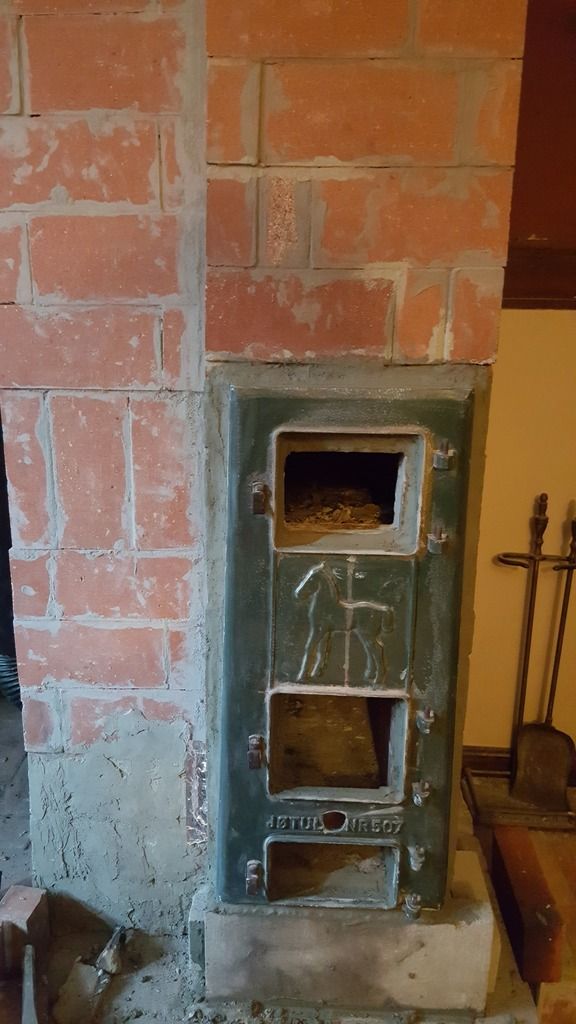
Some concrete slabs were cut and mortared to create some dimension to the front facing:
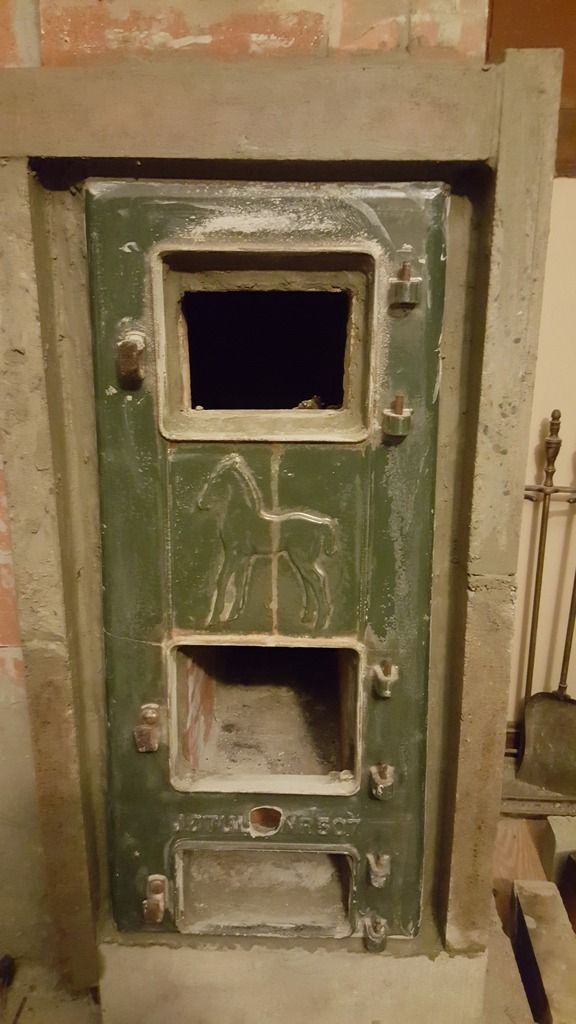
You can see the doors on this front plate. The bottom door has a rotating damper to adjust additional primary air intake. The hole in the front below middle door was existing, a crank/handle attached to a pinion there in this old stove to drive a rotating shaker grate system. The hole now works perfectly for primary air intake:
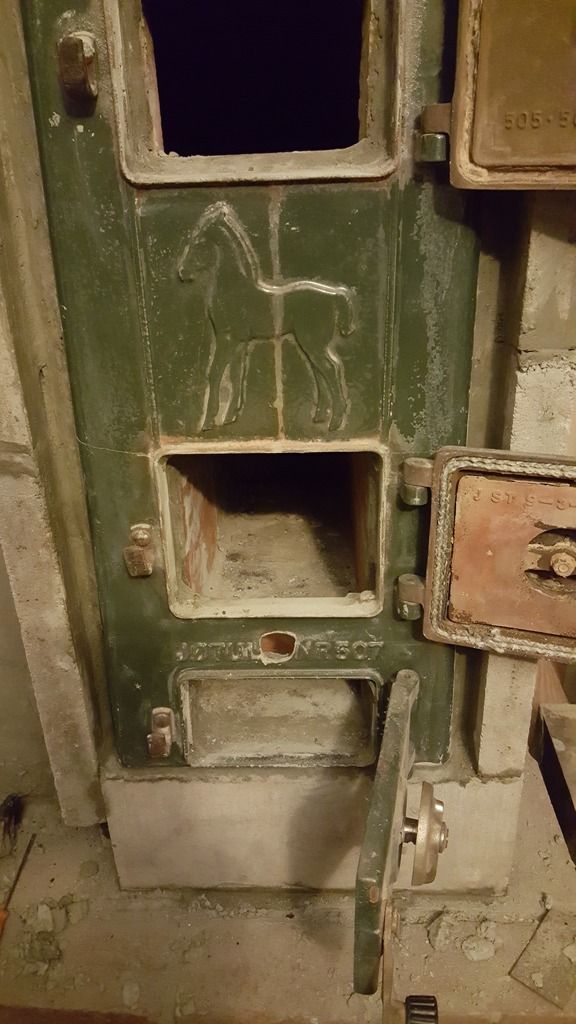
Another view here inside the firebox. Secondary air fitting is still not fabricated/installed:
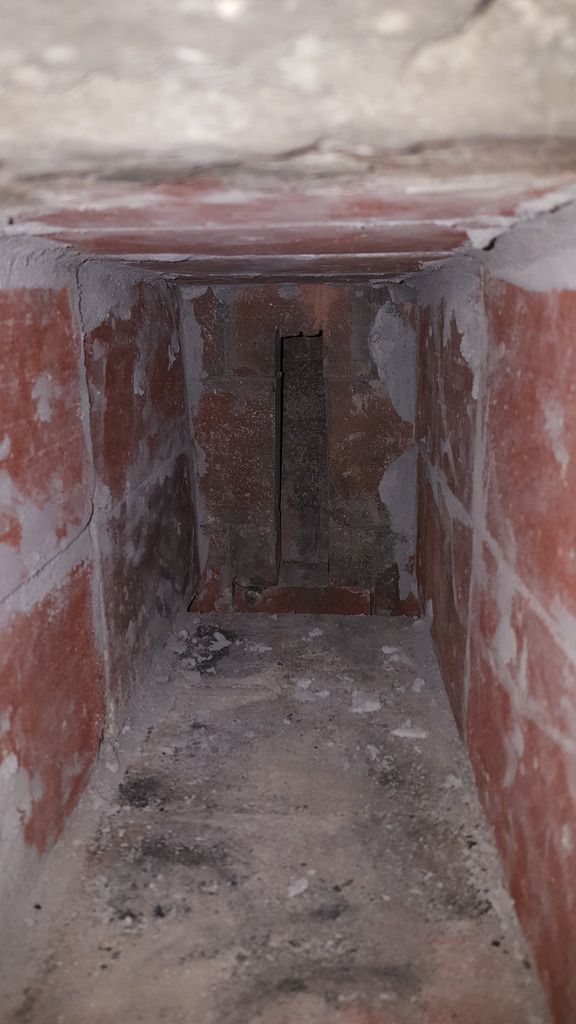
And a good view of the concrete slabs used on the side and front:
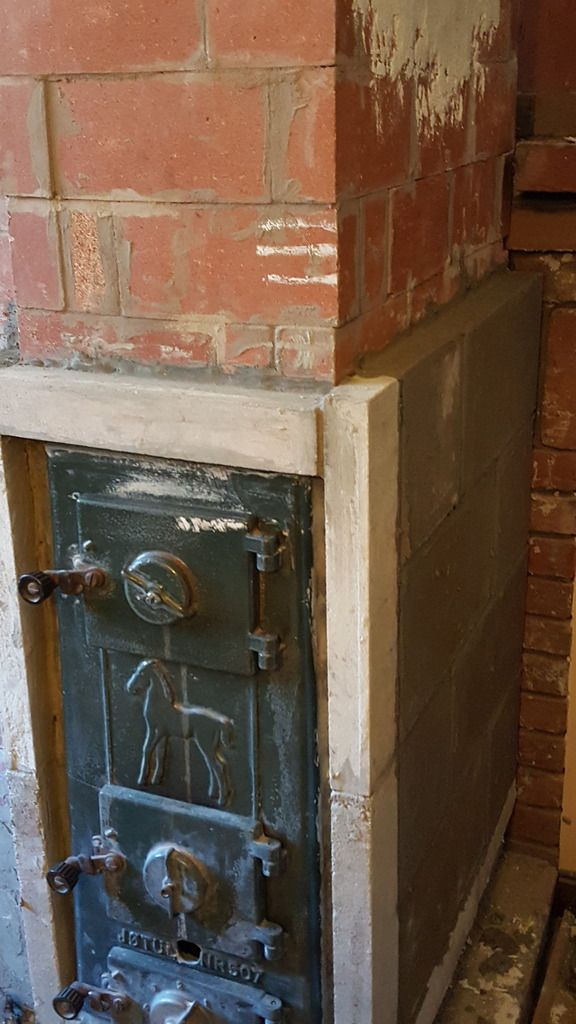
Lastly, above, you can see in the upper right hand corner some plastering. I am experimenting with lime putty/sand/straw for a finished plaster. I don't like the use of straw, so I need to find some other type of short fibers to use in the plaster. I see recommendations of using horse manure, but I can't bring myself to go there with this plaster. I'm considering nylon rope fibers, fiberglass, kaowool fibers, etc. If there is a master of plaster out there, I would love some advice on the best fiber materials to use.
|
|
|
|
Post by drooster on Jan 16, 2017 12:48:19 GMT -8
Nice door, I like the cute horse.
|
|
|
|
Post by matthewwalker on Jan 16, 2017 14:17:15 GMT -8
Do the manure. Wash it. Check out the fiber in there. I bet it will convince you, maybe not though. It's just chewed up grass, once you wash it out.
This is a great little build JRL, thanks for all the details.
|
|
|
|
Post by wiscojames on Jan 16, 2017 17:17:10 GMT -8
I love the project jrl, thanks for documenting it for us here.very sharp. How is the door attached? What is directly above the riser? Those red fire bricks on edge?
|
|
jrl
Junior Member
 
Posts: 101 
|
Post by jrl on Jan 17, 2017 6:27:49 GMT -8
I love the project jrl, thanks for documenting it for us here.very sharp. How is the door attached? What is directly above the riser? Those red fire bricks on edge? The front face attached with 50/50 mix of firestop mortar and type n masonry cement. The front face has many cavities/crevices in the casting so I filled the whole back side of it with mortar and then mortared that to the front of the firebox. The added cement slabs around the front face will allow me to mortar in around the edges of the face for extra strength. I'm planning to do that with lime mortar. The doors themselves have holes in castings that fit onto pins on mounts in the front face plate.
The structure is all refractory brick, same size bricks too, so yes, the ceiling of the bells is closed in with firebrick. I cantilevered a row on their sides and then laid another row on their sides laterally above it. Will snag a picture when I get a chance.
|
|