|
|
Post by Donkey on May 19, 2013 10:46:18 GMT -8
I've just recently picked up a 6 inch Dragon Burner core and I thought I'd share my experience with it.. First, I gotta say that I appreciate the packaging. Nice and simple, no plastic packing peanuts, just cardboard, a little bit of pressboard (for rigidity and protecting the parts) and packing straps. Two boxes arrived, one containing the stove base and one with the vermiculite board heat riser. One of the packing straps that hold the rocket base to a press-board plank looks to have been cut, probably from rubbing against the sharp corner of the casting. No damage to the parts though, everything survived shipping. I took everything out of the boxes.. What you get is a cast base, a metal feed box with p-channel built in, 4 pieces of pre-cut pre-drilled vermiculite board for the heat riser (some assembly required), some gaskets (one for heat riser-to stove base connection, one looks like it's for the barrel, and one that I haven't identified) and a little bag of screws for assembling the heat riser. The base casting looks really nice. It's a clean job, the 2 halves fit together nicely and the thing sets level to the floor with no rocking around. It's pretty neat seeing all of the new, nifty features (p-channel, tripwire, back sweep to riser trip) in one single cast piece. I've been assembling many of these features out of individual carved bricks and/or shaping it with mud, etc. I'm REALLY looking forward to seeing this thing work..  The vermiculite board heat riser is VERY fragile; you can tell, just touching things. This won't matter one bit once the thing is assembled, they will never get messed with or banged inside the stove.. Look out during assembly though, looks like one false move can easily bust the thing to bits. I don't yet know this stove's final resting place, I'll probably set it up as a demo more than once, probably try it for different things.. Keeping that heat riser in good condition may be a challenge for me. The screws that are included for putting the riser together are #2 square drive.. I never use square drive screws, I've got no bits for this and there isn't one included in the kit, so off to the hardware store and back again. OK, I've assembled the heat riser. Something to remember is that since the vermiculite board is so fragile, the screws won't "suck in tight" when you screw them together. Overturning the screws will only wreck the board around the screws and make them turn ineffectually in their holes. Best to use a hand held, manual screwdriver, turn the screws slowly and stop as soon as the heads are flush with the part. This is as far as I've gotten so far. The last couple of days have been really windy and I've been afraid to set up the ultra fragile heat riser on my outside test spot. The wind has died down today, so maybe later I'll move to the next step: test fire the basic stove.. |
|
|
|
Post by Donkey on May 21, 2013 9:25:23 GMT -8
So yesterday, we had a nice, calm, windless morning. I set up the stove on my little test area and did a test burn in it.
It started fast, got up to running temperature fast and just hummed along.. The first word that came to mind when using this stove is "smooth".. It passed through transitions, from starting, to the first load of soft redwood scrap, to the second load of hard madrone wood, to going out, all done with grace and smoothness; hardly a bump or blip, smooth..
Granted, it's just a bare j-tube, no barrel or anything else at this point. Still, you can often see (at least some of) the character of a stove at this stage.
It was really great to see the features of this stove in action.
There is a tripwire looking tail, just below and to the rear of the heat riser that I've seen in the drawings and images, I've guessed at it's function and yesterday I got to watch it work.. It appeared to kick the flame tongue to the center of the heat riser, where normally it tends to "stick" to the back wall. The heat riser tube seemed to warm far more evenly, the hot spot at the bottom-back third was not as pronounced as I've seen it. Interesting..
I noticed another interesting thing.. Likely NOT intended in the design though also not a problem, just noticing.. There is a sweeping transition from the bottom of the burn tunnel up to the little kick-tail at the back, under the riser. This sweep comes together (in the two pieces of the casting) in a sort of V shape. There is a place, just before the center of the curve, where light ash moved in and stayed, pinned to the spot. The little patch of ash didn't grow or shrink (once filled) but just stayed there. It is of no consequence (or of little, I imagine), but it shows that the curve there is a touch deep and could be slightly shallower perhaps.. ??
|
|
|
|
Post by peterberg on May 22, 2013 1:19:51 GMT -8
There is a place, just before the center of the curve, where light ash moved in and stayed, pinned to the spot. The little patch of ash didn't grow or shrink (once filled) but just stayed there. It is of no consequence (or of little, I imagine), but it shows that the curve there is a touch deep and could be slightly shallower perhaps.. ?? You are right, this is not intended in the design, rather the contrary. The back sweep leading to the kick tail (funny names, I like that sort of terminology) is there to smooth the transition from the horizontal stream to the vertical riser. Ideally, because of the sweep there should be no low pressure area anymore. As a consequence, accumulating of ash should be prevented by the fast streaming gases. But the kick tail, being an abrupt change of direction to the gases, albeit small, will create its own low pressure zone in the lower upstream. During the design stage I've spotted that possible niggle and I tried very hard to avoid it. I have to say, in my experimental 4" stove the back sweep is less pronounced and do tend to accumulate small amounts of ash at the lower area of the ramp. All in all, please check this spot now and then, when this little gathering of ash do stay this size I am very happy with it. |
|
|
|
Post by matthewwalker on Jul 30, 2013 9:21:27 GMT -8
Dude, that is bad ass! I love the design, that seems like it would fit a lot of spots that a regular RMH just doesn't. Nice work.
|
|
|
|
Post by lincsoldbird on Jul 30, 2013 11:55:13 GMT -8
What size barrel is that?
|
|
|
|
Post by endrunner on Jul 30, 2013 12:30:48 GMT -8
I love the design as well, i am eager to hear more, great layout!
|
|
|
|
Post by Donkey on Jul 30, 2013 21:33:18 GMT -8
In a lot of older houses around here, there are brick pads for putting a wood stove on. Just about every house has one, they have a chimney jack through the roof (or wall) and often the floor has been beefed up below to carry extra weight. I wanted the stove to fit on one of those pads, which tend to be around 4 feet by 3 feet. I have some bricks laying about, so I put together a mock-up pad for everything to fit on. These bricks are pretty big, bigger than standard red-brick.. This pad is a few inches smaller than a 3X4 pad in all directions. 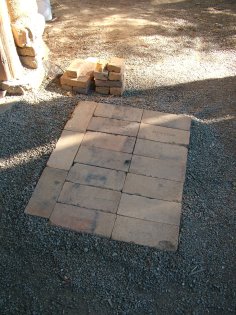 I wanted to build this stove ONLY with stuff I can make or have laying around (plus the Dragon Core), so I made a bunch of adobe bricks. In this stack of bricks there are about 75 bricks, I used a handful more, plus some busted bits and junk from other projects.. When I was drying these bricks, the dog ran through them a few times, some of them got run over with my truck.. I'd say the project took around 80 adobe bricks, measuring 3X6X12 inches, plus a small pile of bits, chunks and halfsies.. 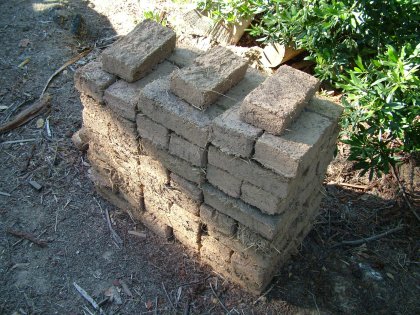 First, figuring out how it will all fit. Gotta have a little room around the heater core for insulation, also enough space for the barrel. 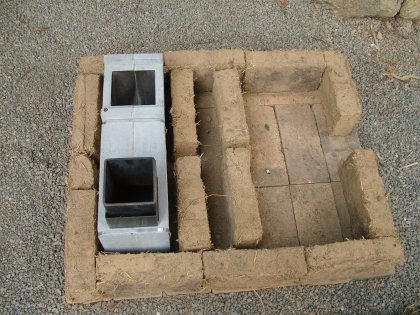 It's all stuck together with clay slip and cob. The clay's from my place. The sand came from our local river, via the aggregate co. and leftover from a different project. The straw was also leftovers. 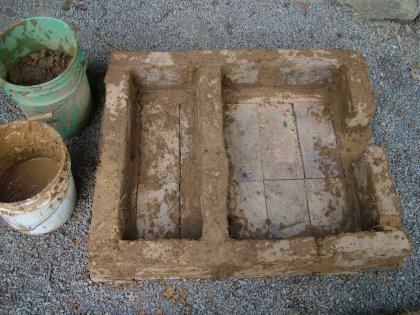 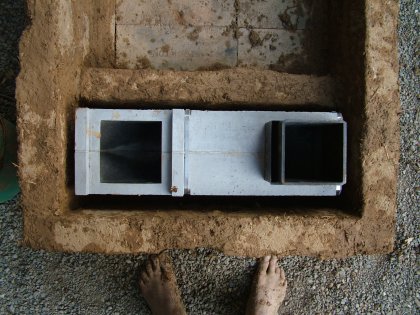 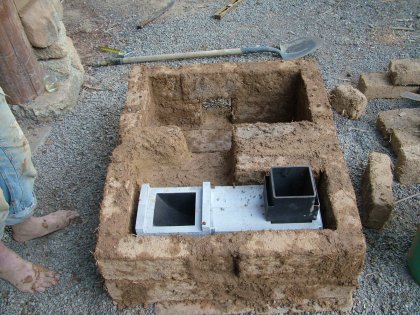 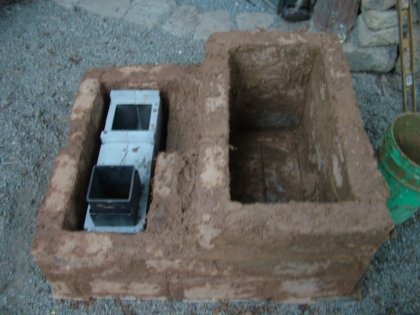 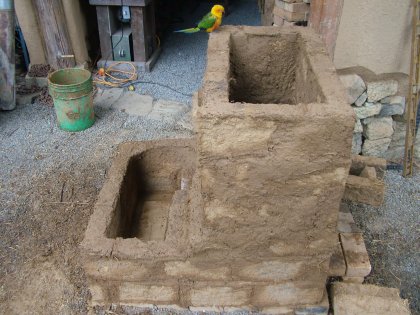 Here's the cavity for the stove which will double as the "manifold" area, moving exhaust from the bottom of the barrel into the bell. 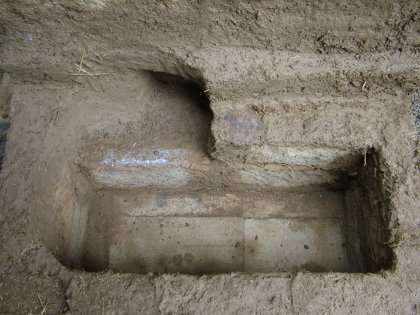 I want the Dragon core to come back out as clean as possible. This stove is just for testing purposes.. Anyhow, I wrapped the thing up in several layers of newspaper and tape, that should keep the insulation and cob layers from sticking it. 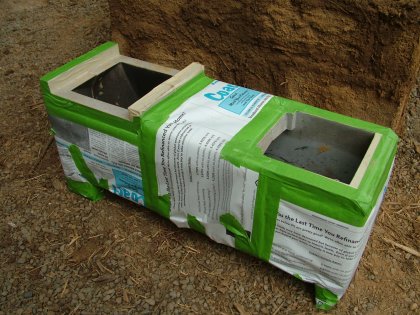 Plop the heater core into it's slot and fill.. I had some rice hulls laying around (all out of pearlite), mixed 'em with clay slip for insulation. Cardboard shields keep the mix from falling into the stove core. 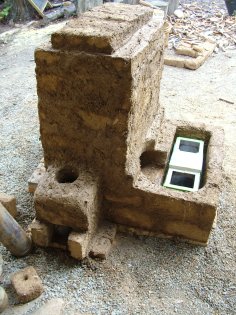 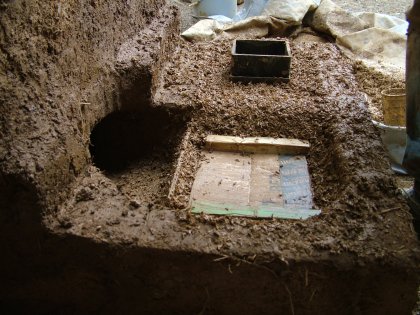 I'm thinking that adobes that are stuck in with cob will be easier to take out than a solid cob top.. Maybe make taking it apart easier, so custom bricks.  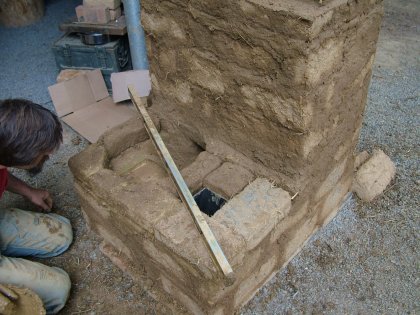 Finishing touches on seating the barrel and the manifold area.. The barrel is a little bit too tight for my liking, it's nice to have ample room to really seal in the barrel and make it sturdy. As a test, this will be fine; on a permanent installation, I'd want to add a couple-three-or-so inches to that area (closer to my 4 foot limit over all). 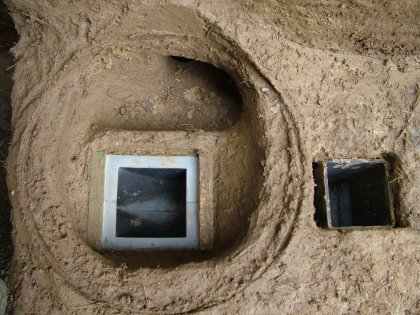 Heat riser. The Dragon Heater, vermiculite-board heat riser. I haven't yet added any more insulation to it; I may yet do it but I'm putting that off for now. I'll use it as-is for a little while first. You cans see that the barrel has been "cheated" way over.. It took a little shuffling to make everything fit; anyway, it's better this way (for now) 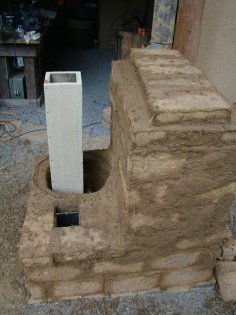 All assembled! 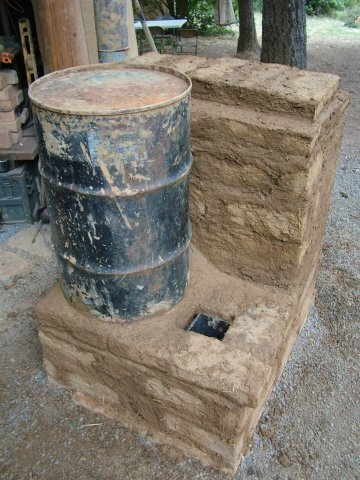 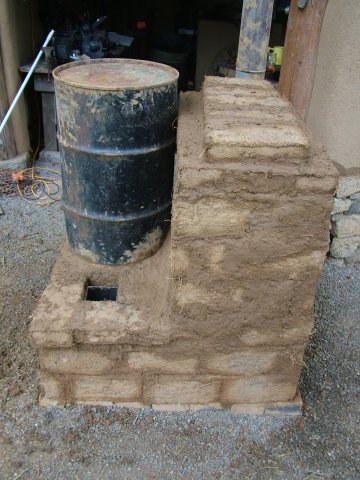 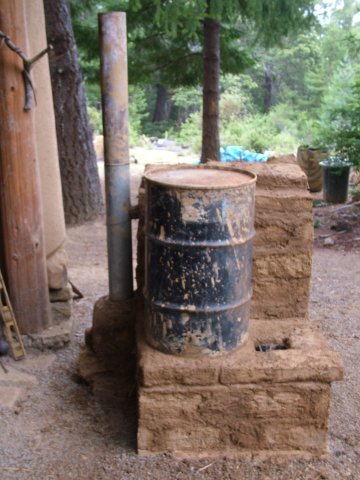 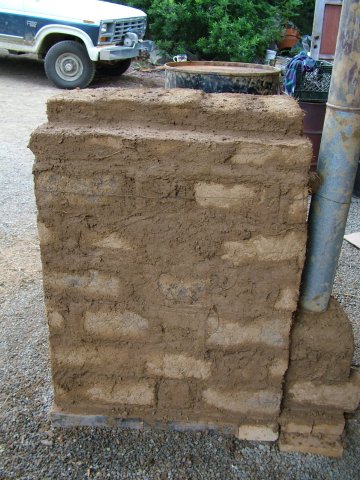 |
|
|
|
Post by Donkey on Jul 30, 2013 21:47:16 GMT -8
It's a 6 inch Dragon heater core and a 30 gallon barrel (29 inches tall, 18 inches diameter).
Barrel top gap is around 5 inches.
The bell (all measurements are taken on internal surfaces) measures 13 inches by 26 inches by 36 1/2 inches. The top is corbeled, so there is a funny little pop-up to consider for ISA measurements, it's 3 inches (brick thickness) tall, 7 1/2 inches wide and 20 inches long.
The stove-pipe is 5 inch diameter.
|
|
|
|
Post by Dan (Upstate NY, USA) on Jul 30, 2013 23:03:48 GMT -8
I feel like beavis and butthead waiting for you to start a fire!
|
|
|
|
Post by Donkey on Jul 31, 2013 0:40:24 GMT -8
I put a fire in it last night..
It started easily, a piece of paper pushed under the heat riser made it draw immediately. The whole stove is wet, so it took a long time to get hot enough to stop smoking but it chugged happily through the wood and put out a VERY cool exhaust. I fed it for a little over an hour without too much fuss. A LOT of water vapor came out, the chimney was running with condensate. The skin of the bell was warm to the touch by the time I went to bed. This morning, the stove had dried visibly in many places.
The feed is a bit small and difficult to get hands into, so at first I stumbled with the wood a bit. I'm burning Manzanita, which is a low, shrubby tree; very hard wood, burns hot. The stuff grows in a tangle and dies back, so I can go out and hand-break a large quantity of small sized branches. The ONLY drawback to the stuff is that it's bent like crazy, so ya gotta snake 'em into the firebox.
I hope to be firing it a lot coming up.. I want to really test it, shame I don't have a testo.
|
|
|
|
Post by peterberg on Jul 31, 2013 4:13:27 GMT -8
Donkey,
Don't you think the tape which is holding the newspaper around the core would burn in? The core will be hot enough to melt the tape to a plastic goo, not a very clean core to retrieve from this prototype. Could the smokey first run be from that same tape?
For now: nice and simple implementation, could be a little bit larger/higher I'd think.
|
|
|
|
Post by endrunner on Jul 31, 2013 9:08:07 GMT -8
it is hard to tell, did you put a few inches of perlite slip insulation around the tunnel?
|
|
|
|
Post by Donkey on Jul 31, 2013 9:22:40 GMT -8
Peter,
I didn't think of that.. My hope is to to burn it all off over time and pull out a relatively clean core. It's better (maybe easier) than scraping cob and clay based insulation off later (I think).
To the size of the bell: I purposely undersized the bell. I don't recall seeing an ISA number for a bell/barrel combination. My concern was that the barrel would toss out a lot of heat, very quickly. It seemed reasonable that a fully sized bell, downstream from that barrel, would not leave enough heat in the exhaust to properly run the chimney.
Endrunner,
Which tunnel?? I only put the insulation around the heater core. It's rice hulls and clay slip by the way.
|
|
|
|
Post by endrunner on Jul 31, 2013 15:20:40 GMT -8
I was asking about the burn tunnel, the cast refractory piece. sounds like your all set. Can't wait to hear more. It is a very cute, small footprint (I love!), and looks fairly easy to make. How long did it take you to build?
|
|
|
|
Post by Donkey on Aug 1, 2013 0:13:02 GMT -8
It took the better part of two days (to build), not including drying time for the bricks. I got utterly obsessed with the thing on the first night, stayed up till 3:00 in the morning fooling with it. The second day I started late on it (early afternoon) and had a fire in it by twilight.
It was SO much fun to build! I've been away from the stoves for too long.. Good to be back at it.
|
|


