|
|
Post by Robert on Apr 4, 2014 15:48:44 GMT -8
Hey Pyrophile. I would be interested to see your pictures. Recently i upload mines on a photobucket and then i place the link here on forum. But if would have problems you can send them to me and i will post them here.
|
|
|
|
Post by pyrophile on Apr 5, 2014 11:19:16 GMT -8
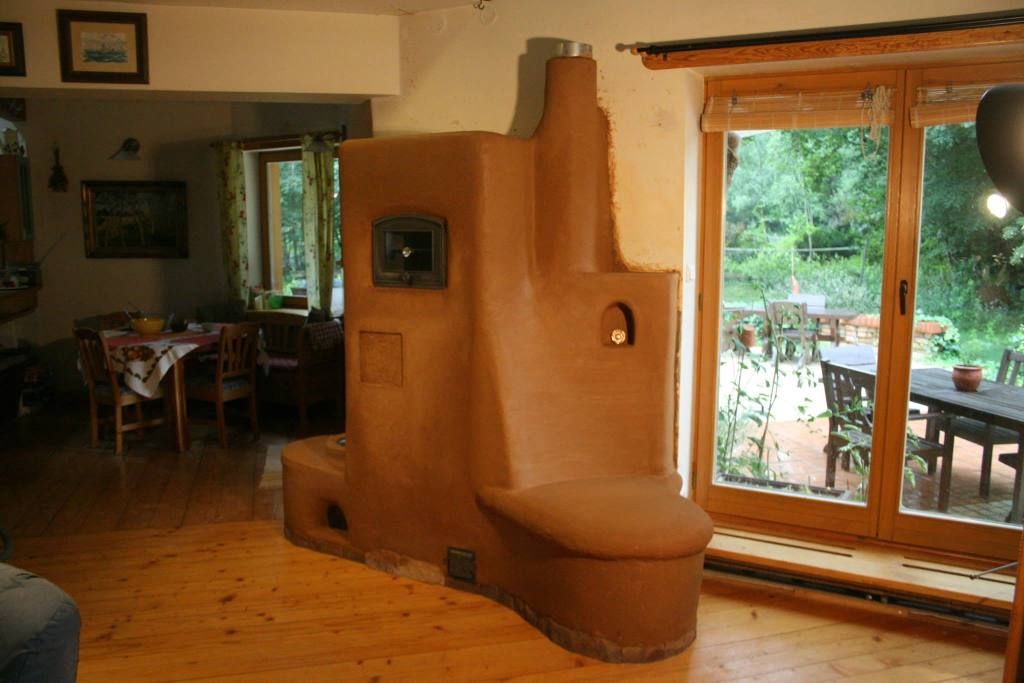
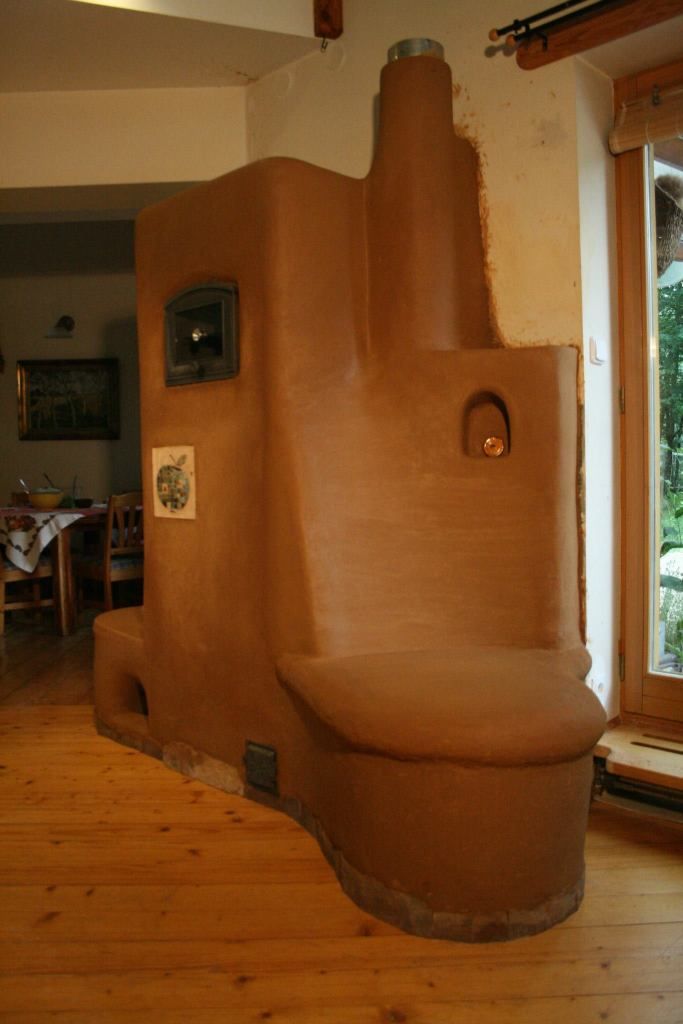
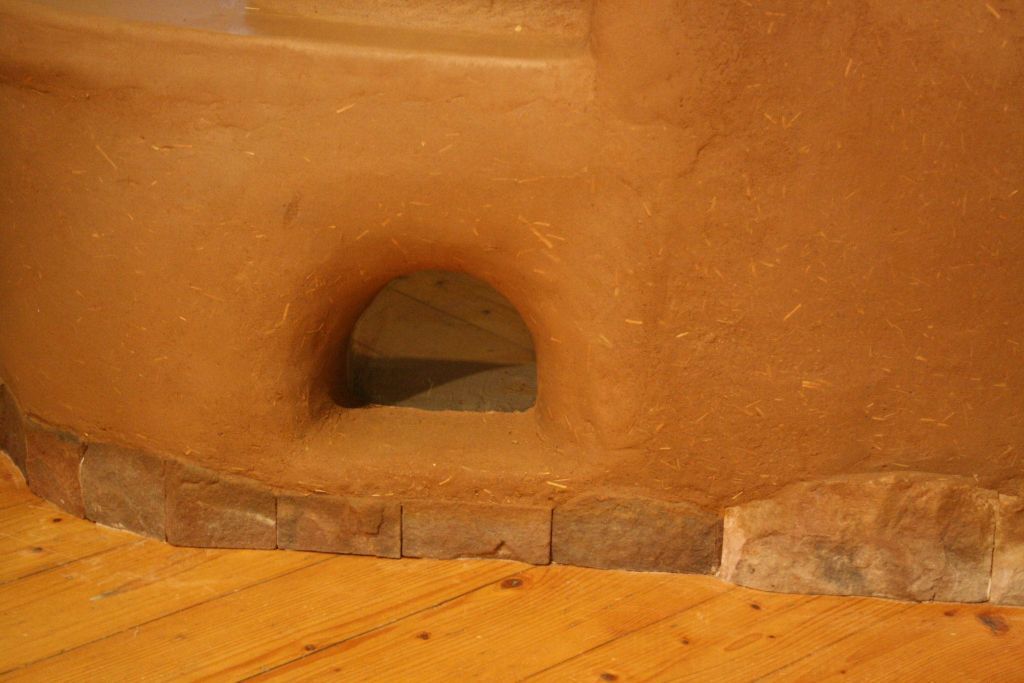
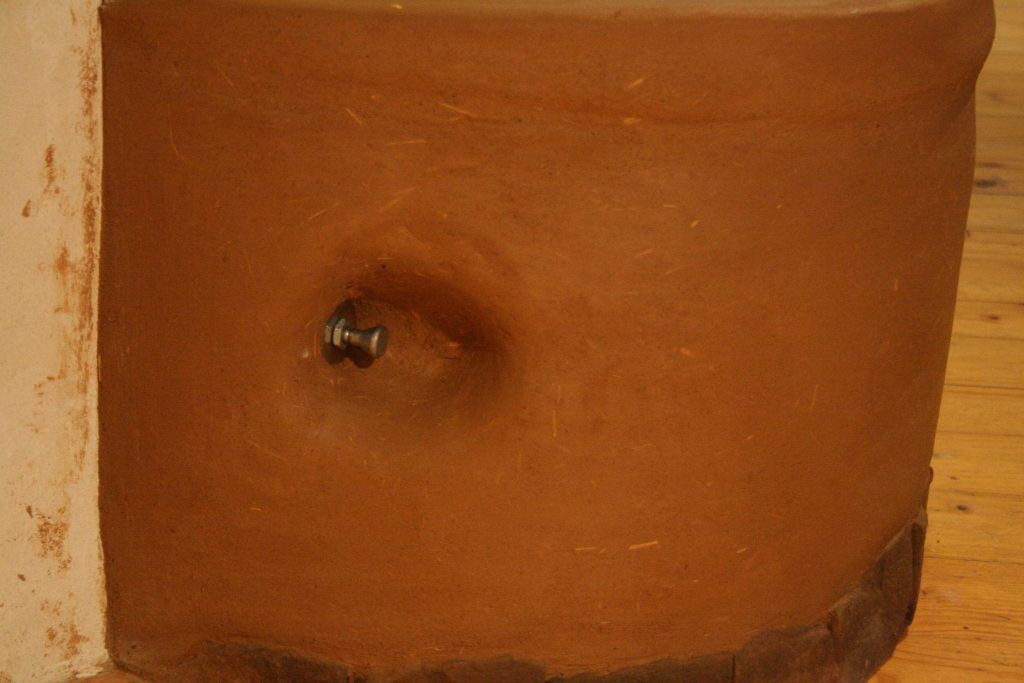
Here are images of a 20cm concrete bell stove. It has been then plastered with earth. 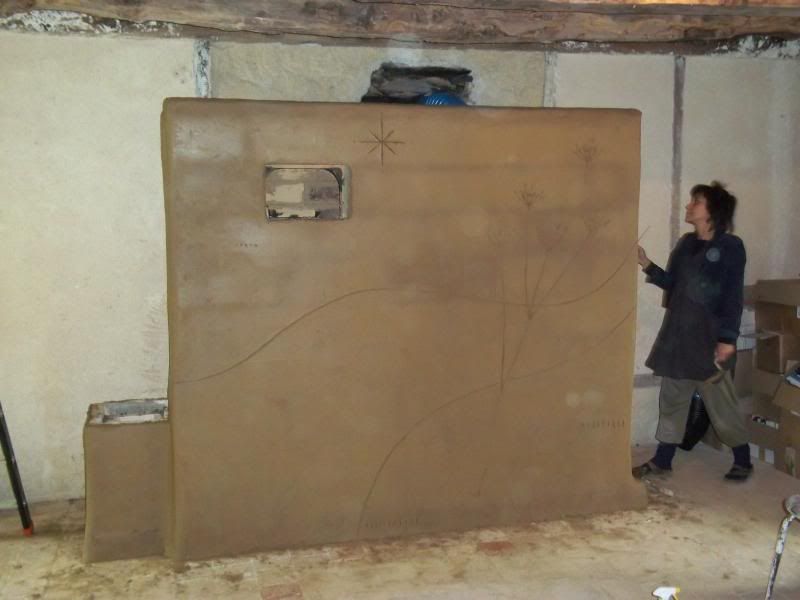 Still wet There is an internal wall that protect the concrete blocks and also adds mass. This wall is made with thin concrete blocks (5cm) plastered with earth (earth+sand)till roughly the top of the heat riser. Then there are ordinary bricks on edge. I forgot a bit what was the material for roofing the internal walls, including roofing the riser but I think I used refractory plates (big bricks, 20*40*5cm, less than 20% of alumine). Internal and external walls are separated by thin cardboard. The heatriser and the horizontal part of the rocket are made with lightweight firebricks but the feeder uses dense firebricks. the bell is not empty but has vetical baffles making the gases'travel longer. These baffles are first made with standing concrete blocks then ordinary bricks (I realize that they were not plastered). 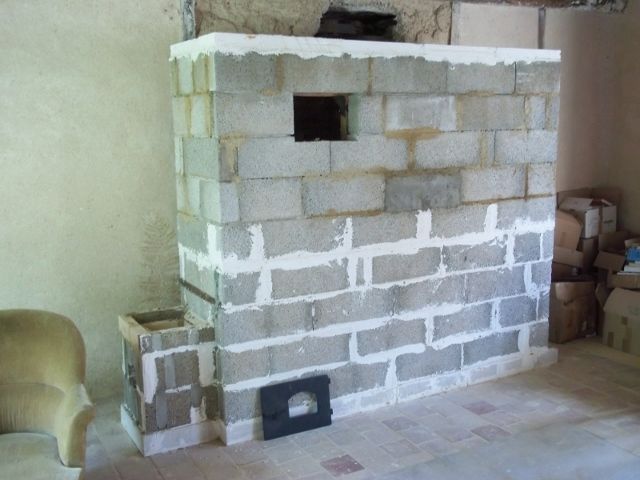  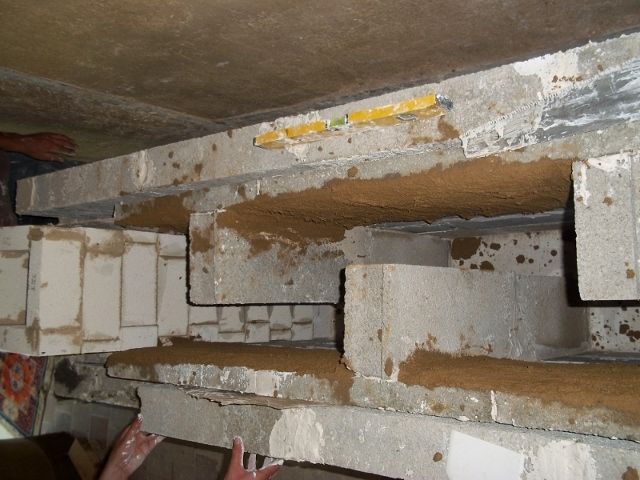 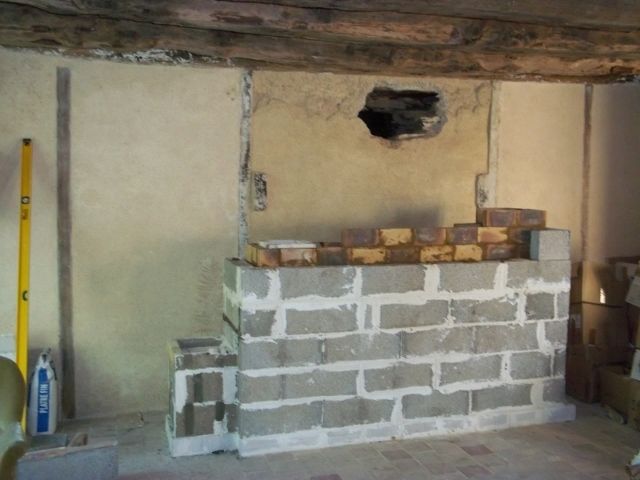 7 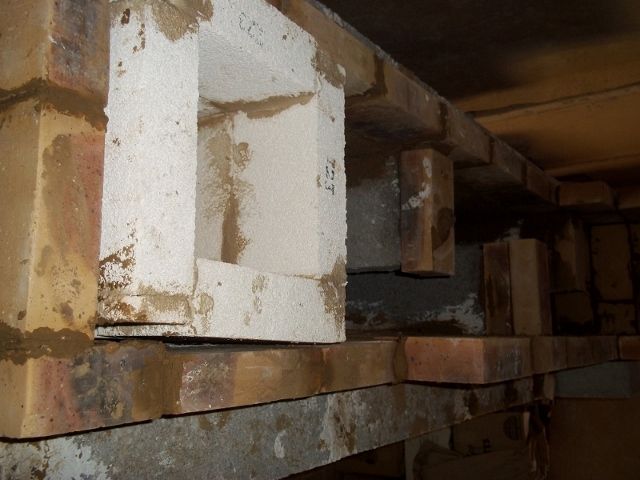 |
|
|
|
Post by peterberg on Apr 5, 2014 23:38:19 GMT -8
Those vertical baffles are very interesting! It doesn't hamper the bell effect, add more ISA and some mass. The method I've been using is adding free standing columns but this is a much more elegant solution.
|
|
|
|
Post by pyrophile on Apr 6, 2014 3:06:06 GMT -8
Yes, I like it but I even think that standing columns are more efficient and more elegant! But a few columns are necessary, I think.
I am using this method of baffles for a few years but this year, I think I will try columns in which I believe more. But how many, how far away one from aother? Kuznetsov uses a space of 13 cm beetween his columns but it might be only because it is easier to build that way as russians cut as little bricks as they can (only a hammer and a brick knife!). Stove proportions are all related to bricks proportions : 13cm is an half of a brick!
But you can find older drawings (Groum-grzimailo, Podgorodnikov or other) where the distance beetween columns is shorter, a few centimeters. How many cm? Well, I supose almost everything should work...but you don't want to cold to much your gases! Can it happen?
In bricks kilns, the space beetween bricks is tiny, 2cm ("a finger") or even less!
I don't find the good images that I will post later...
|
|
|
|
Post by pyrophile on Apr 11, 2014 13:19:44 GMT -8
I created a thread on different forms of bells and other exchangers in "Heat storage/distribution" section.
|
|
|
|
Post by Robert on Apr 14, 2014 1:44:18 GMT -8
Pyrophile nice build... did you used insulating refractory bricks for the riser?
|
|
|
|
Post by pyrophile on Apr 14, 2014 6:33:29 GMT -8
Yes,
There might be a problem with those insulative bricks : ashes combined to high temperatures can create a hard coating (glazing?) in the elbow or in the horizontal part of the rocket, reducing the diameter, with time. I hope not!
|
|
|
|
Post by Robert on Jun 1, 2014 15:09:05 GMT -8
Hey guys... finally the day has come to start building the stove. thanx for inspiration. Now is the time to start sharing the progress slowly... so at the beggining few pictures from an early stage. 1. Here the stove will go.  2.Preparing the concrete base for the stove.   3. There will be air intake from outside since the client has a mechanical ventilation and he wishes the air to be taken from outside. 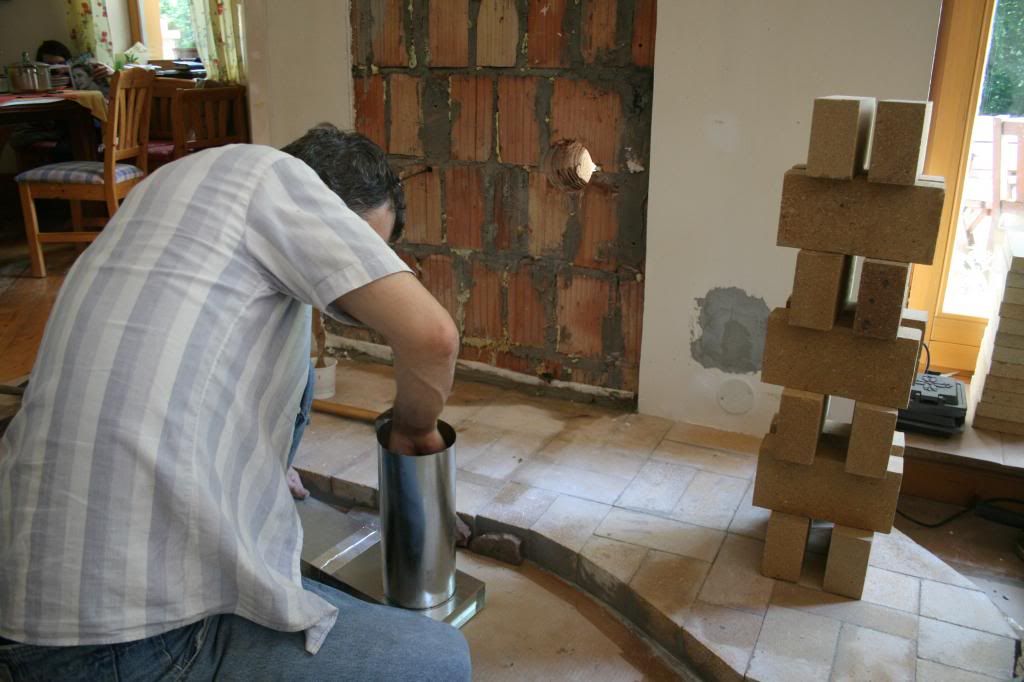 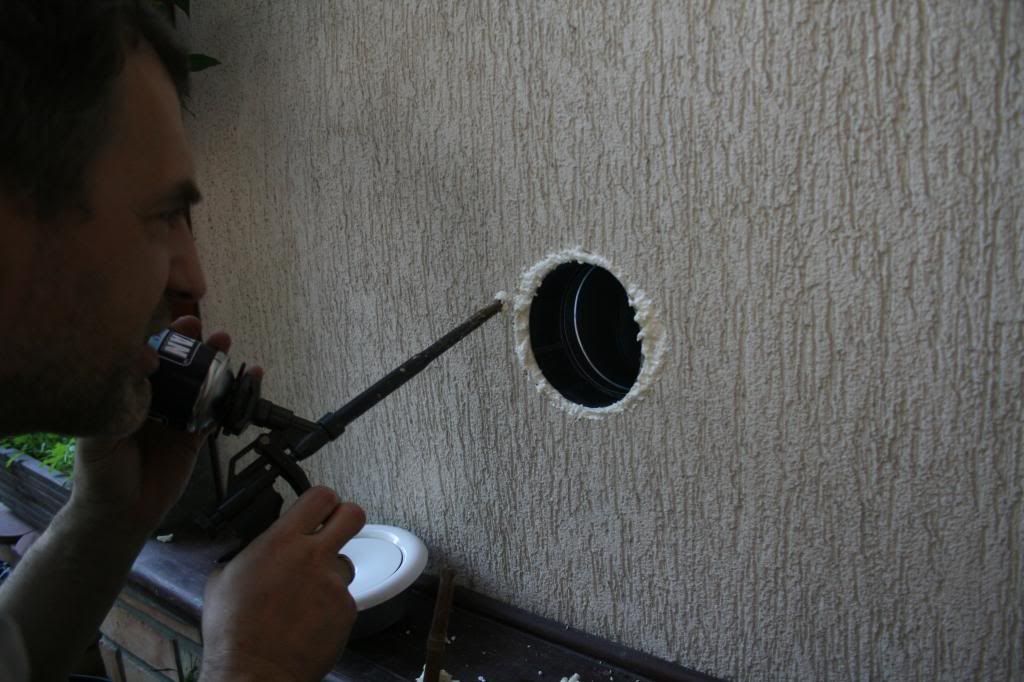 4. The tunnel and the riser are insulated with ceramic blanket and perlite bricks. This time no trip wire and back sweep things being icorporated:( 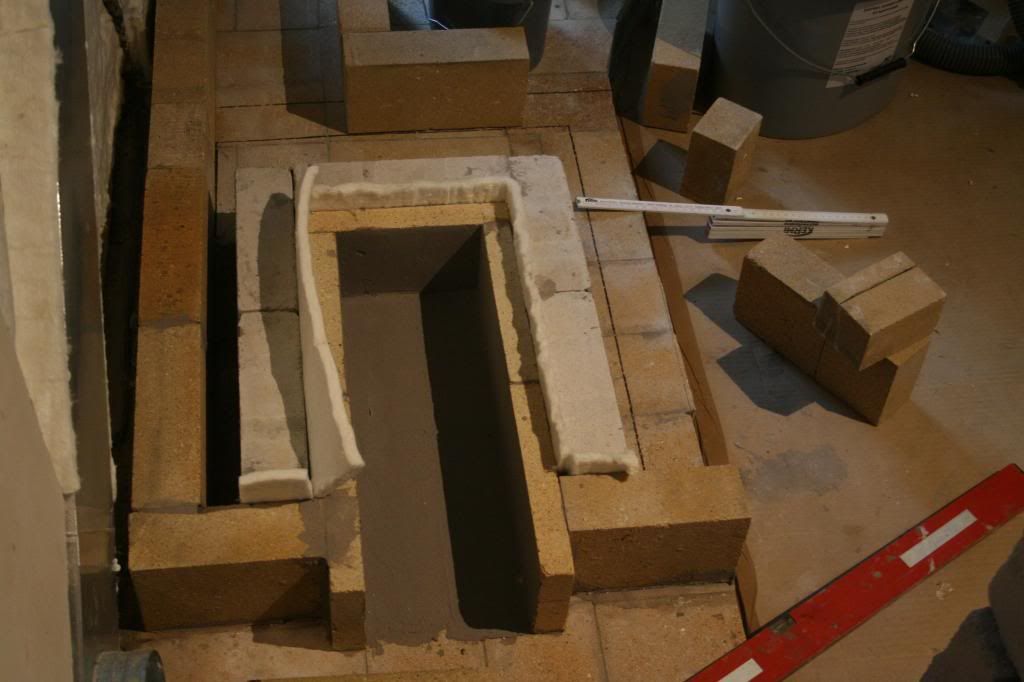 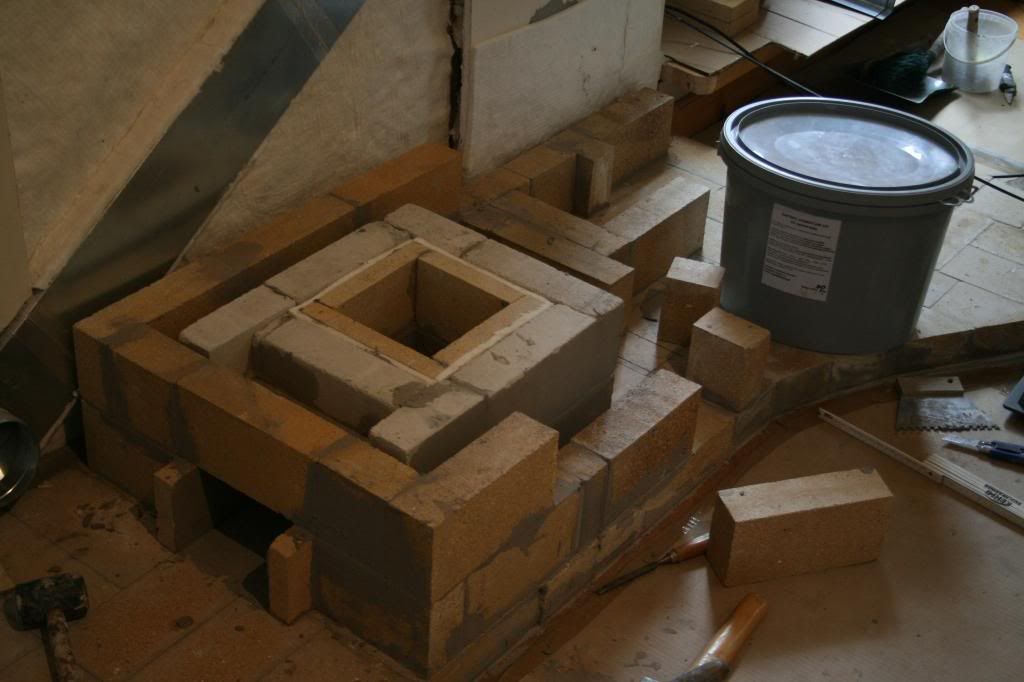 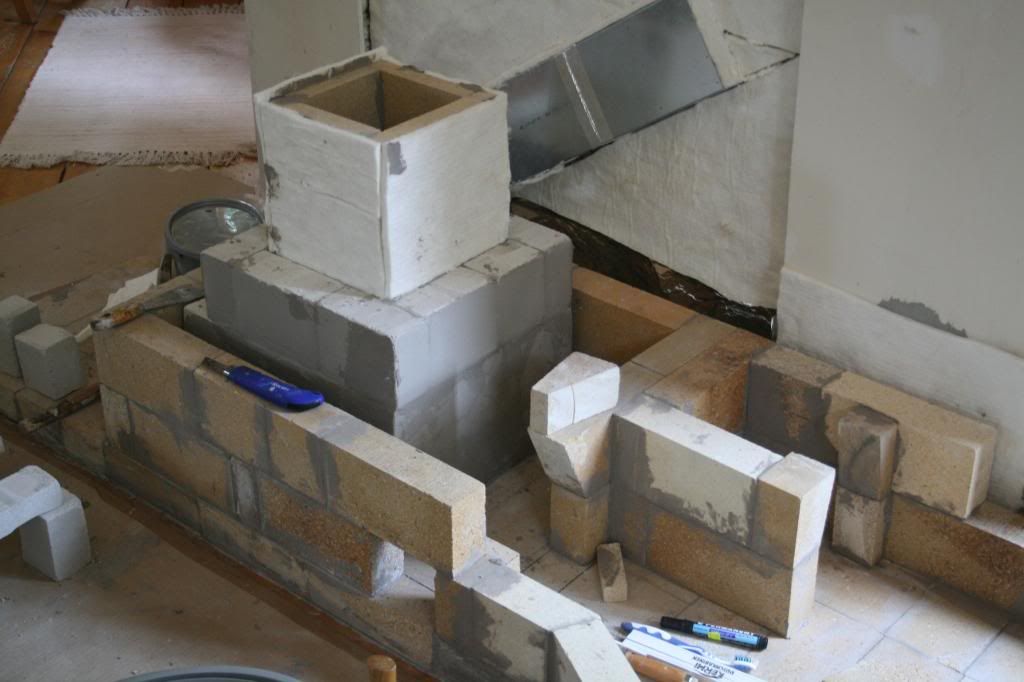 So that is for now. In a few days there will be oven placed on the stove and the heated bench will be capped with concrete slab. Stay tuned:) |
|
|
|
Post by Dan (Upstate NY, USA) on Jun 2, 2014 0:46:16 GMT -8
Looking forward to see more photos, thanks...
|
|
|
|
Post by Robert on Jun 4, 2014 12:56:27 GMT -8
thank you Wolf for being intersted:) 3 more photos from the build: _____________________________________________________________ Creating a bench. lot of cutting bricks:( i need to find some easier way... 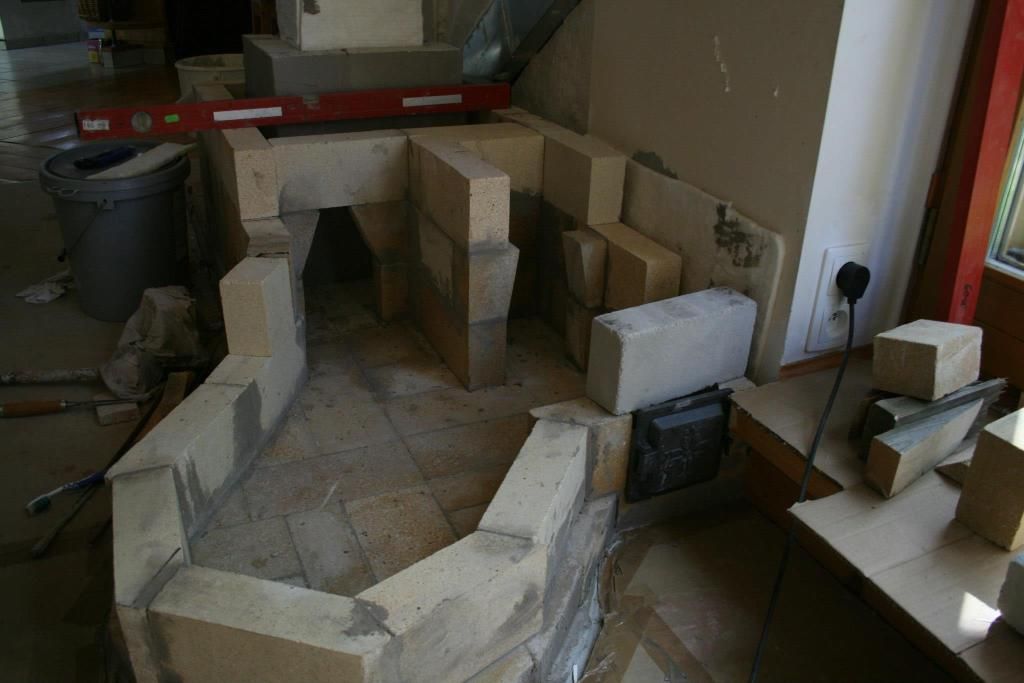 External air intake... now i am figuring the way of connecting it to the feed tube . 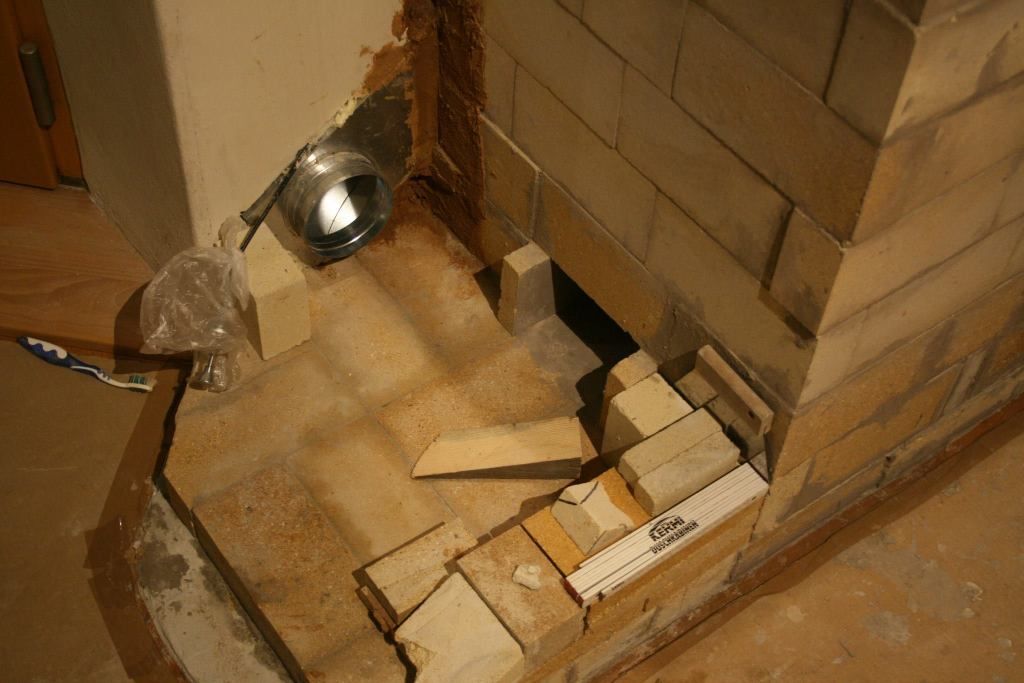 Finished internal channels of a bench... it is some sort of a two bells connected... i am wondering if it woulnd not be better, actually to have it just one bell, for more even heat distribution? i was just afraid that the output from the first bell was to close to the chimney input, so i made this sort of a division in the middle. 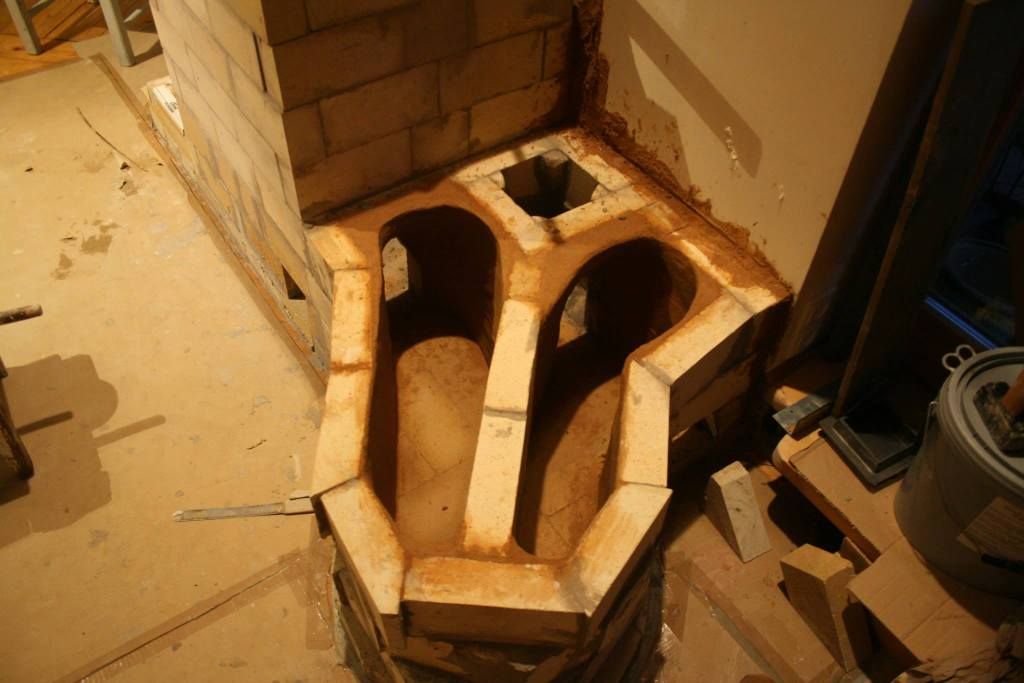 |
|
|
|
Post by patamos on Jun 4, 2014 16:42:41 GMT -8
Hi Robert, Nice build  Having played with these flue-bell combos myself recently... my sense is that in that small an area the height of the exit port to the chimney is going to effect the heat spread and stratification more than anything. Lower and wider is best. You also might want to make sure the input port is higher than the exit. If the port between the bells is far down from the top then the front (left in picture) bell will likely get warmer. well being pat |
|
|
|
Post by Robert on Jun 8, 2014 14:50:58 GMT -8
Few more pictures, there is progress going on but soon i will go to DK to meet Lars Helbro so the stove will have to wait, but there is something i wanted to share with you and i am interested what do you think about that solution for the oven: 1. Above the riser there is a firebrick protection so the oven will not get to hot... i am wondering is it goin to be hot enough in this way... in thery there should be 300-350C at the upper part of the bell so i hope that it will be posible to bake bread in it.. what do you think about that solution? 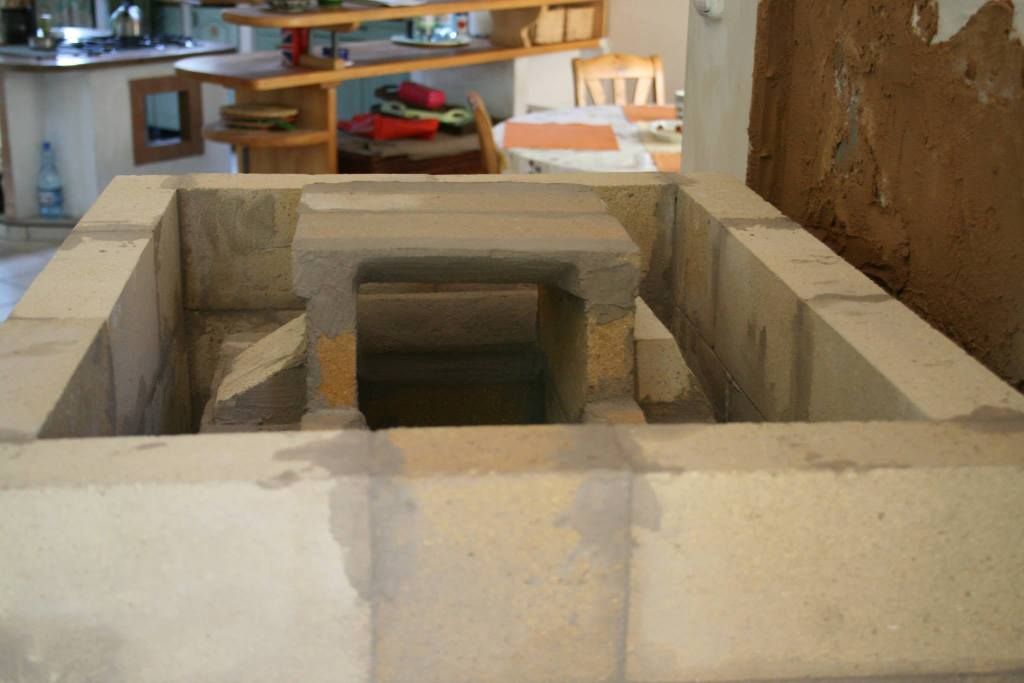 2.metal pieces protected with ceramic paper to support the oven. 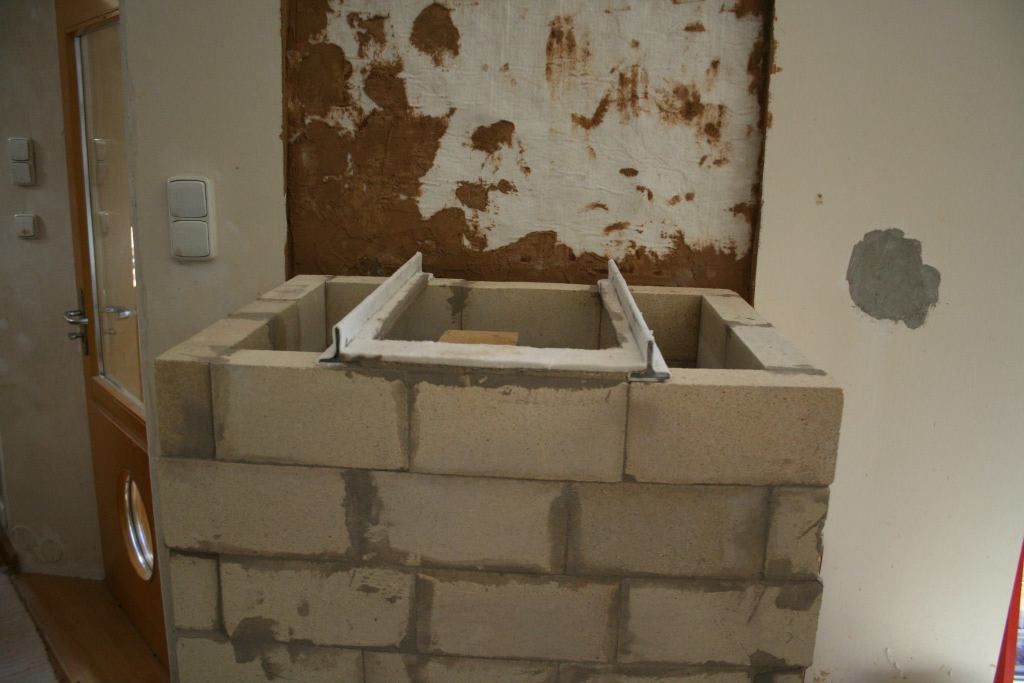 3.and here it is . the iron cast oven 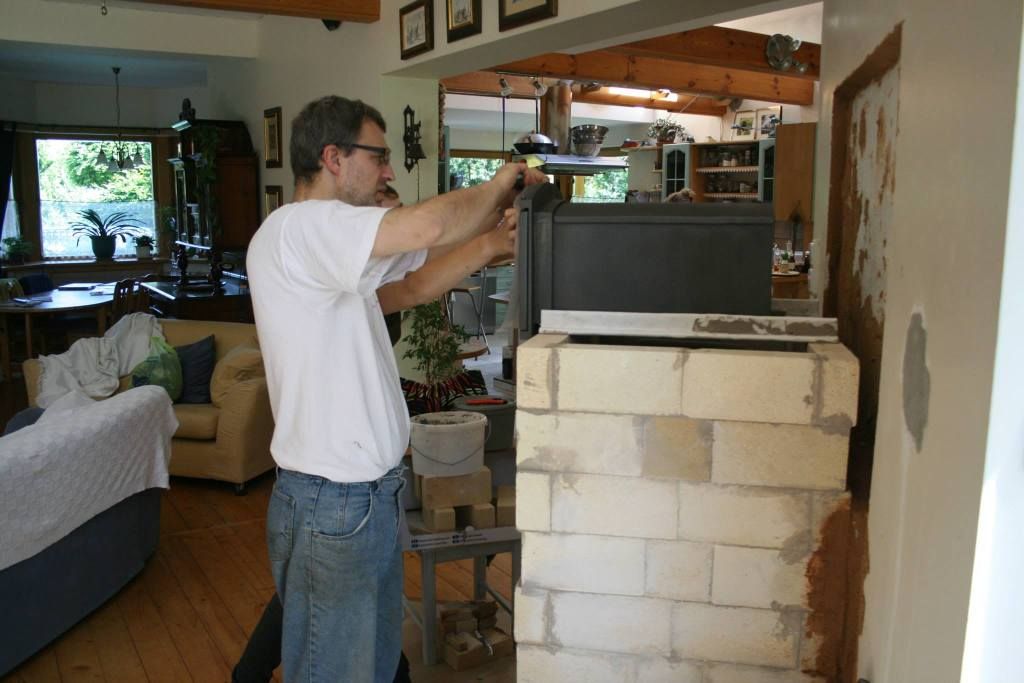 4.and yes thats me:)  5. so this is how it looks like now... i have started to put the base layer of clay on the bench. 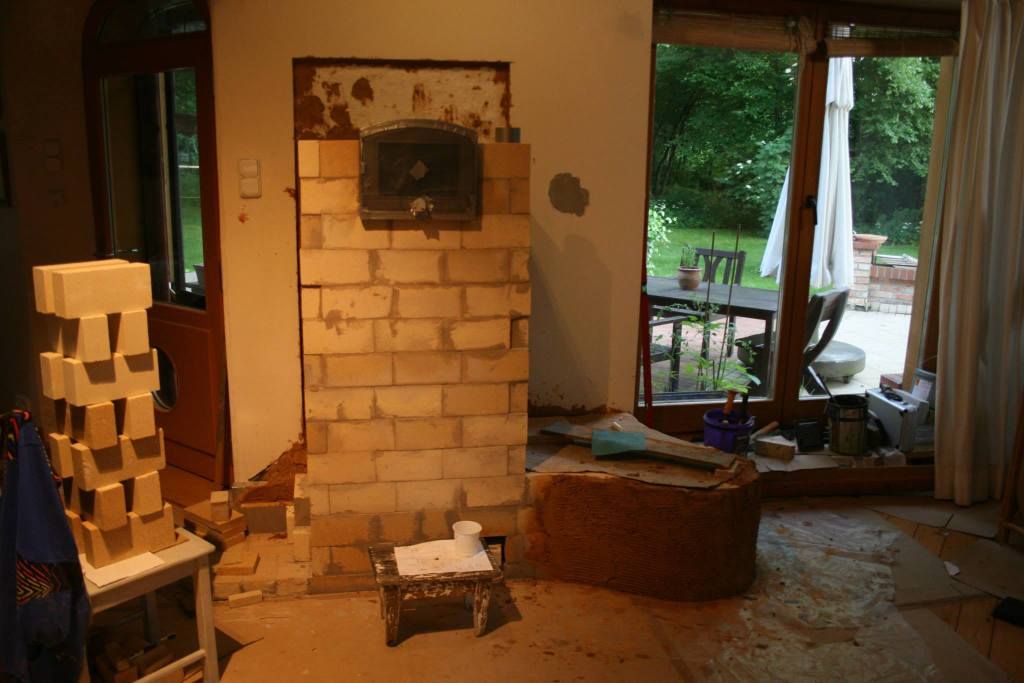 |
|
|
|
Post by Dan (Upstate NY, USA) on Jun 8, 2014 16:28:51 GMT -8
I think your idea will keep the oven with even temps top to bottom, maybe a slower overall cook time from fire start but you won't get scorched bread on the bottom. Seeing photos of other peoples stoves is like rocket mass heater porno... Keep posting... |
|
|
|
Post by Robert on Jul 22, 2014 14:06:50 GMT -8
So i am back from Denmark and it is time to get back to the project. Here is some more pictures: 1. Top of the stove closed will be closed with refractory slab. Supported by the metal profile protected with ceramic paper. I hope it will last long. What do you think guys. Maybe it is was not necessery at all? 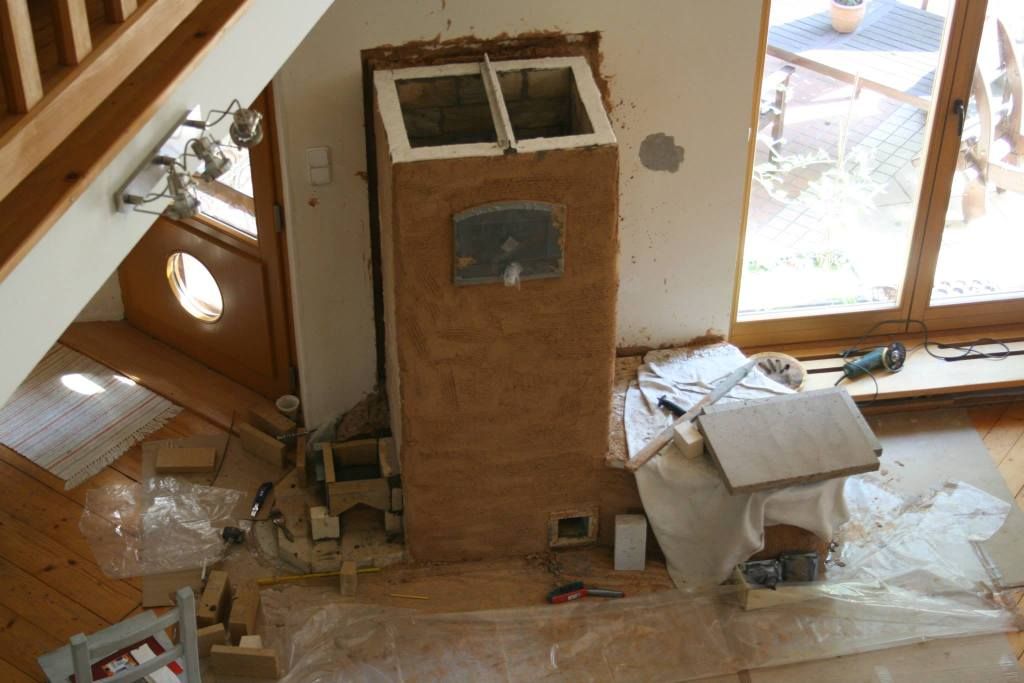 2. Slabs on top.  3. Working out the outside air inlet. 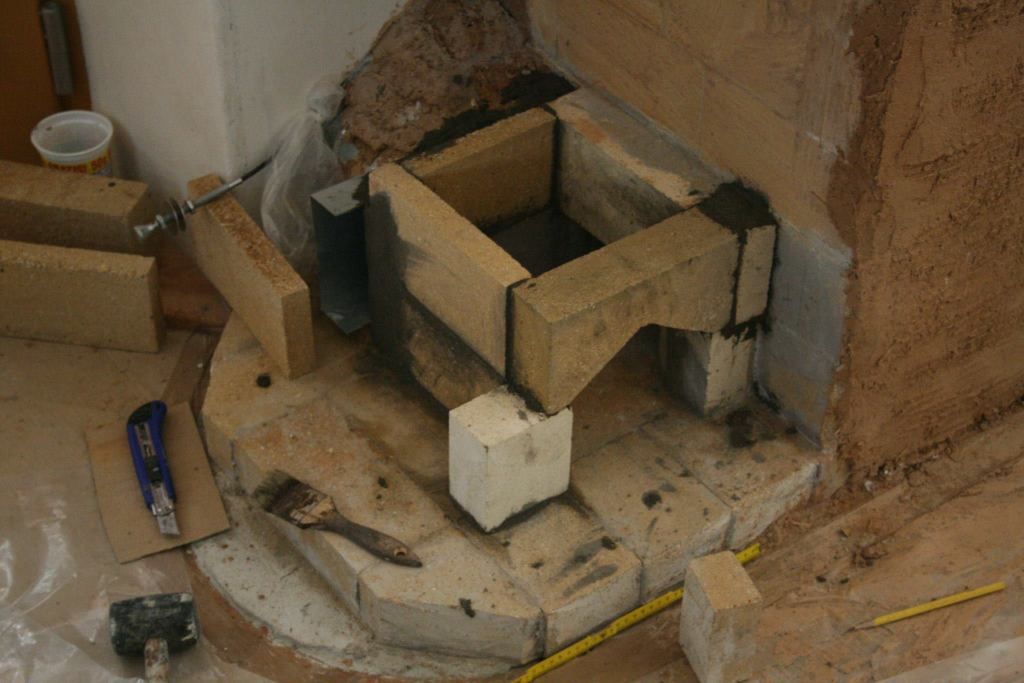 4. I decided to make a small window to see the fire. All credits goes to Matt, Radek and Patamos. Thank you guys for inspiration. 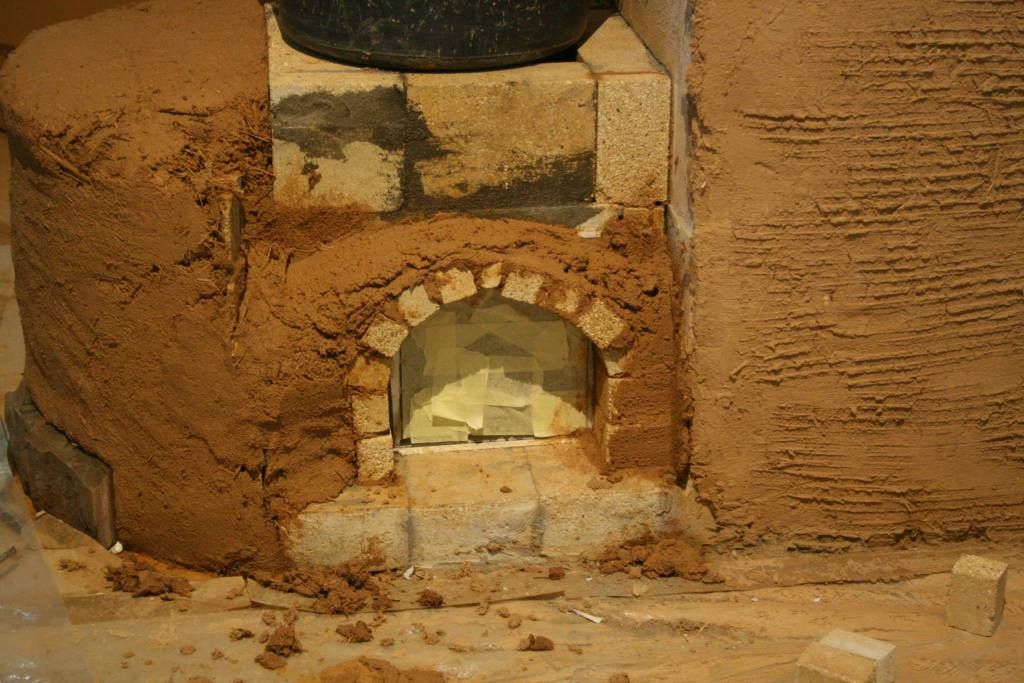 5. Slowly it is coming to its shape. 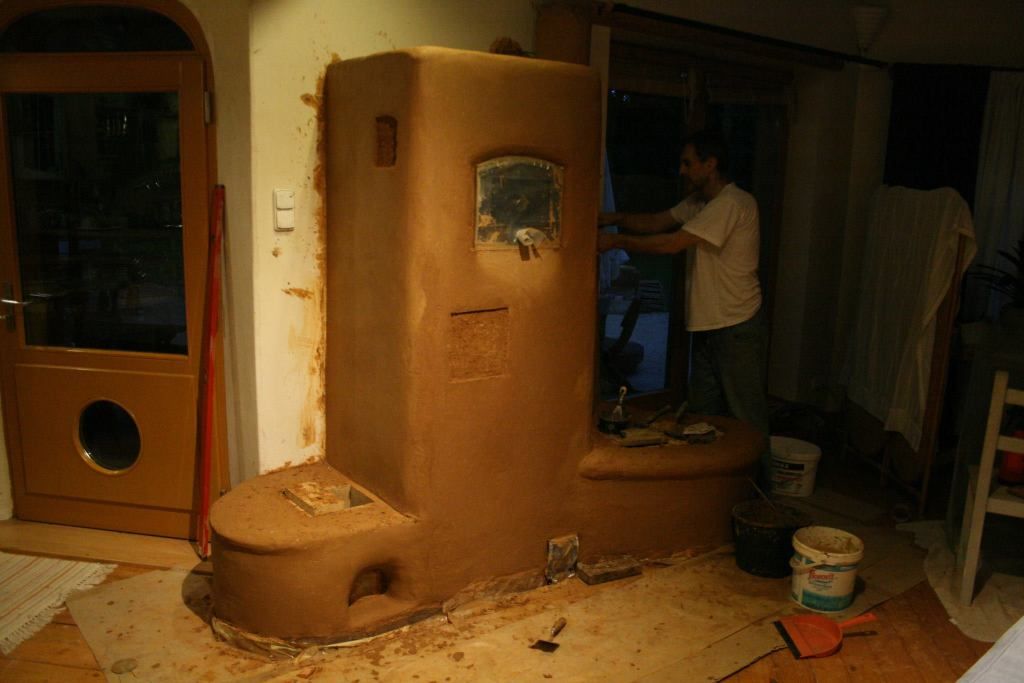 |
|
|
|
Post by Robert on Jul 27, 2014 10:39:17 GMT -8
|
|