dvawolk
Full Member
   DSR2 125mm open system (actual project)
Posts: 271
|
Post by dvawolk on May 20, 2017 15:06:00 GMT -8
Hm, now i understand why threshold is important. Thanks, Peter for the link to the explanations... If you take a photo of your threshold, this would be nice... Below is the updated sketchup file. I tried to lower the oven. I lenghtenned the firebox. I "smoothed" the firebox back wall so that the corners aren't so sharp. I added the threshold that is removable for easier cleaning. The riser will be made from 3cm chamotte bricks and then surrounded with perlite/clay or vermiculite boards (not sure yet). I lowered the firebox for a few centimeters and consequentially i lowered the ceiling of the bell, too. There was a cold air pocket behind the heat riser and firebox. So i changed the positions of the red bricks below the firebox so that part of the gasses can move behind and below the firebox and towards the bench and chimney exit... I added the top concrete slab. This one will be made above the 7cm thich chamotte slabs. I will put cheramic blanket over the chamotte, add aluminium foil over it and then pour the top slab over the entire surface. It will be in direct contact with red brick outer wall to finish the outer layer that will be plastered at the end. The connection to the chimney exit will be made with a 180mm 45° elbow with inspection hole. Because of this hole i removed the upper cleaning door... So there is only one cleaning door present below the bench now ( plus removable oven). Again i calculated the ISA.For the metal oven i counted double surface because of metal (but i ignored the floor of the oven because it will be just above the firebox ceiling chamotte slab..) It comes to 7,06 m 2. Since I am still 0,6m 2 away to reach the suggested ISA (which is 7,6 2) i think that it is best option to add a tower of bricks above the firebox and behind the oven (picture below).  . I will calculate the size of this brick tower tomorrow, if using 12,5x12,5cm square bricks, it should be over 1 meter high to get its ISA to 0,6 m 2. Another option is to add a tower or two below the bench and/or break apart the existing rectangular towers to gain ISA... But i think that i have read somewhere that with bells it is better to have more mass in the upper part of the bell. Sketchup file: here. Looking from above i don't like the heat riser being so close to the wall - i will try to move it slightly away from the wall so that i can get some more insulation around it.... I'm counting the days to start building! :-) Good night, Klemen |
|
|
|
Post by pyrophile on May 21, 2017 2:31:19 GMT -8
Hi!
Isn't a risk that the p channel "sided" under the brick corner of the sidewinder's firebox could not to heat secondary air enough? The duct is not as well heated than when laying dirrectly under the glowing ember, no?
I made some time ago a batchbox firebox with secondary air running under both brick corners and I suspect that secondary air was not heated enough.
Benoit
|
|
dvawolk
Full Member
   DSR2 125mm open system (actual project)
Posts: 271
|
Post by dvawolk on May 21, 2017 3:18:17 GMT -8
Hi! Isn't a risk that the p channel "sided" under the brick corner of the sidewinder's firebox could not to heat secondary air enough? The duct is not as well heated than when laying dirrectly under the glowing ember, no? Hm. I was also thinking about that. But if compared to P-channel, which also works well, the only air that is heated is that vertical part that hangs from the firebox ceiling... I have a batchbox with p-channel at home and at least in the first part of the burn the channel is heated only from the last, vertical part and even this only from the direction that is facing the firebox... The back wall of p-channel is touching the chamotte, which is cool at the begining... And if i recall correctly, Peter's first casted batchbox with p-channel had it running horizontally on the top of the batchbox ceiling, outside of any heated air. And it was tested with great results. And if you compare vertical parts of floor or p-channel, the surface that is in contact with hot surroundings is much larger with floor channel. I am sure that there is a difference and that the floor channel that is exposed to firebox for its total length delivers air that is hotter. But if this is a significant or minute difference, i don't know... I do have a trust in info that is available on batchorcket.eu - and this side floor channel is present there, too. Thats why i decided for this option.. But i would be curious about the secondary air temperature differences, too... Regards, Klemen |
|
|
|
Post by peterberg on May 21, 2017 5:25:01 GMT -8
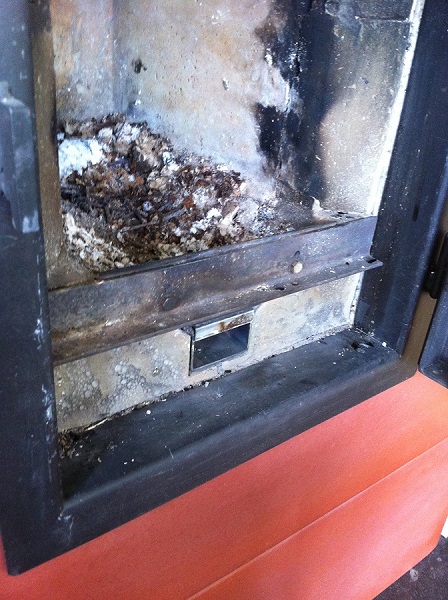
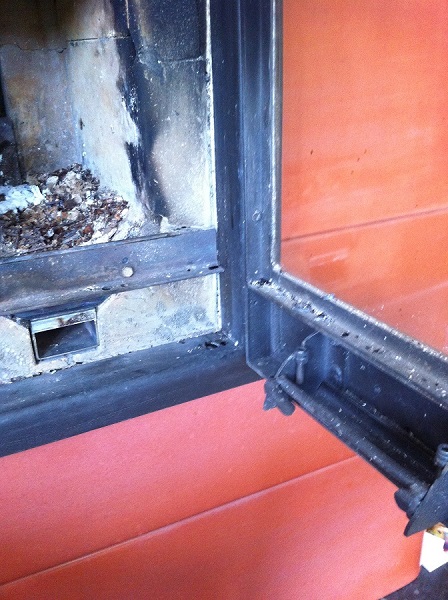
Hm, now i understand why threshold is important. Thanks, Peter for the link to the explanations... If you take a photo of your threshold, this would be nice... Here's a couple of pictures showing the threshold.   |
|
|
|
Post by peterberg on May 21, 2017 5:52:24 GMT -8
Hi! Isn't a risk that the p channel "sided" under the brick corner of the sidewinder's firebox could not to heat secondary air enough? The duct is not as well heated than when laying dirrectly under the glowing ember, no? I made some time ago a batchbox firebox with secondary air running under both brick corners and I suspect that secondary air was not heated enough. Benoit, the vertical part of the floor channel is the one that heats up most. There's no discernable difference in combustion quality when there's a good ash bed on top of the horizontal part. I seem to recall you also used another way to get the air into the port. That has been recently tested by Yasintoda and it turned out to be a second-rate solution. That being said, I know of some guy who used a similar solution as yours and he claims it works well. Since he won't tell me how the air is delivered to the port I can't recommend it. Conclusion for now: The combination of floor channel and threshold makes the batchbox much less prone to overfuelling as compared to a p-channel and straight main air inlet. |
|
|
|
Post by bulbius on May 22, 2017 2:52:17 GMT -8
will the firebox remain uninsulated?
|
|
dvawolk
Full Member
   DSR2 125mm open system (actual project)
Posts: 271
|
Post by dvawolk on May 22, 2017 3:12:15 GMT -8
will the firebox remain uninsulated? Yes. I wasn`t thinking of insulating it. Being inside the bell, the temperature around it would be over 200 °C soon agter the start of burning. |
|
|
|
Post by bulbius on May 22, 2017 3:21:39 GMT -8
will the firebox remain uninsulated? Yes. I wasn`t thinking of insulating it. Being inside the bell, the temperature around it would be over 200 °C soon agter the start of burning. good idea! you can save a lot of space this way. But maybe is it better to insulate at least the firebox floor? being in a lower position in the bell it will not get in touch with hot gases and I think it can shed a lot of heat especially during the ember phase |
|
dvawolk
Full Member
   DSR2 125mm open system (actual project)
Posts: 271
|
Post by dvawolk on May 22, 2017 11:23:49 GMT -8
Here's a couple of pictures showing the threshold.... Thanks, peterberg . As i see you bolted that L profile to a trapesoidal threshold... I simplified mine to be just cut flat profile. I will stick to removable version that will be put in the slots on the frame (image below)... I am concerned about warping because of temperature differences, so i might add an L-profile  Tomorrow i go for the material and this time the door will be made by a local welder... There is about 13kg of stainless steel needed for the door and door frame... I made a final decision regarding the heatriser material:  Inside layer: 3cm chamotte put together with heat resistant mortar... Middle layer: cheramic blanket Outside layer: low density vermiculite board held together with wires... But maybe is it better to insulate at least the firebox floor? being in a lower position in the bell it will not get in touch with hot gases and I think it can shed a lot of heat especially during the ember phase The core is lifted 18cm from the floor. It is supported with red bricks. On one part there still will be a hot gas flow below the firebox (arrow) - better than if i would put it directly on the floor. On the other part there is a dead air trapped inside the support from red bricks (red cross)... It doesn't cost me much if i put some pieces of cheramic blanket inside the dead air compartment...  |
|
|
|
Post by peterberg on May 22, 2017 11:37:07 GMT -8
As i see you bolted that L profile to a trapesoidal threshold... I simplified mine to be just cut flat profile. I will stick to removable version that will be put in the slots on the frame (image below)... I am concerned about warping because of temperature differences, so i might add an L-profile. The L-profile was added later and tried in four different positions, this turned out to be the best option. It could run without that profile but my heater do work significantly better with it. Your removable threshold is better now, it's still possible to amend it and it is in a stable fixure. Not sure whether it will warp though. |
|
dvawolk
Full Member
   DSR2 125mm open system (actual project)
Posts: 271
|
Post by dvawolk on May 22, 2017 11:45:59 GMT -8
The L-profile was added later and tried in four different positions, this turned out to be the best option. It could run without that profile but my heater do work significantly better with it. Your removable threshold is better now, it's still possible to amend it and it is in a stable fixure. Not sure whether it will warp though. From your photos i see that the L profile is just opposite of door's T-profile? Is that correct? I see adding an L-profile here as an additional step so that floor channel i certainly served first... Then the remaining air is spread over that gap between L and T profile... Regards, Klemen |
|
|
|
Post by peterberg on May 22, 2017 12:57:43 GMT -8
From your photos i see that the L profile is just opposite of door's T-profile? Is that correct? I see adding an L-profile here as an additional step so that floor channel i certainly served first... Then the remaining air is spread over that gap between L and T profile... No, it isn't correct. The L-profile is about 6 or 7 mm below the T-profile of the door. It has been upside down so the flange was just above the door's flange and this caused flames coming over the threshold, directed to the door. I didn't try the exact position you mention. |
|
dvawolk
Full Member
   DSR2 125mm open system (actual project)
Posts: 271
|
Post by dvawolk on May 23, 2017 4:33:16 GMT -8
I added a brick tower to gain some ISA. It is built on top of the firebox (the sides are partially above the firebox walls). It is reaching the top of the ceiling at the area where those large chamotte slabs are touching each other (the slabs are colored translucent green for an easier view). Now it seems to me that this is safer construction compared to previous one (chamotte slabs spanning from one edge to the other...  But now i have two options - i can use: But now i have two options - i can use:- two large chamotte slabs 90 x 60cm x 7cm or - four smaller chamotte slabs 60cm x 40cm x 5cm Which do you think would hold better. The smaller slabs are thinner, but i think that they allow more "breathe"...Below is the photo of the second option (again, translucent green color).  |
|
|
|
Post by peterberg on May 23, 2017 7:34:27 GMT -8
I'd think the smaller slabs ensure a better survival rate. Mark however, lay the slabs on strips of superwool and also in the seams between those. Don't use mortar to keep the slabs in place because they won't, they keep moving anyway.
|
|
dvawolk
Full Member
   DSR2 125mm open system (actual project)
Posts: 271
|
Post by dvawolk on May 25, 2017 13:14:16 GMT -8
I'd think the smaller slabs ensure a better survival rate. Mark however, lay the slabs on strips of superwool and also in the seams between those. Don't use mortar to keep the slabs in place because they won't, they keep moving anyway. Understood! :-)
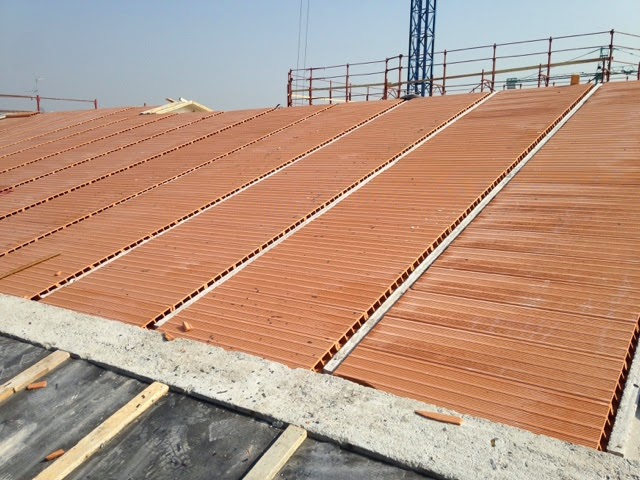
I have a "problem".. and possible solution :-)It is regarding air inlet door opening.. I was thinking of magnets + inox = not good combination :-) and as bulbius said the temperature might very surely be too hot for the magnets... I really wanted to think of some good, but simple and user friendly mechanism, that makes its job well done. And also to be able to have it open in two open positions... And last night i was thinking... Gravity really is not much affected buy such low temperatures as few 100°C :-) so the "spring" has to be gravity driven. Below i s a photo of the door cut away view. Above is the glass, yellow is sealing rope, you see Bottom and middle T profile and that silver piece of pie is 2mm metal welded to the air inlet door... You see a blue circle which is a round rod, 10mm diameter. This rod can move up and down.. And it does exactly that when you are opening and closing the inlet door. The image is not exact...  I think this should work. The problem is that the "stopping curves" are not adjustable (it would be nice to adjdust them with a screw or two and then forget about it...) I guess that adjusting option may need few more nights... :-) The other thing..Above the chamotte slabs i was thinking of pouring a concrete slab, 8cm thick... But today i found "tavelloni". It is a clay "brick" that i found on Italian websites, but i have to trace them here in Slovenia... Here is the picture:  They are used like that  They are in 3,4,6 and 8cm thickness, 25cm wide and can be from 50 to over 150cm long. I was thinking to use 4cm x 25cm x 100cm because they will nicely cover the top of the stove. Over them i can add a thicker layer (6cm) of clay plaster... Best regards, Klemen |
|
 .
.


