nemo
New Member

Posts: 48 
|
Post by nemo on Dec 6, 2014 13:59:43 GMT -8
Hello to everyone! I am new to this forum and to rocket stove building. It's been years since I've first heard of rocket stoves but only now I began to start working on my rocket. The burn effcicency was the main factor that led us to skip from ordinary masonry stoves to rocket stoves. We are a community in Romania and we have about 30 fires burning in winter season...that is a lot of wood to chop and carry from the woods. Efficency is what we are trying to get. We started buiding several pocket rockets(no thermal battery) and, in my opinion not efficient enough also because we did not dig enough for perfect ratios and hints, just applied the basic. I started working on my house and did install a RMH but still feel I need some more help before continuing. I want to make this one by the book, or by the forum. I browsed through the forum and found lots of info but also got confused on some explanations(not so good on technical terms). I thought I'd share some photos with you , show you my progress and, with you experience and kindness , I might get some answers. Thank you! |
|
nemo
New Member
Posts: 48
|
Post by nemo on Dec 6, 2014 14:24:46 GMT -8
The sistem is with a 7.1" exhaust, planned for 20ft horizontal and continuing with a vertical of 8"(10ft). Already have my first question regarding the exhaust(the flue?) How long can I make my tube in order for it to heat thermal battery and not lose to much heat up the exit. Currently I have almost all the sistem set but without thermal mass. It just runs in order to heat the mortar on the walls.The firt part of the tube, after putting good amount of dry wood gets up to about 150F. At the exist air is still warm, do get a bit of smoke untill the stove heats really good. I figure, if air that gets out warm( without the duct being built in thermal mass), I could still add some extra tubing. I am afraid though that the cob bench/bed will not heat enough. How can I tell how much tubing I can put horrizontally? Please excuse me If my English is not that correct. |
|
nemo
New Member
Posts: 48
|
Post by nemo on Dec 6, 2014 14:41:48 GMT -8
Second question would be about the materials used in tubing and insulation. In this region the 8" ducting is Inox and pretty expensive(@50$for 3ft). So I found this inox tube that resists temperatures up to 1300degrees F. But the tube is not smooth, it's just like in the photos. I am afraid that condesation and gasses and other mixes will get caught between those rings and eat the metal. And this leads me to another question: how dangerous can a badly insulated tube or a crack be. I'm thinking carbon monoxide leakage along 30ft of tube some of wich in cob.
And about insulation. Perlite and vermiculite are hard to find or very expensive in these parts. I did my insulation out of gravel and cob. Is it ok or should I take the matter more seriously? On another insulation I poured some slury with sawdust betwwen the gravel. I do not know if the temperature in the heat riser will be hot enough to burn out the sawdust and leave the air insulation(i guess it is how it works).
|
|
nemo
New Member
Posts: 48
|
Post by nemo on Dec 6, 2014 15:37:37 GMT -8
More specs on the stove: feed tunnel is equal to the tube(7") and 3 times shorter than the riser. The burn Chambre is 11.5" long and much wider than in the book (9"). I know it should be the smallest of the intestines but i did shorten it (maybe too much)and it did not pull enough air and chocked and smoked back, and than I removed everything down there and remained the width of two bricks, 9" that is. After the fire is lit up I put my hand on the feed tunnel and feel the strong current it's pulling. The disadvantage is that my wood is burning fast but I hope all that burn will translate in more heat....to be stored, not to run out the exhaust.
The barrel is 55gallon and the space between it and the heat riser is about 2".
I do not have a temperature reading device so I cant say if my stove is running ok or not. I am afraid to build a thermal mass around it just yet. Can't tell If it will heat the cob bench, if it's got what it takes to make a warm home when outside there are 5 degrees F.
|
|
|
|
Post by Dan (Upstate NY, USA) on Dec 7, 2014 5:53:06 GMT -8
Welcome, First off your english is fine, don't worry. Its not like any of us can speak Romanian or Hungarian  . The problems that I see is that your exhaust "manifold" seems too small. I made mine in a similar way and after a year of using it I made that area bigger and the stove ran much better. I could probably make mine even bigger. Make it bigger like the sketch below. 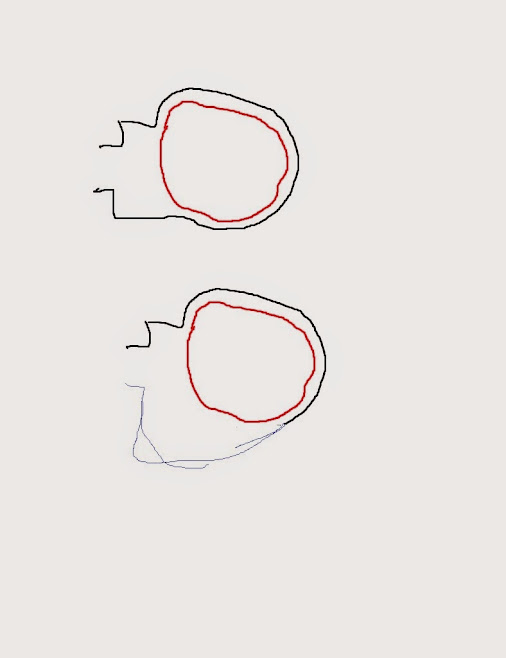 Second your super small space between the insulation of the heat riser and the barrel is going to fill up with fly ash. If you don't take the barrel off after each winter you will not be able to clean out this area well. Third, I know that the aluminum "flex" duct is cheap and easy to install but it makes a lot of drag and takes about 25-50% away from the length you can use. I would try to find some smooth pipes or go with 10" (250mm) flex duct. As for distance that can work, well it depends. If you use an vertical chimney you can get more distance, if it is colder outside with a vertical chimney you can get even more distance. Hope that helps... |
|
|
|
Post by Dan (Upstate NY, USA) on Dec 7, 2014 5:54:56 GMT -8
|
|
nemo
New Member
Posts: 48
|
Post by nemo on Dec 7, 2014 11:31:29 GMT -8
Thank you very much for your reply,Wolf!
Congrats on your stove! It looks great and the red hot barrel looks convincing.
You are right about the manifold. I have read a thread of discussion (the hint I guess it was) which mentioned some maths about what size that should be but really I caught my ears in the calculation. I was about to remove one brick from under the barrel on each side so your drawing is straight to the point.
About the flex tubing, it is not aluminium, it is inox, way tougher and 6x more expensive. Steel or smooth inox on the other hand it's 15x more expensive. I am trying to get this stove to be cheap because I already spent 300$ only on firebrick and tubes and investing is not yet over. Still have to buy T ramifications, condense cap and cleaning caps. Also I still have to build some 20 rockets around the community. We have chosen this stove because it should be cheap and use less wood. We are self sufficient community doing permaculture and beekeping,farming, rural stuff. Money is not our strong point;).
I have already bought 20ft of 7"tube and 10ft of 8". So I think I would buy another 10 or 20 ft of 8"tubing. With so many sizes I have trouble linking the tubes. Reductions cost as much as the tube.
I do use a vertical chimney and it is indoors, except the small exit through the roof.
Can you please explain this part, did not understand it: "it makes a lot of drag and takes about 25-50% away from the length you can use.".
Also another question if you can help me with. How should the tubing be arranged? Should I put first the smaller 7" which I make the bench with and then the 8" one for the vertical chimney, or the other way around?
I like the ducting you used but you cannot find here something like that for under 800$(the arrangement in your stove).
Thank you for your time and help!
|
|
|
|
Post by Dan (Upstate NY, USA) on Dec 8, 2014 2:06:43 GMT -8
The "ribs" in the flex duct make drag. This reduces the distance you can push and pull the gases through the tube.
With a smooth tube you could even go farther. With the flex tube you loss some of the distance you could go, my guess is 25-50%.
To do it cheaper you could try the half barrel method shown in posts on this forum.
If you have two different sizes of tube DEFINATELY use the 8" first, as the gases cool you can then get away with the 7" pipe for the vertical part.
I have a 8" system that goes into a 6" vertical pipe to the outside. Since the gases cool from 1700F to 135F I can do with a pipe half the size since the cooler gases take up half the space with the same pressure.
|
|
nemo
New Member
Posts: 48
|
Post by nemo on Dec 8, 2014 12:49:13 GMT -8
Now I understand the concept. Thank you very much for the info, wolf! Now you really got me thinking on the half barrel system and I made some sketches on how I can incorporate them in my system. I have found this thread donkey32.proboards.com/thread/560?page=2 but still I have some questions. Do not know weather this is the place to post them or on the half barrel thread... I'll first post them here... Sorry for the quality of the drawings...used paint and no mouse.   So the half barrels I'm using only for flues and mass. Does the half barrel need to be connected directly to the manifold or do I get away with using 8" tube as connection. Also can I add further more tubing after the half barrels or do I have to go straight up? 1,2,3 are clean outs that I know not other way to put them in the barrel system without Tees and tubes. Probably I do not need the first clean out since I have one in the manifold? Any suggestions are appreciated! |
|
|
|
Post by satamax on Dec 8, 2014 15:14:15 GMT -8
|
|
nemo
New Member
Posts: 48
|
Post by nemo on Dec 9, 2014 1:33:23 GMT -8
Yes, Satamax, barrels alone would be very short , but what if I complete the rest up to 30 ft with inox tubing of 8"?.
I did see the link you passed with the barrels but that situation I cannot apply.
The wall ideea is pretty nice but I'll stick to the basic for this one. Already bought most of my tubes and waiting for my Tees. Moreover, i have kids playing in that room and cannot afford an open fire there. Still looking for answers. Thank you!
|
|
gjh42
Junior Member
Posts: 61
|
Post by gjh42 on Dec 9, 2014 17:52:50 GMT -8
A bell instead of duct runs does not affect the character of the fire at all. It would be no more open - in fact, there could be less exposed hot metal for kids to worry about. As for your already purchased material, if you have 20 more heaters to build, surely someone else could buy and use it.
|
|
nemo
New Member
Posts: 48
|
Post by nemo on Dec 9, 2014 21:28:52 GMT -8
Gjh, when I said "an open fire " I was reffering to the fact that the feed has to be in the same room as the mass as I see in the "lopez-rocket". The tubes I cover in cob. However, after some digging I found this donkey32.proboards.com/thread/803/evaluating-6-dragon-burner?page=1and is it correct to say that the barrel and the feed ,in my case, stay where they are an I only remove the tube and after that wall with the manifold I begin building a bell from brick ? In this case the side wall does not really help because I cannot make it part of the construction as I see no way to link it to the other brick wall in order to make a bell. I have to build the whole bell alltogether in orded to link the bricks and make it airtight. I begin to like the bell ideea as I read the benefits of it on the dragon stove page. Still I have no clear model nor dimensions on what I can apply in my case. Does my system carry the whole wall like in lopez link or how big should it be? Can anyone provide me with some clear setup that will work with my 8"system? The lopez rocket I cannot do because she ended up modifying all the dimensions and does not have a barrel.And I dont have the insulation boards. |
|
nemo
New Member
Posts: 48
|
Post by nemo on Dec 9, 2014 21:55:00 GMT -8
Another question would be: does the bell always have to be tall?(for the cold air hot air principle to work). If so, how tall?
The flue system has the possibility of storing the heat in a lot of thermall mass that does not take space as it is something useful , a bench or a bed.
Do I have the same heat storing efficency with the bell? From only one layer of brick on each side how much storing will that provide? Adding another layer of brick in the same manner will take up more from the little space in my house. And that is a lot of brick I have to buy. Cannot use old bricks or rocks or lots of cob which would be free with this one.
I see in the lopez experiment somewhere around 500bricks some of which refractory. That is an extra 300$ non refractory.
|
|
|
|
Post by satamax on Dec 10, 2014 2:26:47 GMT -8
Nemo, you didn't get it! Leave the roket core and barrel where they are. Then make a bell like the lopez labs against your wall. That's an option. You can do many many many things with a bell. I think with a lopez style bell, you would have to reduce the dimensions anyway. IIRC a 6 inch J tube rocket can whistand 4m² of ISA (internal surface area) You already have 1.8m² with the barrel. So you're left with 2.2m² to go. Let say you have a 1m high bell, wall style like the lopez, say 20cm deep. You make it 80cm long along that wall, and you have 2.16m² of bell. Or make it 50cm high, and 1.6m long and you could make yourself a cool shallow bell to sit on. In that case, i would most certainly double the course of bricks against the wall, 22cm wide, another 20cm of empty space, then another 11cm of brick for the front. That would make a 55cm deep seating spot. Plus plaster thickness. Tou could then use patio pavers for the top. You could also pour cob into a form, and tamp it (tap on it with an heavy piece of wood to make it compact) I'm daft because when you've drawn the two barrels here, you're nearly spot on! Make it a double bell, leave the barrel top between the two, exept a shallow port of the proper CSA (cross sectional area) for the gases to comunicate between the two bells. You don't even need the return tube in the back, you can have both of thoses at the same end. The vertical plunging to the bottom of the bell, with a 5cm gap for example. make the oppening between the two bells 8cm high, so the second bell doesn't get bypassed. Well, enough babling here you go! A pic is worth a thousand words. www.permies.com/t/38889/a/23704/halfbarrelmassbell.skp?download_attachment=trueUse the view > face style > X Ray ; to see how it's made inside. In conjunction with the orbit tool. You can also right click on components and hide! you can even do mistakes, as you can't do any harm to this file  |
|


 .
.


